Have you heard of “Galentine’s Day?” From what I understand, it’s basically a reason to get together with your girlfriends and celebrate Valentine’s Day together with just the girls – no boys allowed! An extra excuse for girl’s night? That’s something I can get on board with! Yesterday I shared with you some fun free printable Valentine’s Day treat bag tags…but today I want to show you what I did with some of my Valentine’s Day decorated sugar cookies to make some extra-special treats for some extra-special gals in my life! Instead of making all regular sugar cookies, I put some of them on cake pop sticks and turned them into “cookie pops” to make Valentine’s Day cookie bouquets!

If you’ve never made decorated sugar cookies like this before, heart shaped cookies are a GREAT way to start. Even solid colored heart cookies would be pretty! I am NOT a professional baker…I wouldn’t even consider myself an amateur baker…so take all my advice with a grain of salt. Or sugar. But really, if I can do this, you definitely can too!
Supplies: (contains affiliate links – click here to read my full disclosure)
- Heart-Shaped Cookie Cutters
- sugar cookie & decorating icing recipes & ingredients (see bottom of the post)
- decorating bags and tips (I used #3 tips)
- cake pop sticks
- cellophane treat bags
- mason jars
- ribbon
- floral foam
- shredded paper or other filler material

(grab those free printable treat bag tags here!)
Now, when I bake and decorate sugar cookies, I always spread out the work. The first day, I make the dough – it only takes me about 20 minutes, and then I pop it in the fridge. It keeps in the fridge for up to 3 days (or you could even freeze it!) so plan accordingly. A day or two after I’ve made the cookie dough I’ll do the baking. That’s a bit more time consuming since you have to roll, cut, and bake them tray by tray. If I’m doing a double batch, that usually takes me about 2 hours, including clean up. After the cookies are baked, you can store them in an airtight container, or you can freeze them! Sugar cookies freezer really well. That’s what I did with my Christmas cookies – I did several batches in late November and early December and froze them all until I was ready to decorate them the week before Christmas.
Making the icing isn’t difficult, but it can get messy since you’ll need a lot of bowls and decorating bags and things, so I usually try to do that the day before I’m ready to decorate. I always double the cookie dough recipe so I double the icing recipe, too, to make sure I have enough for all my cookies. (If you made a single batch of cookies you could probably get away with a single batch of icing.) Once it’s made, I color each portion, load them into my decorating bags and squeeze bottles, put them in the fridge, and clean up the mess. That way, when I sit down to decorate later that day or the next day, it’s in a nice clean kitchen and I’m able to enjoy the process rather than get stressed and anxious about the big mess I’ve made! ;-) So, to recap…Day 1 – make dough. Day 2 – bake cookies. Day 3 – make icing. Day 4 – decorate! Of course, you can pause and freeze after Day 1 OR Day 2, and you could certainly combine any of the steps and even do them all in one day if you really wanted to. I just like splitting it all up to lessen the workload and make the decorating more enjoyable for myself!
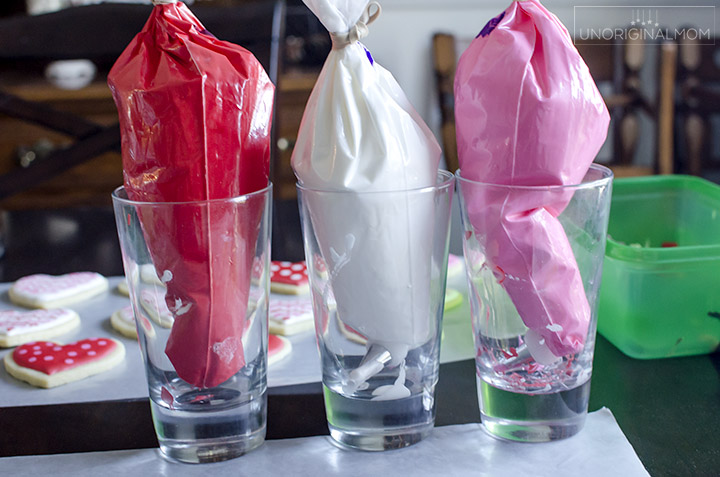
Now, to ice the cookies…I used all wet-on-wet icing techniques for my heart shaped cookies, and it was really pretty easy! Since I wasn’t doing any detailed piping, I made all of my icing flood consistency. That means, it’s watered down enough that it will settle on your cookie to make that nice flat iced surface. If you’ve never iced cookies before you’ll want to do a bit of researching how to make the right consistency of icing – I recommend this video by Flour Box Bakery on how to make your icing, and this video on how the basics of using piping and flooding techniques. I just used 3 colors to keep it simple – white, red, and pink. (Tip – the longer the icing sits, the more vivid the colors will be. I made my red icing the day before and it definitely got more red by the next day!)
Here’s how I decorated my cookies!
Step 1 – outline your cookie
Step 2 – flood your cookie within the outline, then use a toothpick or scribe needle tool to even it out
Step 3 – add your accent colors of icing. For this cookie, I was doing the marbling technique so I just did stripes of alternating pink and red.
Step 4 – use your scribe tool or a toothpick to marble your icing – carefully drag it through the icing in vertical lines, alternating in direction. (i.e. start by dragging a straight line top to bottom, then do one bottom to top, etc.) Be sure to wipe off your tool after each pass.
Step 5 – let the cookie dry COMPLETELY – it will take several hours or even overnight.

To make the “lips” cookies – use the same “wet on wet” technique as described above to drop a dot of colored icing inside a white background and then use your toothpick to carefully drag out the color on each side. For the heart borders, put dots all the way around the edge of your cookie and use your toothpick to drag all the way around the border, making sure to go directly through the center of each dot and not lift up your toothpick until you’ve gotten all the way around.
I made about 2 dozen of my cookies into cookie pops by adding a cake pop stick on the back of the cookie cut-outs before I baked them. It made them a bit more cumbersome to decorate since I had to be careful not to bump the sticks and the took up more space to dry, but other than that they were the same as baking and decorating regular cookies. (You can see how I packaged my regular cookies with fun treat bag printables in this post!) Making the cookie pops into Valentine’s Day cookie bouquets was the fun part! I used large mason jars as the base for my bouquets and stuck some dry floral foam inside them to hold the sticks.
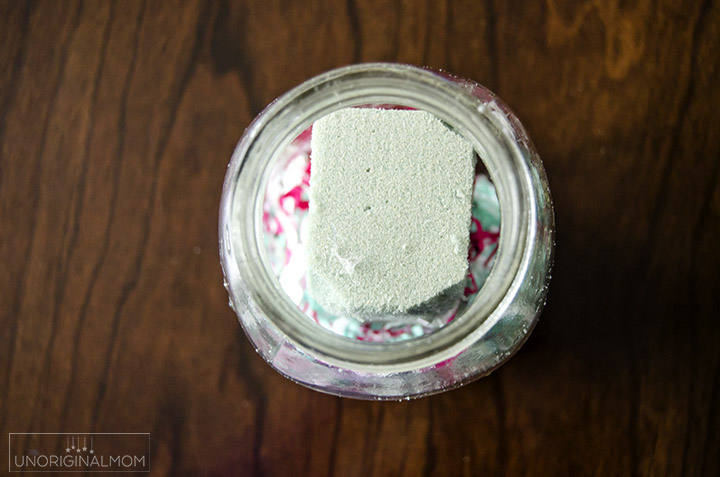
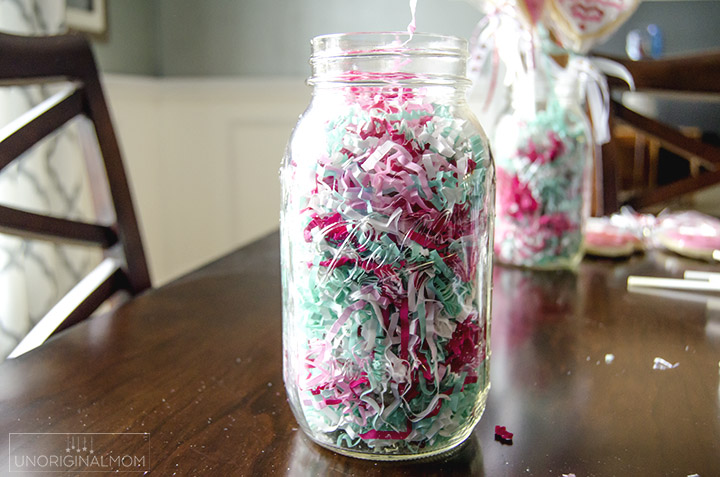
Then I used some shredded paper as filler around the foam – both to hide it from view as well as to keep it in place.
I covered the cookies with 4×6″ cellophane treat bags and held them shut with a twistie tie, then tied some fun pink, red, silver, and turqoise ribbons around the sticks. I pushed them down into the floral foam, and voila – adorable cookie bouquets!

For a finishing touch, I tied on these fun “Galentine” tags with red baker’s twine.

And I’m sharing these tags for free as a Valentine’s gift to YOU, sweet readers! They’re for personal use only. Click here to download the PDF tags.

Are you thinking of doing some Valentine’s Day baking? Don’t forget you can use my free printable Valentine’s Day treat bag tags, too! What a better way to show someone you love them than with some homemade treats?
Want to save this idea for Valentine’s Day Cookie Bouquets? Be sure to pin it NOW so you can come back to it later!

- 1 c butter (softened)
- 1 c sugar
- 1 egg
- 1 t vanilla
- 2¾ c flour
- ½ t salt (if using unsalted butter)
- Cream together butter and sugar until light and fluffy
- Add egg and vanilla
- Add flour 1 cup at a time
- Mix on low just until incorporated - do not overmix
- Wrap dough in plastic wrap and chill for 2 hours or up to 3 days.
- Preheat oven to 350 degrees
- Roll out cookies to ¼" thickness and cut.
- Chill for an additional 10-20 minutes before baking to help cookies keep their shape
- Bake 12-14 minutes or until cookies are just barely light brown on the edges
- Cool completely. Decorate or freeze until ready to decorate.
- 1 pound (4 cups) powdered sugar
- ⅓ c warm water (plus extra water for making icing consistencies)
- ¼ c Meringue Powder
- 1 t vanilla
- Add meringue powder to warm water in your mixer
- Mix for 1 minute on medium until foamy
- Add vanilla and mix
- Add powdered sugar a little bit at a time while mixing on low
- Increase speed to medium and mix for 4-7 minutes until icing is stiff and increases in size. Check for a stiff peak
- Mix to desired color and consistency
Happy Valentine’s Day, friends!


Get your copy of my FREE meal planning binder!

Sign up to get a free copy of my meal planning system - an 11 page printable meal planning binder, complete with a pantry inventory, shopping list, and more to help get on top of your menu each week!


Meredith, these are gorgeous! And I love that you made them into a cookie bouquet – so fun! You have a serious talent for decorating cookies; when I was in college, I helped out at a family friend’s bakery every once in a while but I was relegated to doing “base coats” with a spatula and left the detailed decorating to the pros :)
You may say you aren’t a professional baker, but I am pretty sure you could make a lot of money selling these. They are so gorgeous and fun. The presentation is awesome.
Wow Meredith, These cookies are really beautiful and look delicious. I am loving it.
These are so much fun! You did a great job :) Happy Valentine’s Day!
Yummo! These look professionally done! beautiful!
your honestly a rockstar . tags and cookies in one post with links !!!! so glad i found you
I love the idea of celebrating Galentine’s Day with homemade treats for your girlfriends! Turning sugar cookies into cookie pops for a bouquet is such a creative touch. Your detailed tips on spreading out the cookie-making process and using heart-shaped cutters make it seem achievable for anyone. Thanks for sharing your fun and festive Valentine’s Day project!
This is such a creative idea for Galentine’s Day! Love how you turned cookies into pops for bouquets. Can’t wait to try making them with my friends!