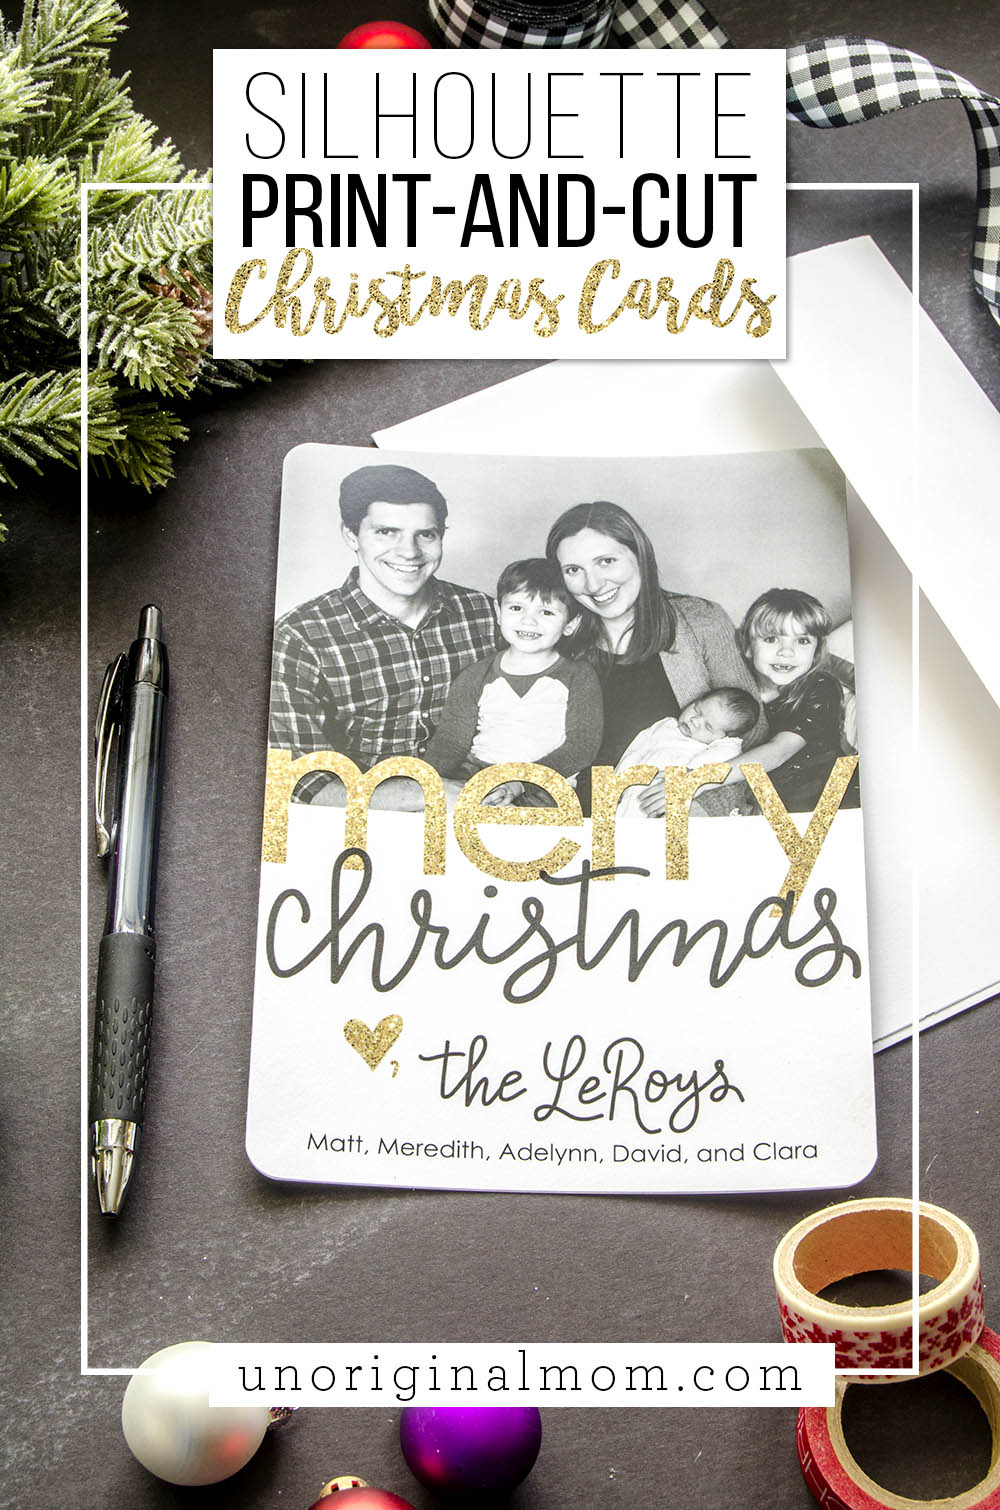
Looking for a way to add a unique twist to your regular old family photo Christmas cards this year? Use your Silhouette to add a simple print-and-cut overlay to your cards. They’ll look professional and expensive, at a fraction of the cost!
Special thanks to my friends at Silhouette America for sponsoring this post! As always, all thoughts and opinions are completely mine. This post contains affiliate links – click here to read my full disclosure.
Christmas cards are one of my favorite things about the holiday season. Instead of a mailbox full of junk mail, it’s so fun to find hand addressed envelopes with cards, photos, family updates, and sweet messages from friends and family. I display them where we can see them everyday (this is how we festively hang them on a closet door) and my kids love playing with them and rearranging them. It’s like real-life Facebook, only much better :-)
Sending our Christmas cards to friends and family is a highlight of the season, too. We typically do photo cards, but I like to add a bit of a handmade touch to them when I can – using my trusty Silhouette CAMEO, of course! (Like how I added a pop-out message tag on our card a few years ago!) Last Christmas, I decided to combine store-bought photo cards with a print-and-cut overlay, and I really love how they turned out. The concept is really simple, and there are so many variations you could do with it! Here’s a quick how-to.
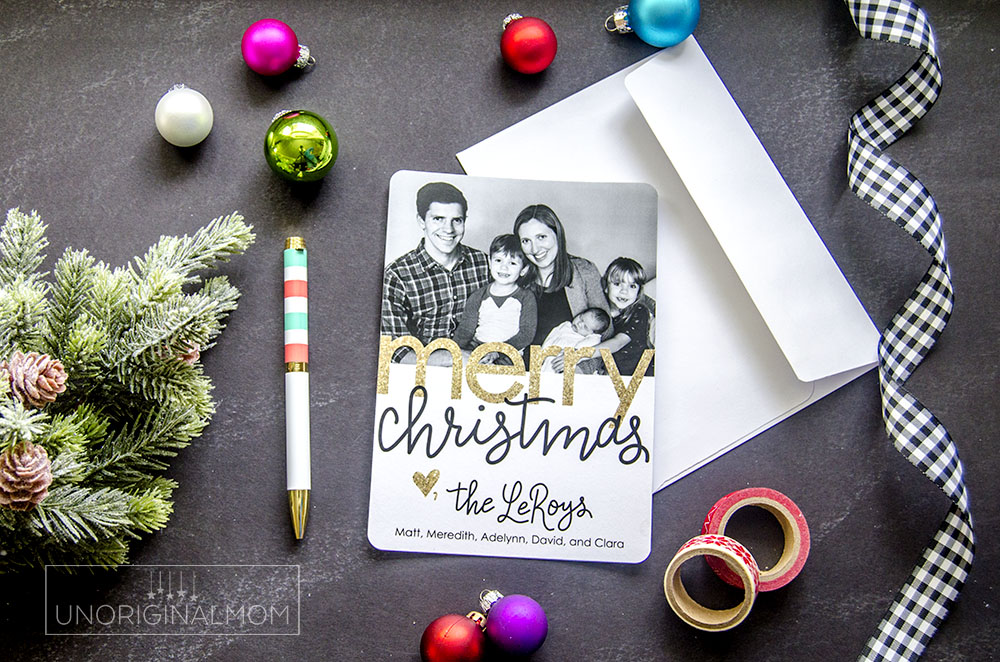
SILHOUETTE PRINT-AND-CUT CHRISTMAS CARD SUPPLIES:
- Silhouette CAMEO or Portrait
- 5×7″ photo cards & envelopes (I used a Groupon deal for photo cards from Staples)
- white card stock
- glue stick
- corner rounding punch
I started out by designing a simple photo card and ordering them from an online print store with a coupon – I think I spent 25 cents per card. I used a black and white family photo on the top half of the front of the card and left the bottom half blank, since that’s where the print-and-cut overlay was going. If you want a double sided card, put whatever you’d like on the back – more family photos, a message, or even a pretty Christmas background (the Silhouette Design Store has a bunch of great patterns you could use). Once those are ordered, the next step is designing, printing, and cutting the overlay.
SILHOUETTE PRINT-AND-CUT CHRISTMAS CARD TUTORIAL:
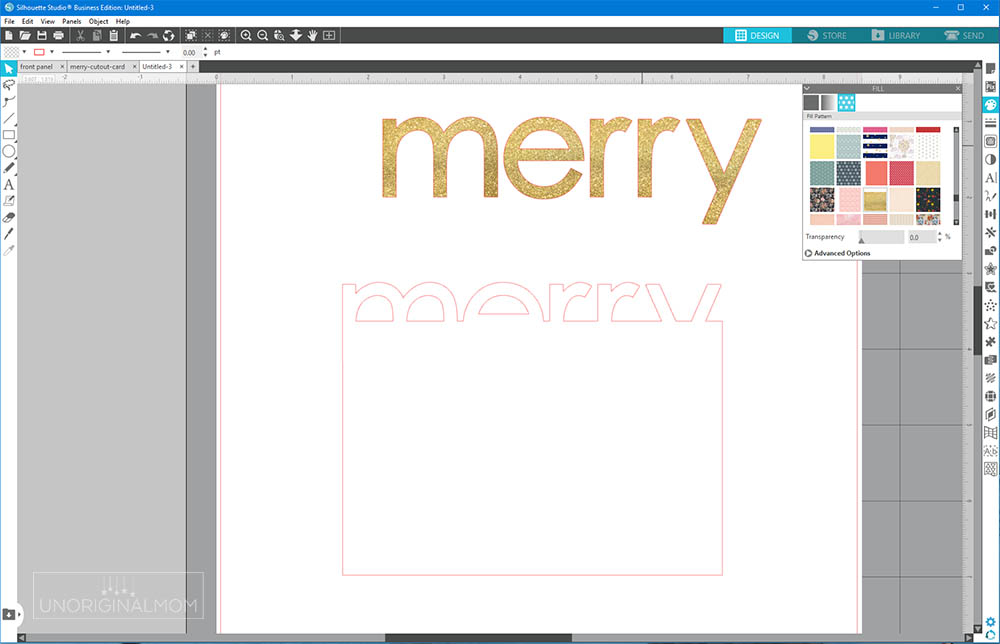
I used the same text welding technique I used for these return address labels to create the “merry” pop up of this overlay. It’s super simple to do in Silhouette Studio! First, create a rectangle exactly five inches wide and whatever height you need to overlap with your photo. Then, type out your word in whatever font you’d like (I used Century) and size it to be the same width as your rectangle. Place it so that about half the word is sticking above the rectangle. Duplicate your word and drag the copy out of the way for now.
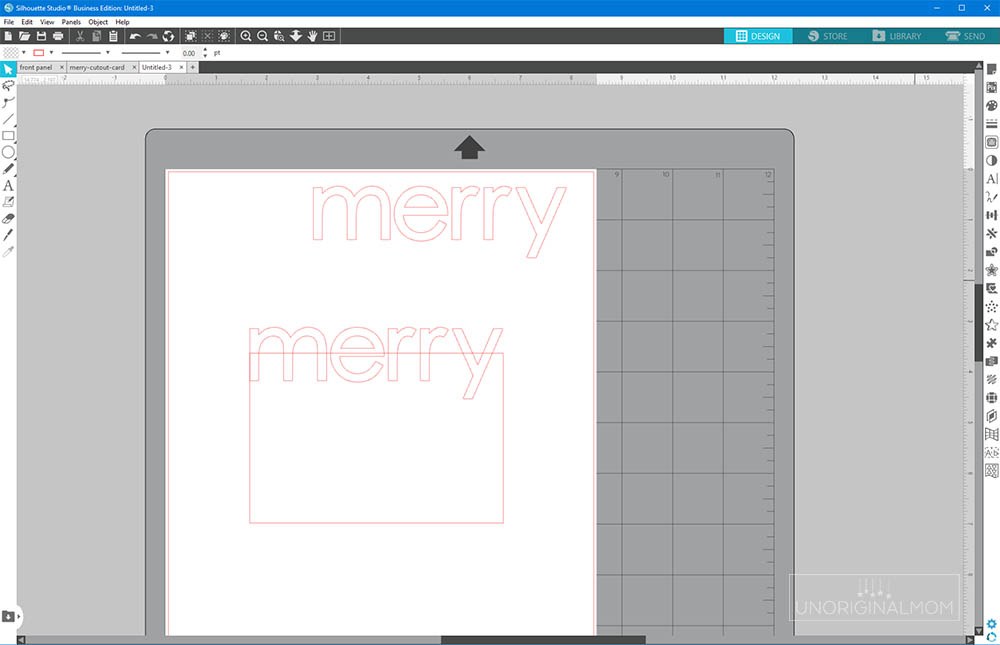
Select the original word (the one without fill) and the rectangle, and weld the two objects together. This is what you’ll want to select as your cut line. Go to the duplicated copy of your original word and fill it with a color or pattern (glitter, watercolor, plaid, floral, etc.), then drag it back on top of the outline you just welded together so it lines up. Finally, you’ll need to add your message text to the rectangle! Make sure the text is set to “no-cut” and has a fill color so it will print.
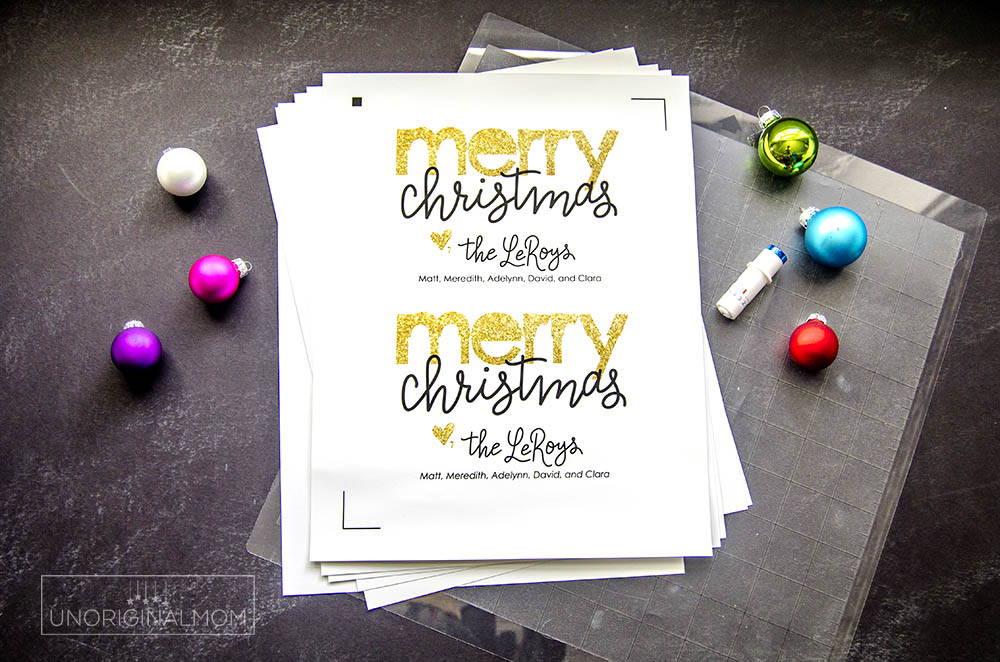
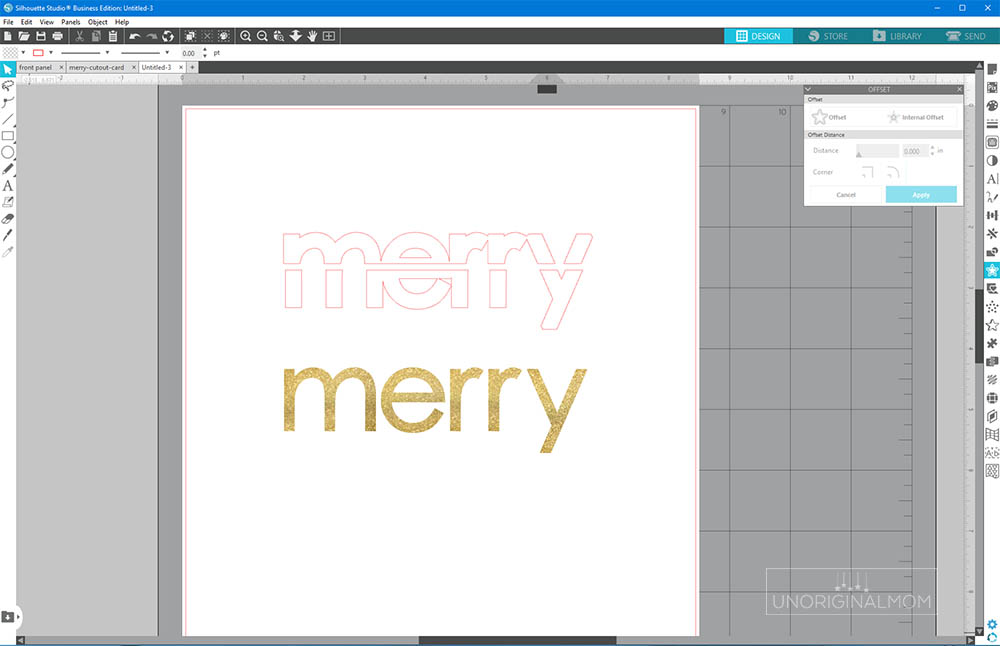
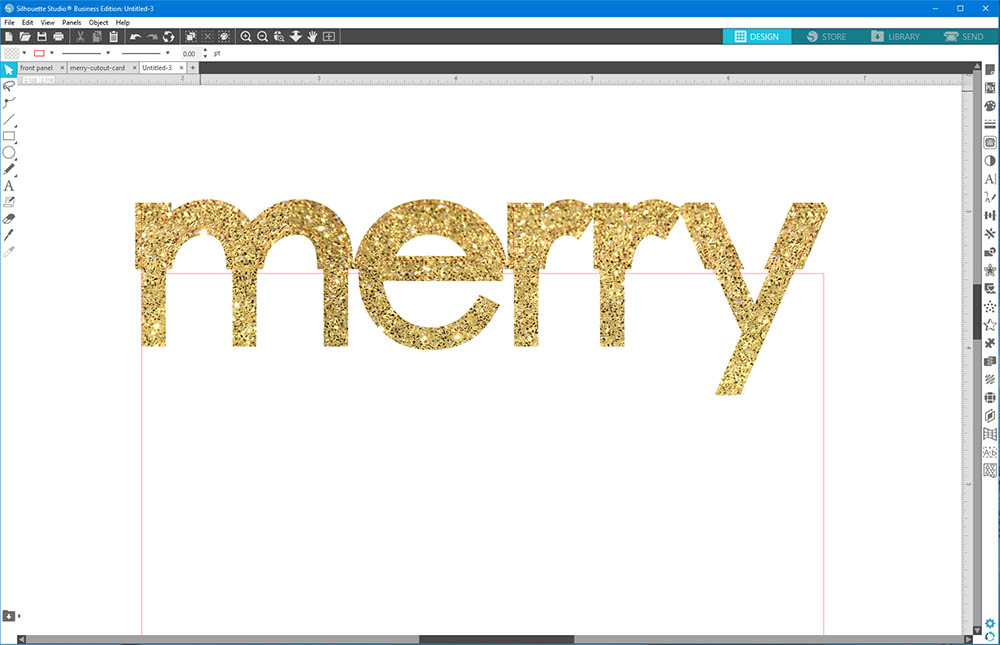
Optional step for advanced users – You can see in the photo of my printed copies above that I added a small offset to the fill to get a full-bleed on the letters, but that’s not strictly necessary. It ensures that even if the cut is a hair off, you’ll still get the pattern fill to the very edge of your letters. It’s a bit tricky, but if you’re familiar with Silhouette Studio, here’s how I did it: I used the offset tool on my word to get an outline slightly larger than my text, and then used the knife tool to slice the offset shape it just barely above the top of my rectangle. (It’s important that it’s not exactly in line with the top of the rectangle, otherwise if the cut is at all off vertically you could end up with a line of your fill color on the top edge of the white rectangle.) Then I lined it up and welded the offset shape with the filled text (remember, that layer is no-cut) so the bottom half of the text looks correct but the top half is slightly larger.
Once you’re happy with the design and color scheme, make sure you’ve enabled registration marks and then you can either print them at home or have them printed at a print shop. (Don’t forget to print and cut a mock-up first to make sure it all lines up the way it’s supposed to!)
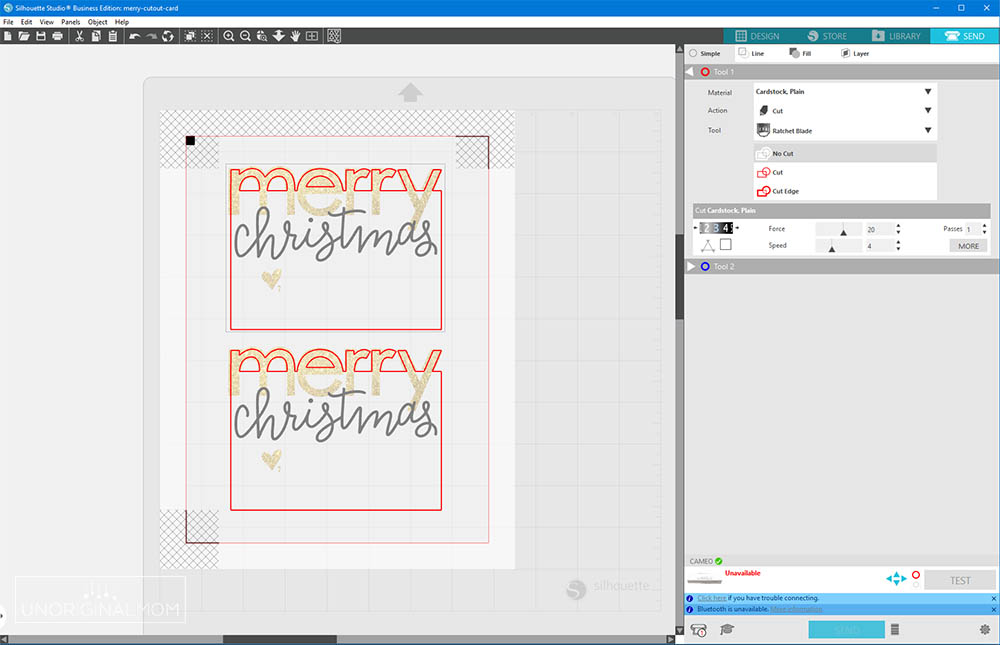
I wanted higher quality prints than my home printer could give me, so I had them printed in color on plain white card stock at a local print store for 50 cents a page. Be sure to save your file as a PDF in order to send it to a print store – they won’t be able to open a .studio or SVG file. (If you have the Business edition of Silhouette Studio, you can save directly to a PDF – otherwise with the regular or Designer edition you’ll have to “print to PDF” – I have more details on how to do that in this post.)
Then, I put my CAMEO to work cutting all those overlays! I just put on some Christmas music and kept unloading my mat, switching the papers, loading it, and hitting “repeat job.” It probably took me about 30-40 minutes to get through 25 sheets (50 cards), which isn’t bad at all!
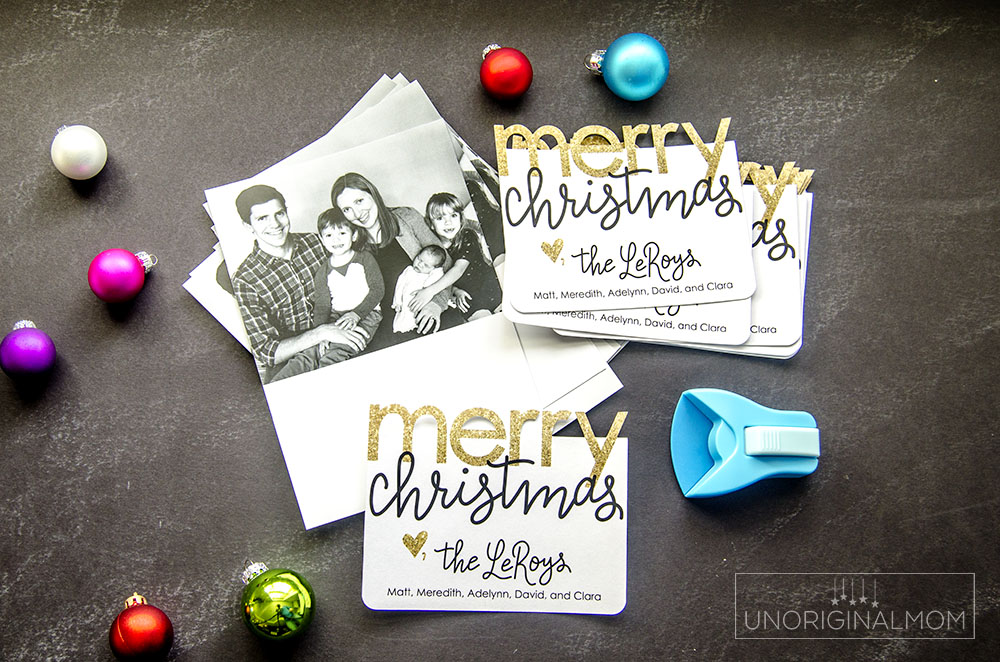
I wanted rounded corners instead of square ones to give my cards an even more high-end look, so I used a corner rounding paper punch to make sure I got the same rounding degree on my overlays and cards. After all the corners were rounded, I used a glue stick to adhere the overlays onto the cards.
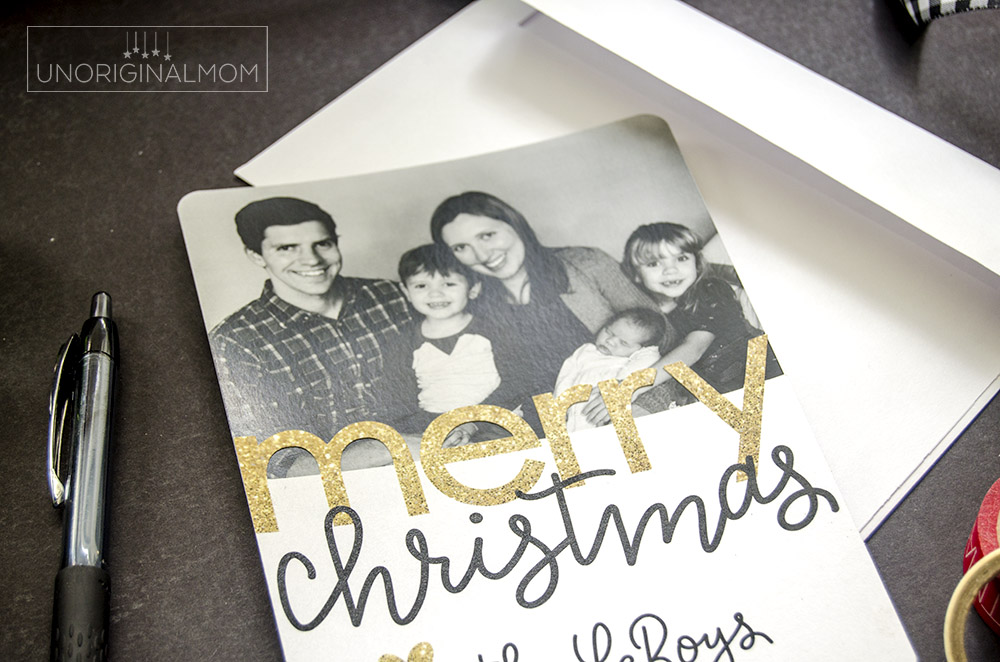
The result – beautiful, unique, and professional looking family Christmas cards for about 50 cents each! It’s hard to capture in photos, but the contrast between the matte card stock and the shiny photo cards is really neat. The “merry” letters really pop in front of the photo!
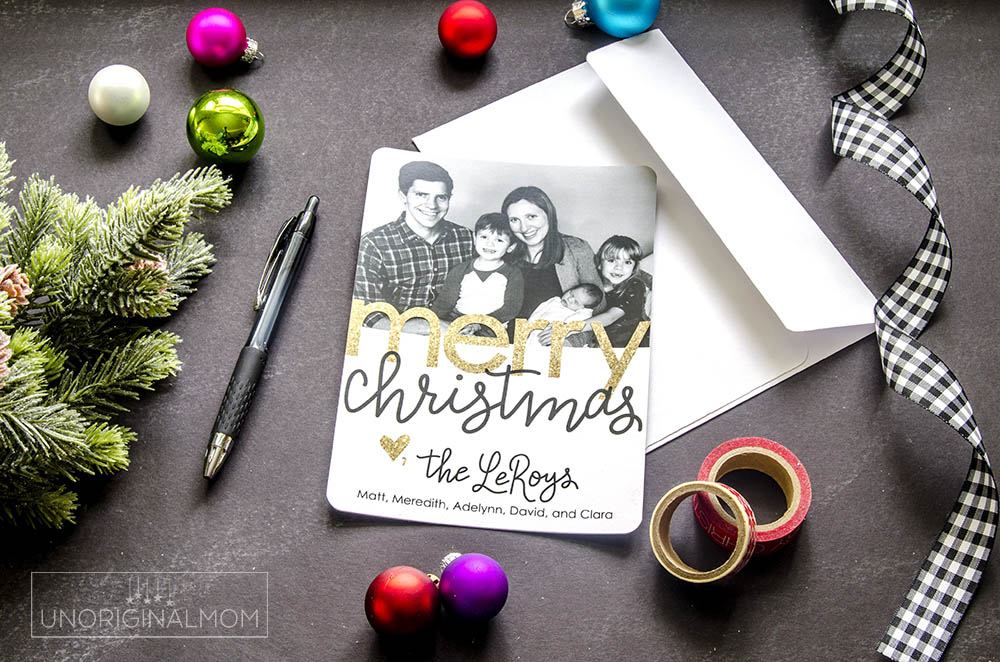
There are so many possibilities with this simple overlay technique! Do you have any other ideas for using your Silhouette to jazz-up Christmas cards?
THE SILHOUETTE BLACK FRIDAY SALE IS ALMOST HERE!!!!

Eeeeek!!! My very favorite sale of the year is almost here!! Every year the folks at Silhouette run C-R-A-Z-Y deals and incredible machine bundles for Black Friday. If you’ve been thinking about buying a craft cutting machine…or upgrading your existing machine…this is the best time of year to do it, hands down. I can’t reveal any sale details yet (other than it’s gonna be SO good!), but here are THREE things you need to do to get ready for this sale.
- Put together your wishlist! Browse the shop over at Silhouette America and figure out what you need to stock up on (blades and mats, for sure!), what materials you want to play with (aaaaaaall the specialty media goodies) and if you’ve got a machine upgrade on your list (hello, CAMEO 4!). I’ve got a comprehensive Silhouette Gift Guide post that will help you out with that!
- Mark your calendars for 2:00 PM on WEDNESDAY, November 27! The official Silhouette Black Friday sale opens to the public on Thanksgiving evening, but you can unlock EARLY ACCESS with my discount code, “UNORIGINAL.”
- Sign up for my email list so you don’t miss the sale! I’ll send out an email the moment the sale is live with all the details plus my thoughts on what deals are the very best.
- Okay, I know I said 3 things, and this is really just an addendum to #3…you can also sign up for my SILHOUETTE SANTA email list! This is a special email list where you can sign up your hubby/significant other/crafty-fairy-godmother so that they will get an email from the moment the sale goes live…along with a not-so-subtle-hint that somebody they know is wishing for a CAMEO 4 under the tree this year! I’ll be deleting this email list the moment the sale is over, so you don’t need to worry about signing them up for tons of emails. Sign up your significant other to my Silhouette Santa list here!
Feel free to leave a comment or send an email with any questions.


Subscribe to unOriginal Mom via email and get instant access to my library of FREE Silhouette Studio & SVG cut files - exclusively for email subscribers. Plus there's a new file added every month!




What a fantastic idea to elevate your Christmas cards with a personalized touch! Using your Silhouette for a print-and-cut overlay is such a creative way to make your cards stand out. It’s wonderful how you cherish the tradition of sending and receiving holiday cards. The personal connection is truly special and heartwarming. Thanks for sharing this delightful holiday card DIY!
What a great idea! I love how you can add a handmade touch to photo cards with the Silhouette. Can’t wait to try this for our Christmas cards this year!