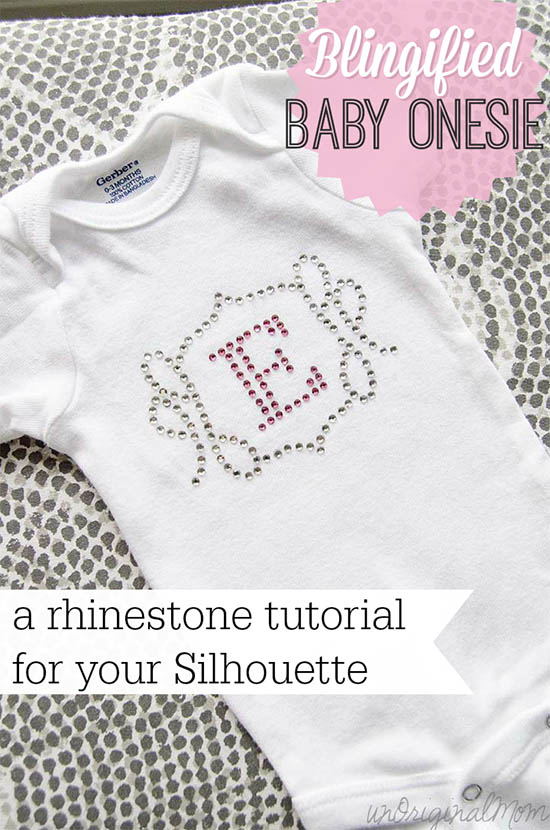
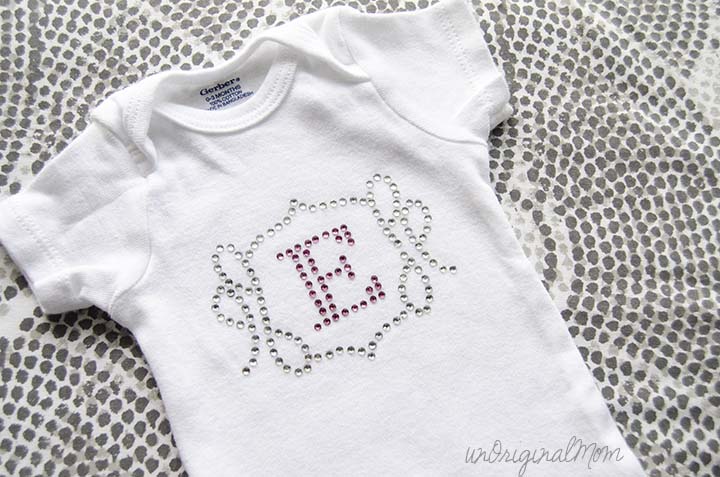
A few weeks ago, I shared with you some Super Cute Onesies…included in the mix was this glitzy, glamorous monogrammed rhinestone onesie for precious baby Eleanor!
This post contains affiliate links – click here to read my full disclosure.
It was my first foray into the world of rhinestones with my Silhouette, and to be perfectly honest, probably the most difficult medium that I’ve tried. It is a pretty tedious process that I imagine gets a little easier each time you do it…but as you can see, the end result is so worth it! (I mean, can it get any cuter than rhinestones on a baby girl??)
Now, if you have the regular version of Silhouette Studio, you can use rhinestone designs that you purchase from the Silhouette store – but because the regular way of re-sizing designs would also shrink the size of your rhinestones, you need some extra features to be able to modify and design your own rhinestone templates. These features are available through the Designer Edition of Silhouette Studio (read to the end of this post for a special promo deal on the Designer Edition!), so I thought I’d put together a little tutorial on working with those features and creating your own rhinestone design!
NOTE: This tutorial was made using Version 2 of Silhouette Studio – if you have Version 3 (the newest version) it looks a bit different, but functions the same way!
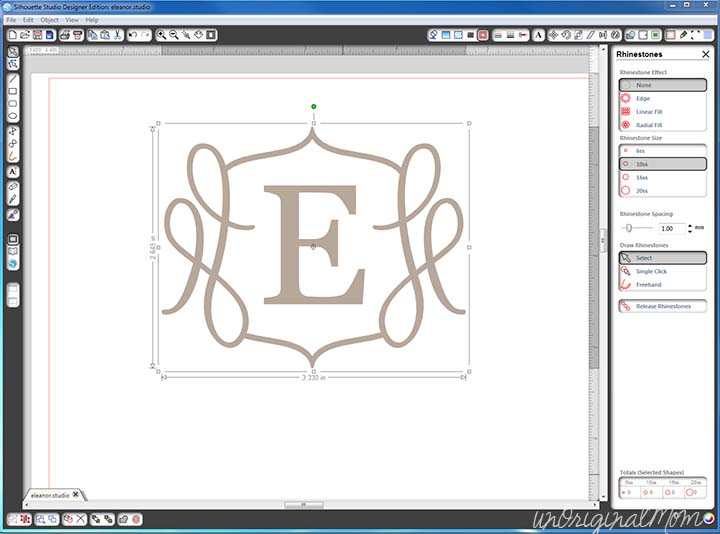
The first step is to decide on a design. I found it easiest to “trace” an existing design…free handing a design with little tiny circles just isn’t really easy! So pick out a design from your library, buy one from the Silhouette store, or type some text. You just need an image to put behind your rhinestones. You can even just do a google image search for what you’re looking for – although if you’re not using a cut file, you’ll have to do all the filling by hand over top of your design using the “single click” tool under the Rhinestone menu. I used a monogram – design #60060 from the Silhouette Store. (Note – because it’s an SVG file, it looks like a solid filled shape instead of cut lines – the rhinestones will look like that too. If you’re using a regular .Studio cut file, your shape and rhinestones will just be red outlines – that’s okay!)
IMPORTANT: Size your design NOW to the final size – once you add the rhinestones, you can’t re-size it!
Okay, here’s the important part to use my little “trick.” Before you do anything, duplicate your shape on top of itself. You can’t tell from looking, but there are actually 2 identical shapes stacked on top of each other here. Got that? Ok, you may proceed!
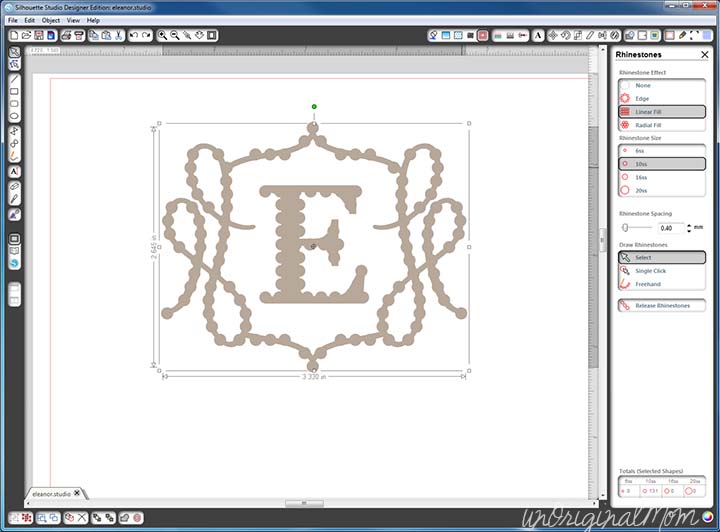
To “fill” your design with rhinestones, you’ll need to select your shape, pick the size rhinestone you’re using, and experiment a bit with the different fill features and rhinestone spacing until you get something *close* to what you’re going for. I found the “linear fill” work best for my shape. It’s going to look a bit funky, because now you’ve got rhinestones on top of the copy of the original shape that was hiding. If that’s bugging you, just drag it off to the side for a minute, but keep it there so you can drag it back.
Once you’ve got something close enough, change your copied shape to a different color to help you see your rhinestones more clearly. (Remember, if you started with a regular Studio file your rhinestones will just be red outlines.)
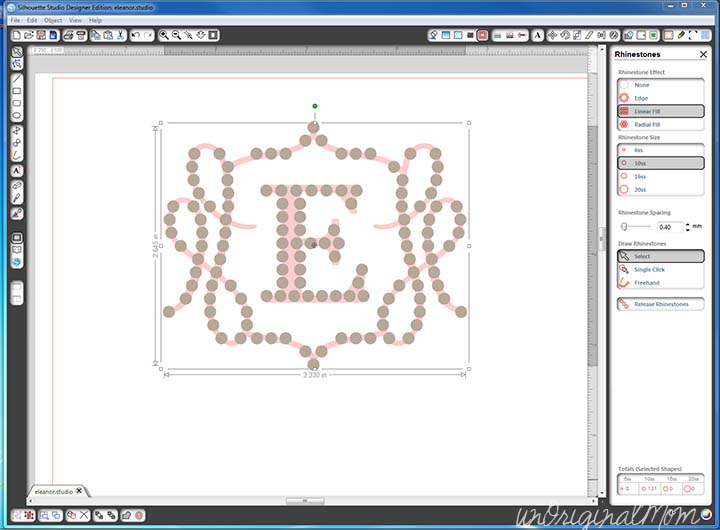
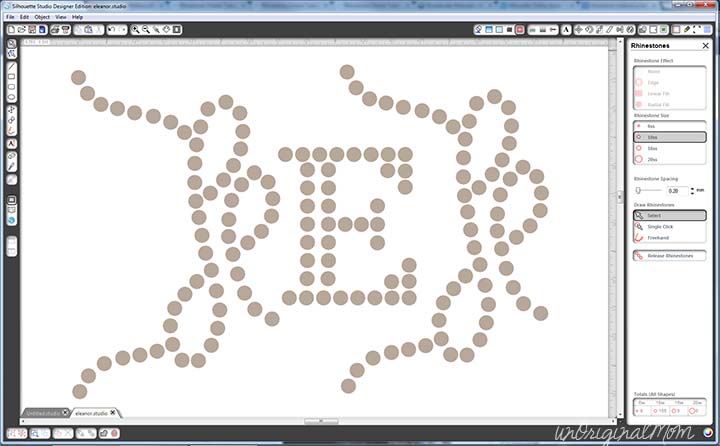
Select your rhinestone shape and then click “release rhinestones” in the Rhinestones menu on your right. Now is the tedious fun part – move around all those little circles until you’re happy with the design! The “align” menu can be really helpful here – I used it to evenly space the rhinestones in the vertical and horizontal lines of the letter E. Remember to leave enough space between the circles that your machine will be able to cut them cleanly. If you need some extra rhinestones, use the “single click” tool to add more wherever you click your mouse.
Now, here’s another trick. Since the outside border of my design is symmetrical, I only did half the design…then I selected it, copied it, and deleted the other side…
…then I mirrored it and reattached it so that my border was exactly the same on both sides.
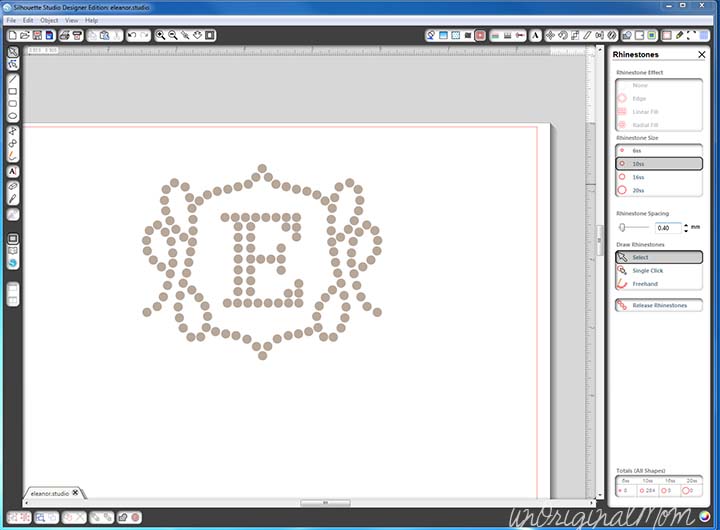
Here’s the final version!
Remember, DON’T re-size it now! That will change the size of your rhinestones, too, which you don’t want. You CAN select your shape and change the size of your rhinestones, if you want…but it won’t re-size your design, just the size of those little circles.
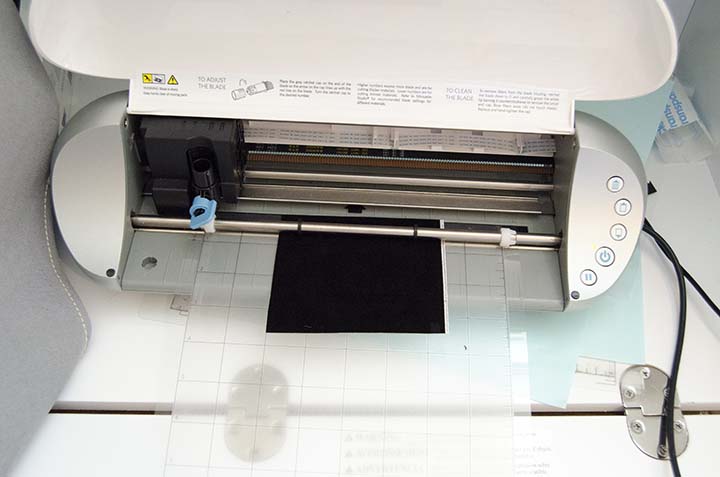
Now you’re ready to cut your design! You’ll need Template Material, Backing Board, and Rhinestone Transfer tape – they all come in the Rhinestone starter kit (along with rhinestones and a positioning brush), or the Rhinestone Template Kit. Use the Silhouette Template Material to cut your template. I tried using the full sheet, but my rollers had a heck of a time gripping against that fuzzy black material…so I just cut out a rectangle a bit bigger than my design and placed it in the middle of my mat to cut.
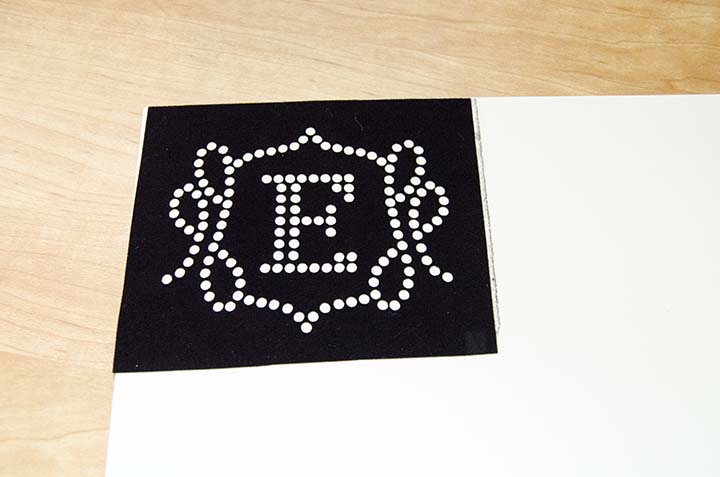
It won’t look like anything is cut…but it is! Rip off your template in one quick, swift motion – you want to leave behind as many of those little black circles as you can! But you’ll probably end up having to go back and weed the stubborn ones out. I used my hook tool for that. Then stick your template onto the white backing board. (Presto reusable template! You can use it over and over and over again!)
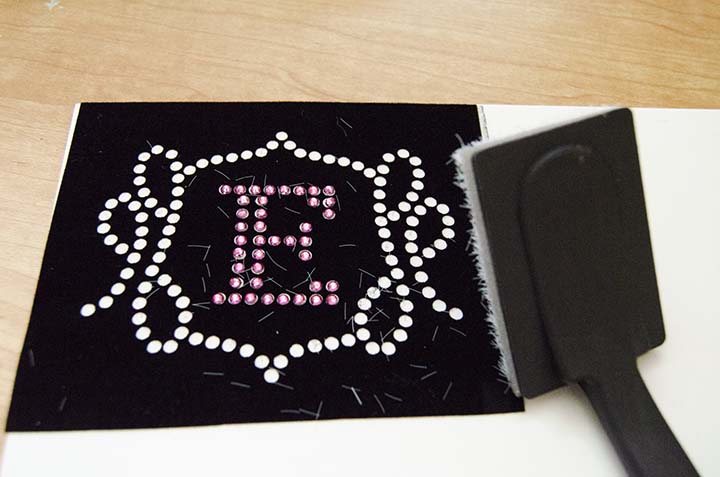
Now the most tedious super fun part of all…placing the rhinestones. Pour on some rhinestones and use the brush that came in your Rhinestone Starter Kit (or a regular old foam brush) to help place the rhinestones. A pair of tweezers may help with the stubborn ones, too. (I think the Silhouette Pick Me Up Tool would also be really helpful!) I decided to use pink rhinestones for the letter E and clear ones for the border. This took me a while…just put on some music and get to work!
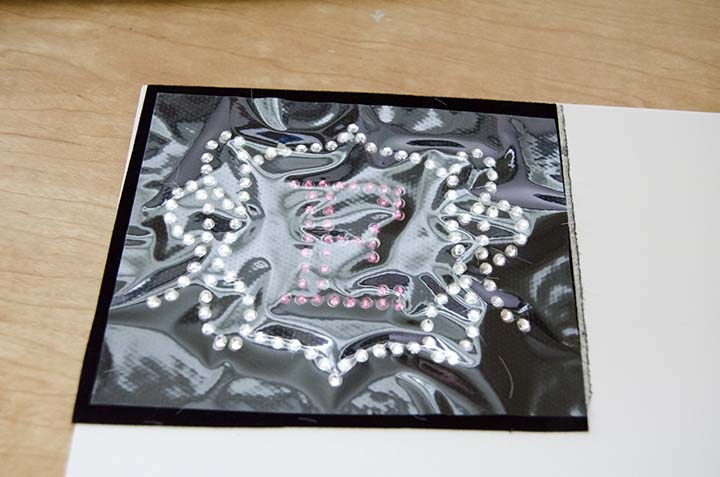
Once you’ve got all your rhinestones placed, here’s the scariest part – the transfer tape. Best to be quick and confident with this, too. Cut a piece of the transfer tape from your Rhinestone Kit to fit your design, then lay it down with one good press onto your rhinestones.
Give it some extra presses on every part of your design so you’ve got all those little buggers. Then lift up the tape and watch your rhinestone design come with it! Then lay it onto your garment where you want it.
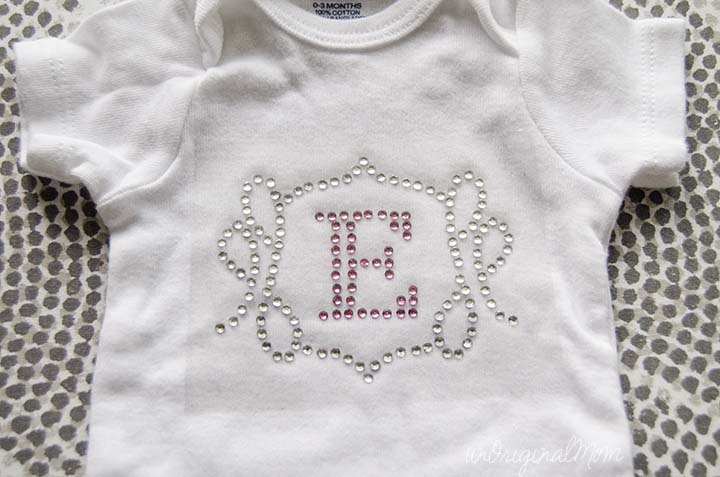
Just like you would with HTV, lay a thin cloth on top (a pillowcase or thin dish cloth works well) and iron with pressure for about a minute or so. Repeat a few times as needed until all your rhinestones are sticking. Gently peel up your transfer tape, and just to make sure it’s good-and-glued, turn it inside out and iron again from the inside.
Ta-da! A beautiful, blingified baby onesie.
A Silhouette Promotion
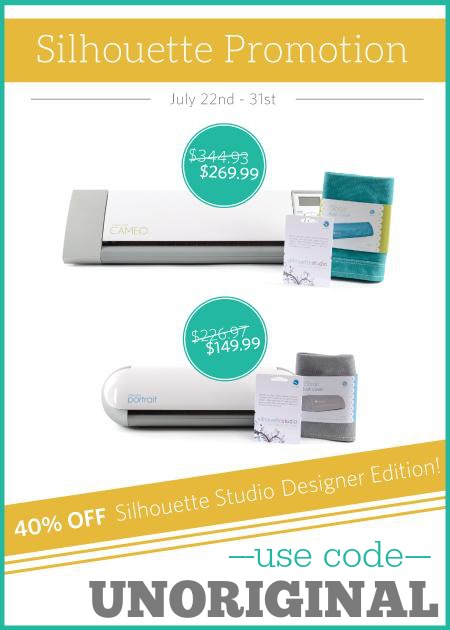
Want to make some rhinestone designs of your own, but don’t have Silhouette Studio Designer Edition? You’re in luck! From now until July 31st, you can get it for 40% off at when you use the code UNORIGINAL! That’s truly a great deal (in fact, less than I paid for it when I upgraded), so if you’ve been waiting for a bargain, this is it!
Not sure what the big difference is with the Designer Edition? Here are some of the features that are “unlocked” when you purchase it –
- Ability to open, manipulate, and cut .svg files
- Rhinestone tools to convert designs into rhinestone templates and create your own rhinestone designs
- Sketch tools to convert designs into several styles of sketchable art
- Creative knife tools to allow you to clip designs using different patterns
- Enhanced eraser set to modify designs with more precision
- Built-in ruler and guide lines for precise alignment and drawing
- Layers support (including ability to cut by layer)
- PDF import
- Nesting feature to allow you to arrange cuts as efficiently as possible—a scrapper’s dream!
- Shadow tool—allows you to add a drop shadow to printable designs
My favorite perks are the knife and eraser tools as well as the built-in ruler and guides – they just make everything so much easier! It’s fun to be able to play with the rhinestone designs, too.
There are also some great deals on machine bundles, if you are looking to pick up your own Silhouette!
CAMEO bundle – $269.99
1 Silhouette CAMEO
1 copy of Silhouette Studio Designer Edition
1 teal CAMEO dust cover
Portrait bundle – $149.99
1 Silhouette Portrait
1 copy of Silhouette Studio Designer Edition
1 grey Portrait dust cover
Don’t forget to use the code UNORIGINAL at checkout to get these great prices!
So, what are you going to blingify with your new-found rhinestone skills? Perhaps a baby onesie, t-shirt, tote bag, or even a card? I’d love to see your project!
This post contains affiliate links – click here to read my full disclosure.


Get your copy of my FREE meal planning binder!

Sign up to get a free copy of my meal planning system - an 11 page printable meal planning binder, complete with a pantry inventory, shopping list, and more to help get on top of your menu each week!





This turned out beautifully!
Stopping by from Someday Crafts. So glad I came across this! Have been wanting to try this.. Great step-by-step tutorial. Thanks for sharing, pinning!
Great tutorial and love the onesie!! The rhinestone kit has intimidated me since day one of getting my silhouette. Maybe it is possible! Would love it if you stopped by our Motivational Monday party going on right now to link up this post.
{http://www.burlapandbabies.com/2014/07/motivational-monday_28.html}
This is adorable, Meredith! Great tutorial! Thank you bunches for linking up and partying with us!
Thanks so much, Kristi! Love linking up with you each week!
Loved the design! Can you give me the name or number of the flourish that you used? Thanks.
Hi Vicki, the design is linked in the post above, it’s #60060 from the Silhouette Store!
This is adorable! Super cute! Now, I’m going to be a party pooper and point out that rhinestones on baby onesies are choking hazards should they come loose. For this reason I just can’t bring myself to rhinestone any gear for the little ones, but this design would be precious on a piece of fabric and framed for the nursery. Manufacturers of toys, clothes, and baby clothing have many safety rules regarding construction, and when we make things at home, we don’t have someone inspecting them.
I agree, not appropriate for little ones, BUT nothing to stop you from cutting out of glitter or holographic htv to give the look of rhinestones.
Hello sir, How are you? My name is Abdul Hannan Shoharab. I am a rhinestone designer. I can convert any vector design into rhinestones. Are you interested in working with me? Please contact me.
This is such a fun project! I love how you shared your experience with rhinestones on onesies. Can’t wait to see more of your cute creations! 💖