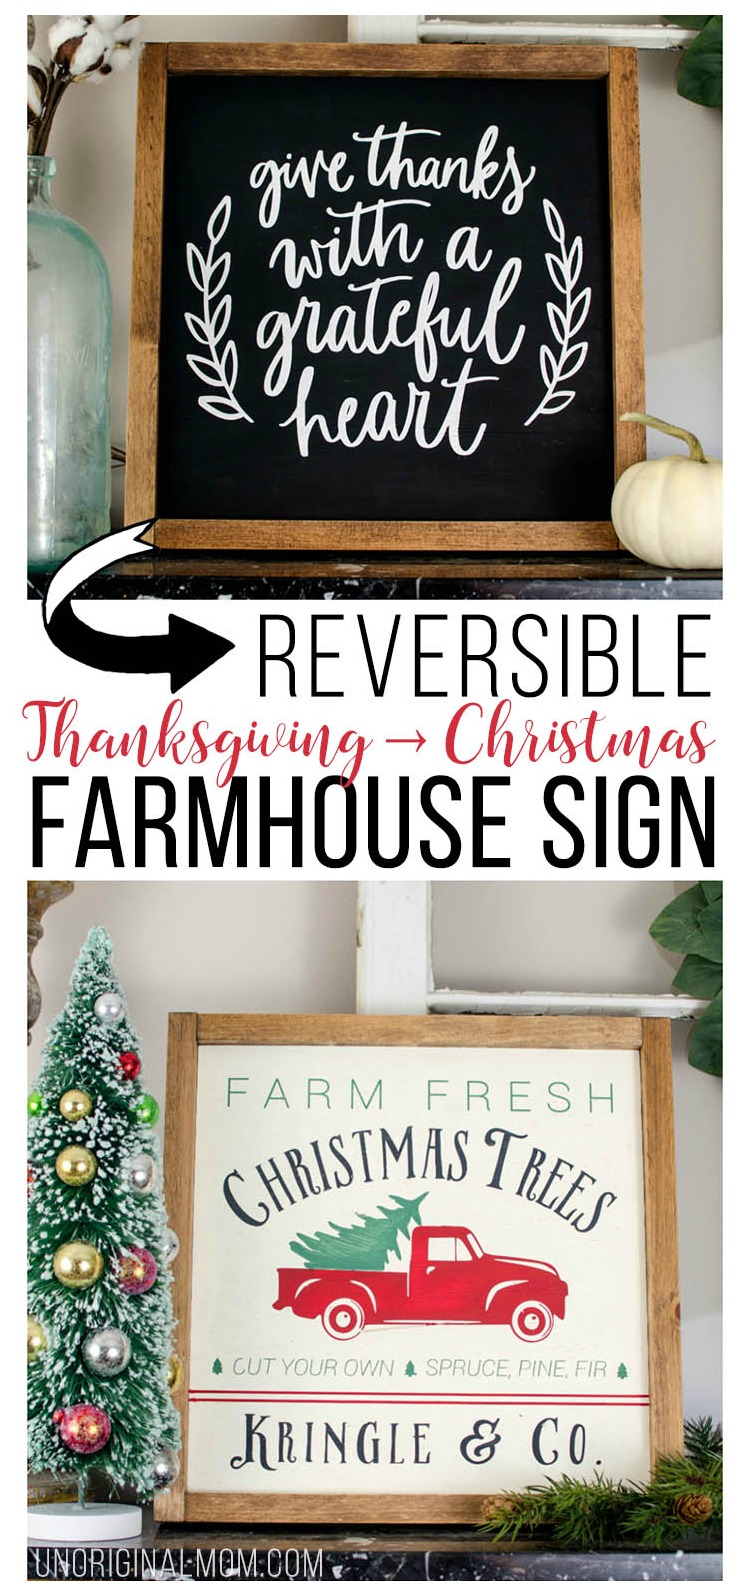
I wish there was more time between Thanksgiving and Christmas. It seems like no matter how hard I try, Thanksgiving always gets overshadowed by Christmas preparations and anticipation of the holiday season. As a blogger, I’m decorating for fall at the end of August and as soon as Halloween is over, it’s time to break out the Christmas projects. Poor Thanksgiving just gets the short end of the stick!
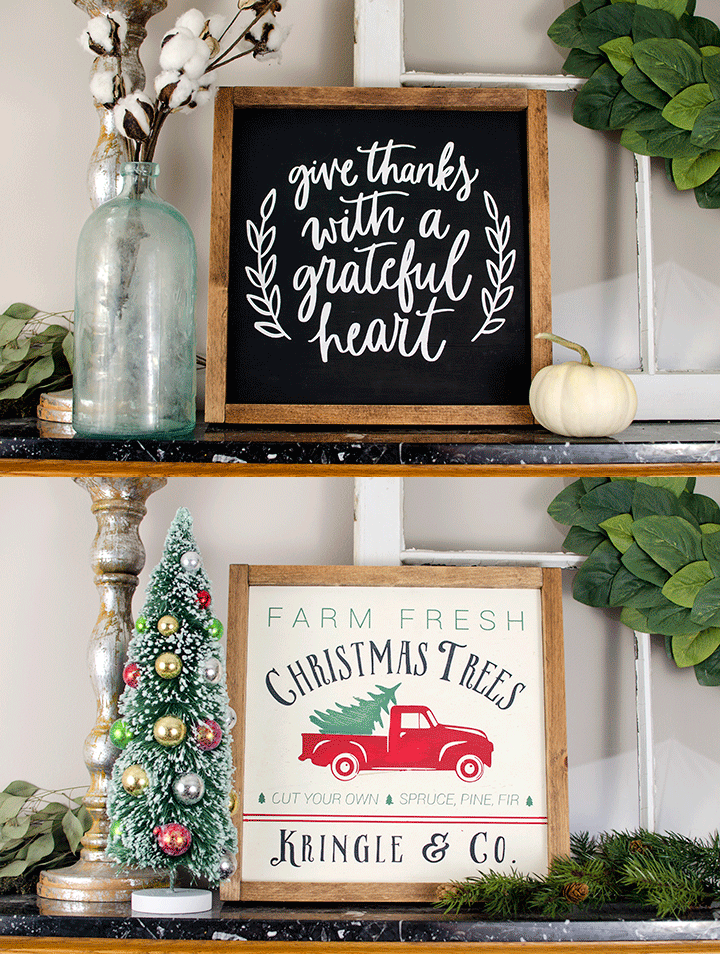
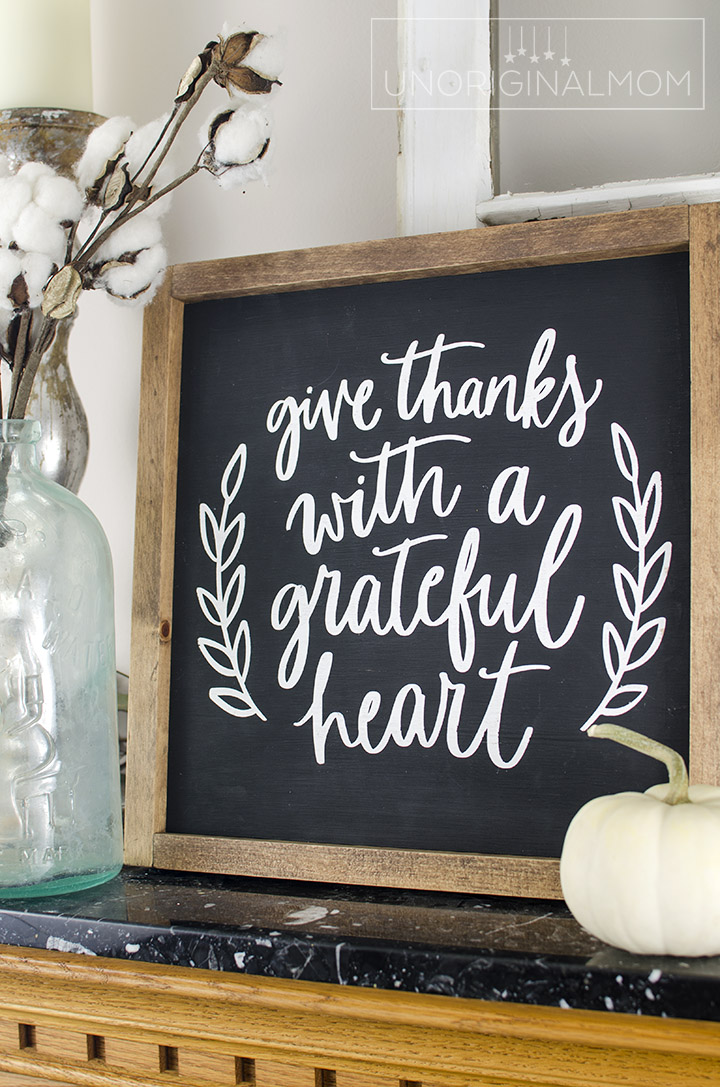
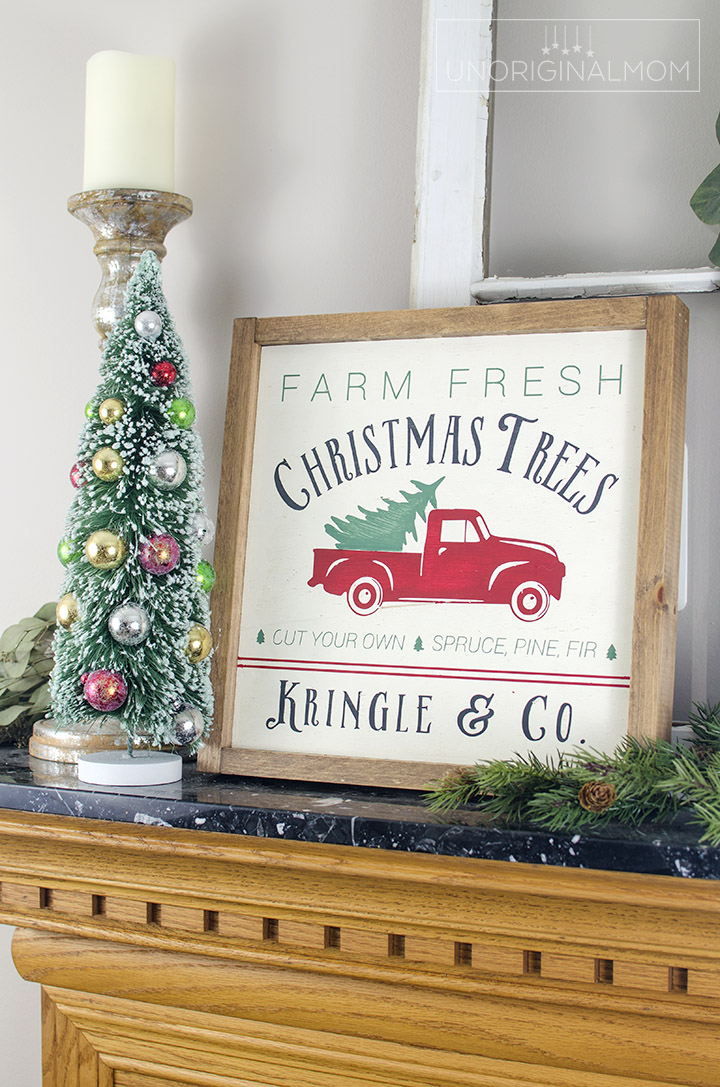
That’s why I decided to make a double-sided farmhouse style sign with a Thanksgiving sign on one side and a Christmas Tree farm sign on the other. It’s sitting on my mantle, styled for fall – but even as I break out some Christmas decor, I can leave it set on the Thanksgiving side until after Thanksgiving Day – and then, all it requires is a flip of the sign and it’s ready for Christmas! To give you a better idea of how truly terrific this sign is, I made my first-ever GIF to show it off!
Practically speaking, this is a space saver as well. We are officially maxed out of Christmas decor storage space, so for every new decoration I get each year I have to get rid of something else…or come up with a creative solution like this, so I can store this sign with my fall decor instead of having to squeeze it into my Christmas stash ;-) Want to make your own? (Of course you do!) Here’s the full “how to.”
SUPPLIES: (This post contains affiliate links. Click here to read my full disclosure.)
- 1/2″ plywood, cut to desired sign size (mine was 12×12″)
- 1×2″s cut to frame lengths
- stain – I used Minwax Special Walnut
- vinyl or contact paper
- transfer paper or clear contact paper
- Silhouette Cameo
- craft paint
- designs – I used this Give Thanks with a Grateful Heart design from the Silhouette Design Store, and I created the Christmas Tree Farm design myself – free cut file available in my Silhouette Library
- Fonts – just in case you’re looking to customize your own sign for your personal use, the fonts I used were Roboto and Brilant Typeface. Remember, though, copying someone else’s design to sell is unethical and illegal.
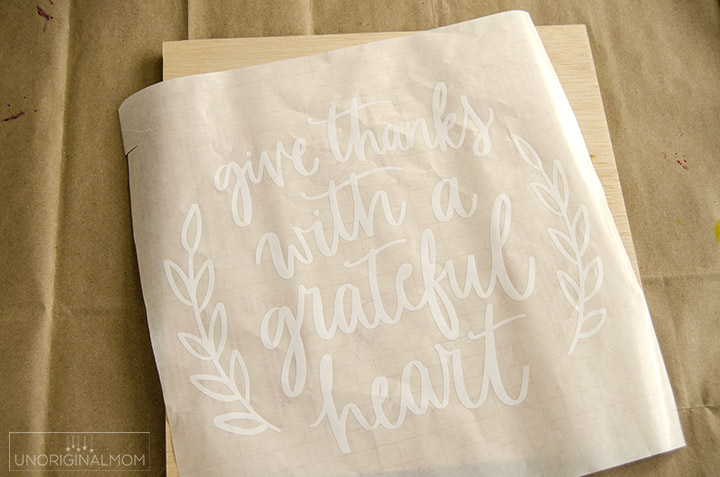
The first thing I did was to cut my stencil out of contact paper using my Silhouette Cameo. I used this design from the Silhouette Design Store. You could use vinyl if you’d like, but I find contact paper works well for stenciling and is much more inexpensive than vinyl.
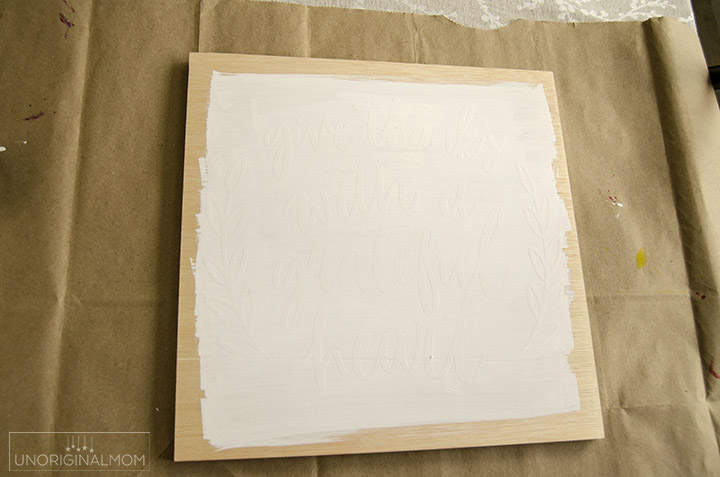
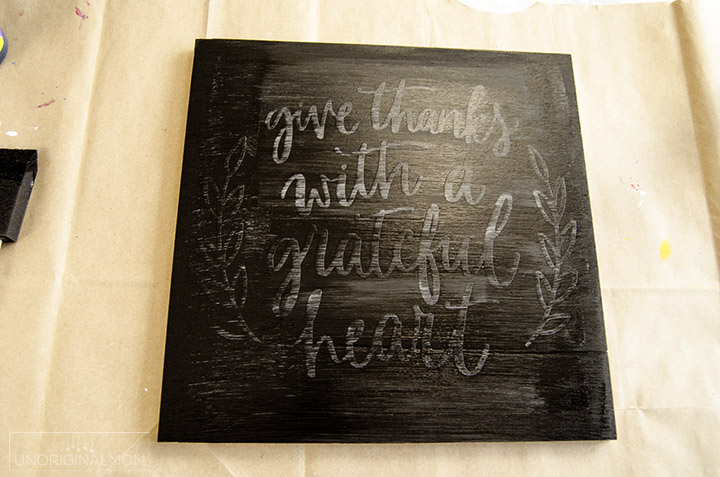
I had pre-cut plywood and frames leftover from my sign painting party, so that made this process even easier. Once my sign surface was sanded and wiped down, I used the PVPP method to stencil and paint my sign (you can read a more detailed tutorial about that here). For the “grateful” sign, I used a reverse stencil, so first I painted the sign the color I wanted my TEXT to be (white). I let that dry completely and then used transfer paper to apply my stencil. Then I painted the text color again OVER the stencil to make sure the edges were sealed – that way, any paint that bleeds underneath on this coat doesn’t matter since it’s the same color.
Once that was dry, I painted several coats of my BACKGROUND color (black) over the entire sign.
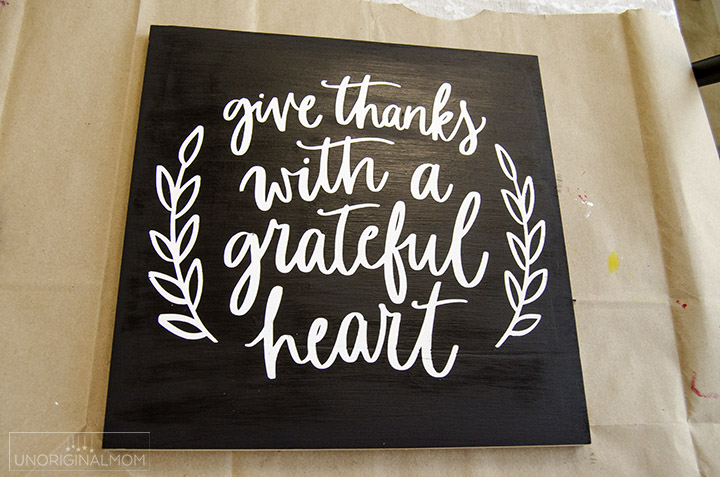
Then I peeled up my stencil to reveal crisp, beautiful lines!
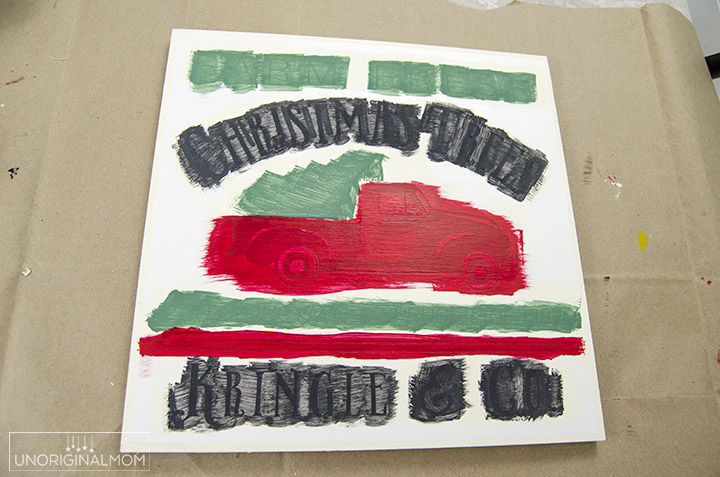
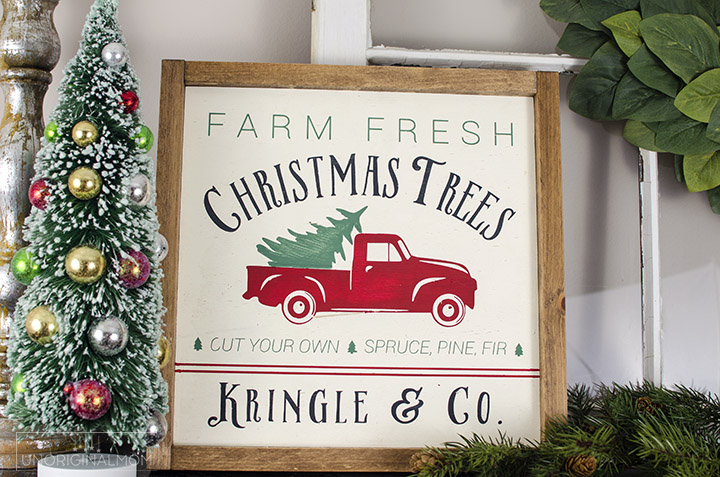
Once that side had a chance to dry, I flipped it over and started again with my Christmas Tree Farm stencil. This time, though, since I wanted multiple colors of paint, I weeded the text and image away and used the negative space as a stencil. That means I painted my sign the BACKGROUND color first (off-white), applied the stencil, and then painted over the stencil again with the background color. Then I painted my colors on, being careful to keep the colors separate.
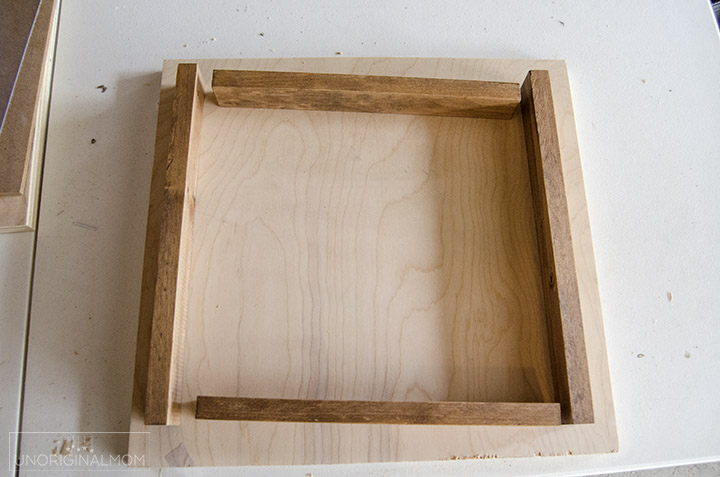
The frame is just made of 1×2 boards that I stained with Minwax Special Walnut. Then my husband used his nail gun to assemble them into a square, and pre-drilled two holes on the top and two on the bottom so I could nail the frame onto the plywood sign.
Here’s how the Thanksgiving side looks, sitting on my mantel all styled for fall –
And here’s how the Christmas farmhouse sign side turned out!
I created the Christmas Tree Farm sign design myself and I’ve added it to my Silhouette Cut File library, so you can have it – for FREE! Sign up below to get access.
For you visual learners, here’s a video of how I made the sign, start-to-finish!
Do you have a Silhouette – or Silhouette goodies – on your wish list this year? Take a look at my Ultimate Silhouette Gift Guide & Wish List!!
Looking for more handmade Christmas decor inspiration? Browse through these fabulous Holiday decor projects from other bloggers participating in the Handmade for the Holidays Blog Hop!
The fun doesn’t end here, though…there’s two more days of Handmade Holidays Inspiration!
Handmade Holidays – Gifts: Christmas Potpourri Jars + Free Printable Tags
Handmade Holidays – Recipes: Mint Chocolate Macarons


Subscribe to unOriginal Mom via email and get instant access to my library of FREE Silhouette Studio & SVG cut files - exclusively for email subscribers. Plus there's a new file added every month!






I love that this sign is reversible! Thanks for sharing!
Loving this and less to store at the end of the winter!
This is simply amazing. Do you sell these stencils?
Thanks Barb! No, I’m sorry I don’t make them to sell – there just aren’t enough hours in the day. You might be able to find someone on Etsy that does custom vinyl stencils. Or, Silhouette is going to have a killer Black Friday sale where you could snag your own cutting machine, if you’re interested in being able to make them yourself!
Love this idea and that it is reversible.
Can you tell me the differences between the Cricut and the Silhouette? I’m not sure which one to get!
What is the brand of the contact paper that you use for a stencil? I have always used vinyl and it is expensive.
Hi Autumn, it’s just regular Con-Tact Paper brand, I linked to it in the supply list above! :-)
This is too funny! After your sign painting party post I got to thinking that this would make an awesome PTO fundraiser (which we are doing on Thursday). While I was working on the samples I thought, “hey I could do both side!” I got the first side done, but have been busy getting everything ready for our fundraiser. Can’t wait to get it finished ?. Now back to sanding
Oh my, that’s terrific! Great minds think alike! :-) What a great fundraiser idea, too…I hope it goes well!
I am fairly new to Silhouette but the file is just showing up as an image. Do I need to use the trace tool to make it a cut file?
No, that’s just because I filled the shapes/texts with color. The cut lines are still there, just go under “cut settings” and they should be all set to cut!
I have tried and tried to get the Christmas cut file to work and it is not recognizing the picture. It says it cuts it and is complete within a half second. So it seems like it isn’t recognizing anything there. I can’t get the picture to trace properly either. I got all set to do this project and invited a friend over and we can’t get it to work :(
Hi Donna, I’m so sorry you’re having trouble! You shouldn’t need to trace anything, though…just size the entire design to how big you want it and send it to your Silhouette. Did you check the cut settings to make sure the cut lines are set to “cut”? They should default that way when you open it, but if you tried to trace it maybe the cut lines got set to “no cut” somehow.
So when I tried to just open it up and test cut it without even resizing, it said it was cutting and then complete. So nothing ever happened. I spent an hour trying to figure out a way to do this with no luck at all. I would really love to make this sign. Do you think it could be b/c I don’t have the latest version of the software? I haven’t updated mine in a long time b/c I can’t figure out the new versions. Haha.
That does sound like it could be a software issue…have you tried unplugging/restarting your Silhouette and restarting the computer? Sometimes that helps when it’s being finicky. It could also be the software version…I *just* updated my software and this is the first file I created with the new version, so perhaps it’s a problem there. I just tried saving it as a “version 2” file and added a separate link to that in the Silhouette library, so you could go download that one and see if it works for you! So sorry for all the trouble, but I’m glad you’re persevering to make it work!
What color name is the black paint that you used?
Hi Lynn, I actually mixed it myself…I wanted a dark charcoal gray, but all I had on hand was a medium gray, so I just mixed it with some black until I got the shade I wanted.
[…] Farmhouse Christmas Sign | Unoriginal Mom […]
Hi Meredith! What font is “Christmas Trees” in? I love it!
Thanks Bryna! Here’s the font I used – https://crmrkt.com/dby24w
What brand is your paint and how long do you let it dry?
It’s just regular craft paint, I don’t even remember what brand I used. Any kind of craft paint should work! I let it dry completely between coats, except on the last coat I peel the stencil off while the paint is still wet.
What kind of plywood did you use? Im worried about the texture on the ones I have. Did you sand it down perhaps?
By the way, I just found your site and Im crazy in love. Thank you!
Thanks Jayme! Glad you found me :-) I used 1/2″ plywood, which is flat and smooth, though I did sand it lightly. You may be thinking of OSB, which is rough particle board – that wouldn’t work well for a sign. But any kind of solid plywood would work well.
Thanks for sharing your awesome talents! So, I am working on the red truck picture but don’t understand how in the world you applied it? I used the pvpp method but after I painted over my vinyl, now I am stuck. I would usually just paint again different color and peel, but here you used different colors? Thanks for your help!
Going back and reading, I see you did a reverse stencil! I’ll give it a try next time!
Yes! I love the reverse stencil method with PVPP, I get crisp lines every time! You can watch the video to get a better idea of how I did it, too.
[…] Reversible Holiday Sign […]
[…] Reversible Thanksgiving And Christmas Farmhouse Sign from unoriginalmom.com […]
Hello Meredoth, I love your reverseable sign… I was wondering if you did it all from scratch because I didn’t find a download link to download it.
What font is the grateful design?
Thanks Joanne! The “grateful” design is from the Silhouette Design Store, it’s linked under the “Supplies” list. The Christmas Tree Farm design is one I did myself and it’s available in my Silhouette Library – the subscription box at the bottom of the post will get you access.
[…] Reversible Thanksgiving And Christmas Farmhouse Sign from unoriginalmom.com […]
Love this look! Thanks!
[…] A reversible Thanksgiving and Christmas farmhouse sign is a flexible and useful decor item that can be used for both seasons. It usually consists of a wooden board with Thanksgiving-themed statements or pictures on one side and Christmas-inspired artwork on the other. This dual-sided sign allows you to easily flip between Thanksgiving and Christmas decor, making it a practical and space-saving solution for farmhouse-style holiday decorations. Tutorial […]
What a creative idea to make a double-sided farmhouse sign for Thanksgiving and Christmas! It’s brilliant how you’ve found a solution to make the most of both holidays without sacrificing space or decor. Plus, your first-ever GIF to showcase it is a nice touch – it really brings the project to life! Thanks for sharing your process and inspiration. Can’t wait to see more of your DIY projects!
What a clever idea! The double-sided sign is a great space saver and keeps Thanksgiving special. 👍