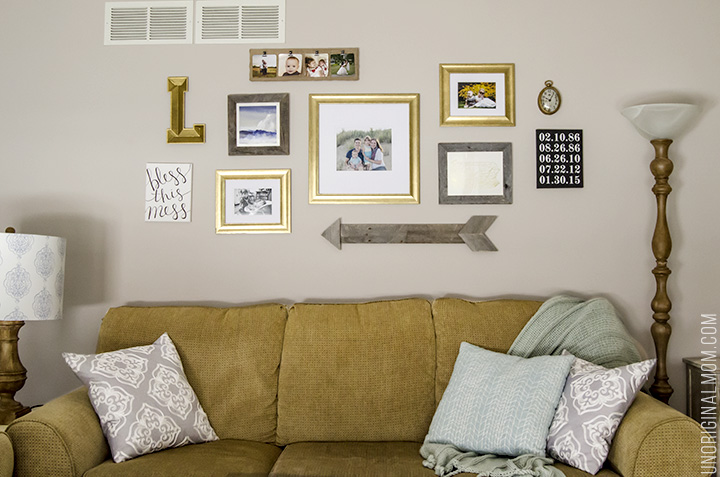
Well, this post is a little bit embarrassing. First of all, this living room gallery wall was literally the first thing up on the walls in our main living space besides a clock…and it took over two years after we moved in to do it. Yikes. Procrastinate much? Second of all, we finished this gallery wall in April and I shared in on Facebook Live video (you can see that video here), promising the full blog post on it would be up soon. Yikes again. So here we are, FIVE MONTHS after we got the darn thing finished, and I’m just now getting around to finishing the blog post about it. Gah. Sorry, folks. :-/
I will confess, one of the reasons it took me so long to get this post written is I just couldn’t get photos I was happy with. I am SO thrilled with how the gallery wall turned out, but the photos just don’t do it justice! (If only I was a better photographer, had better equipment, was able put more time into shooting/staging/editing the photos, yada yada yada.) Finally I decided I just needed to get over it and share this with you!
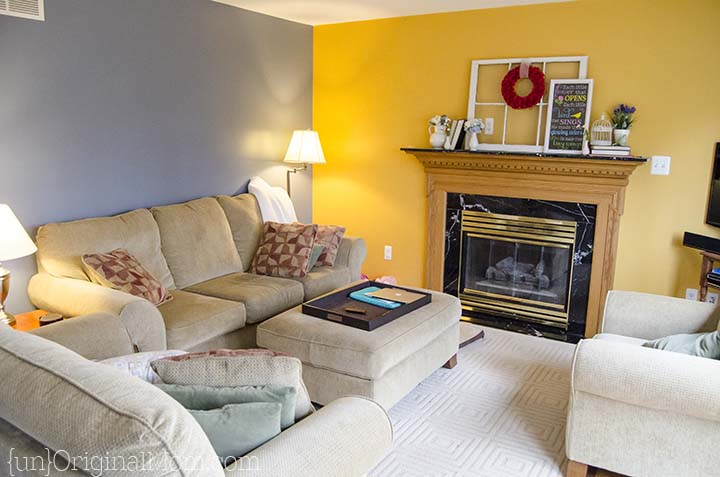
Our living room is SLOWLY evolving into the room that I want it to be, and this gallery was was a huge step in that direction. (Projects around here move at a snail’s pace, but I’m sure nobody else can relate to that, right?) Here’s the original “before” photo from a few months after we moved in. The previous owners had a love of accent walls…in fact, there were FOUR different colors in the living room. It took us a while, but we finally got around to painting it – you can read all about it plus see more photos and details about the paint color we chose in this post.
Besides paint, I’ve also replaced the carpet, lamps, end table, and throw pillows. My hubby also built us an AMAZING custom corner TV stand that will someday make it onto the blog…it still needs cabinet doors, so once that happens I’ll write a post about it. Probably in another 6 months ;-) On the to-do list is a major fireplace overhaul (painting the dated brass insert, probably painting the wood white, and tiling over the black marble surround) and figuring out what to hang on the walls on either side of the fireplace. We’ll get there. Eventually. #slowandsteady
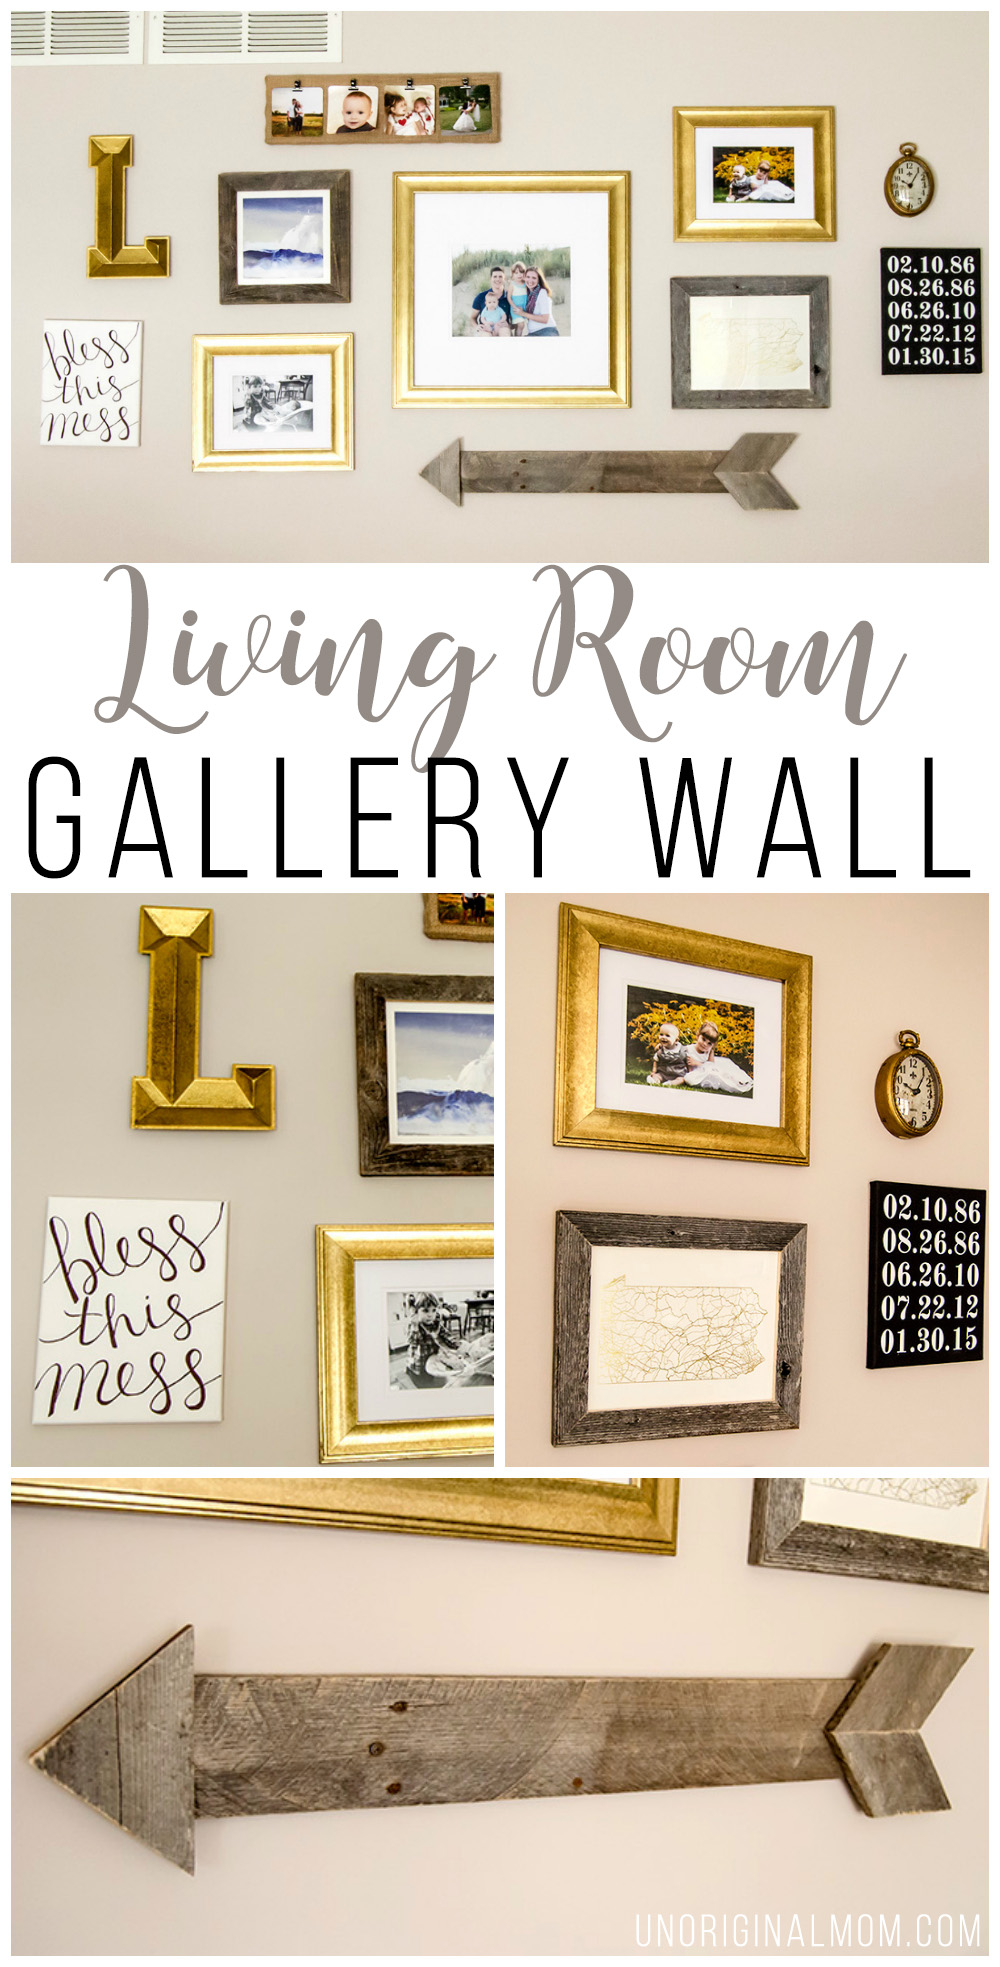
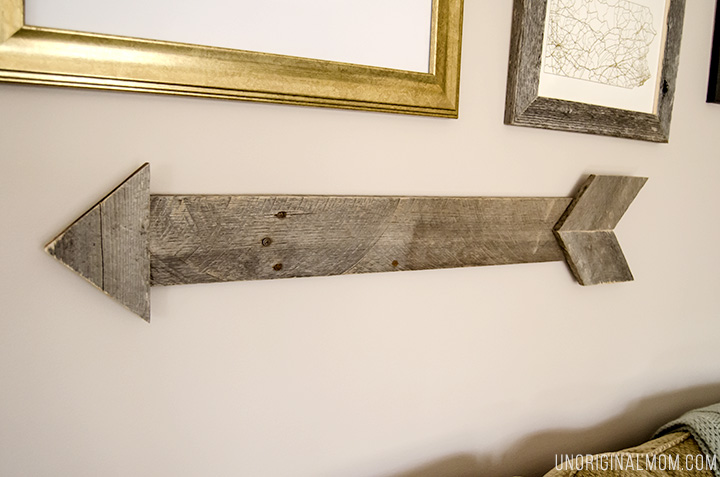
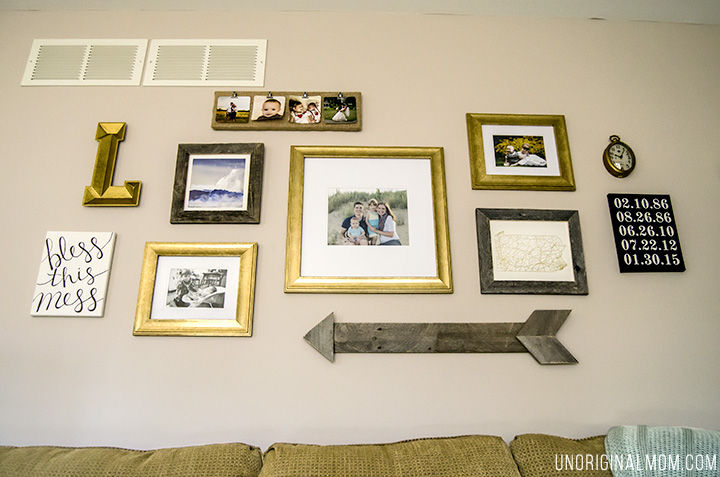
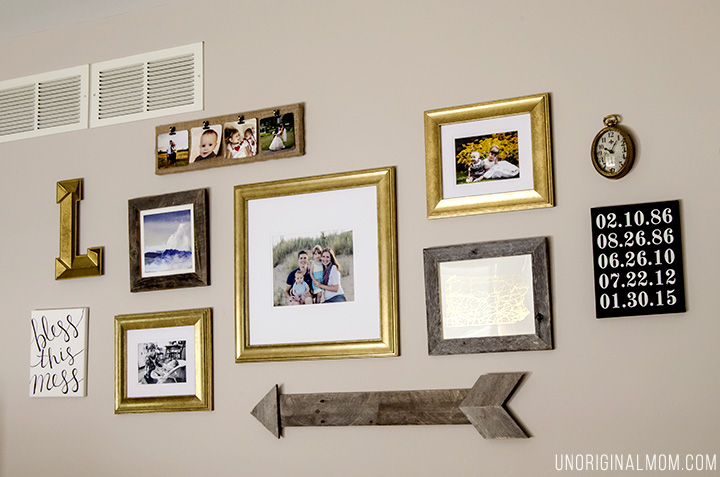
But enough about the living room, you’re here to see the gallery wall, right? Right! I scoured Pinterest for a looong time for various photos of gallery walls and got lots of great ideas…but most of my inspiration came from this beautiful one by Love Grows Wild. I even had my handy hubby make me a pallet arrow from her tutorial. I think it’s my favorite part about the gallery wall, and I always get lots of comments on it from guests!
There are a total of four DIY elements in this gallery wall (including the arrow) – can you spot the other 3?
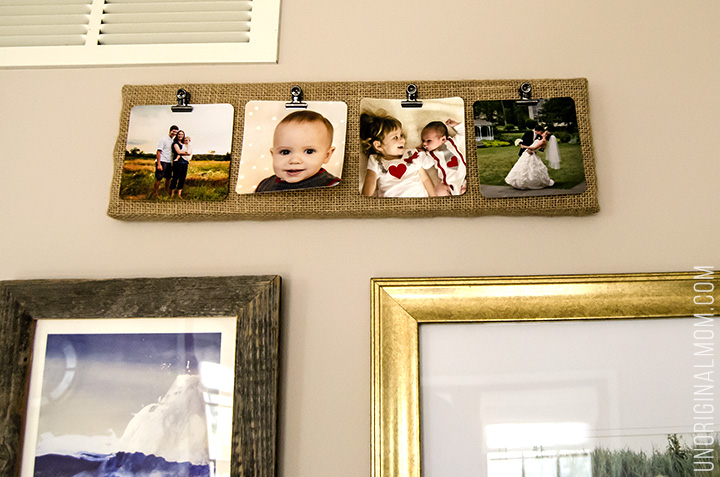
The first one is the burlap covered display board. I wanted an element within our gallery wall that made it easy to switch out printed photos. I also ended up needing something shorter and longer to fill that space at the top. I didn’t already have anything that fit that description, so I decided to DIY something! I took a scrap piece of wood, covered it in burlap, and attached some little clips I found in the scrapbook aisle at JoAnn’s. So simple!
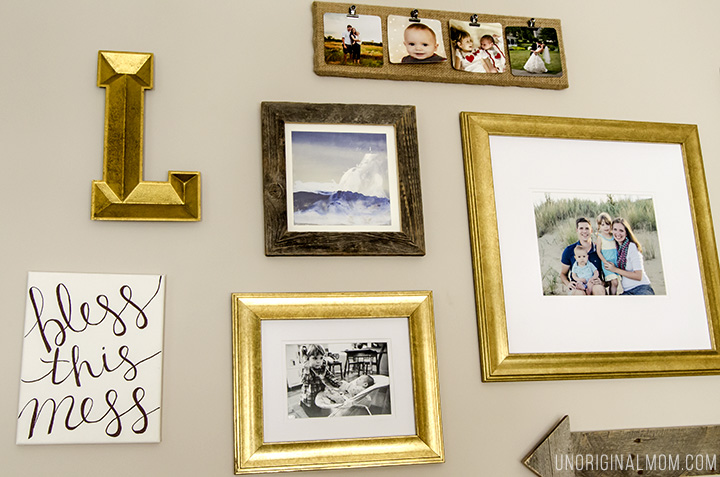
The next DIY element was SO easy. I took a cheap blank canvas from Michael’s and used a sharpie to create this “Bless this Mess” hand lettered art. (I did sketch it with pencil first to be safe.) Considering our living room is almost always a total mess, I figured it was appropriate!
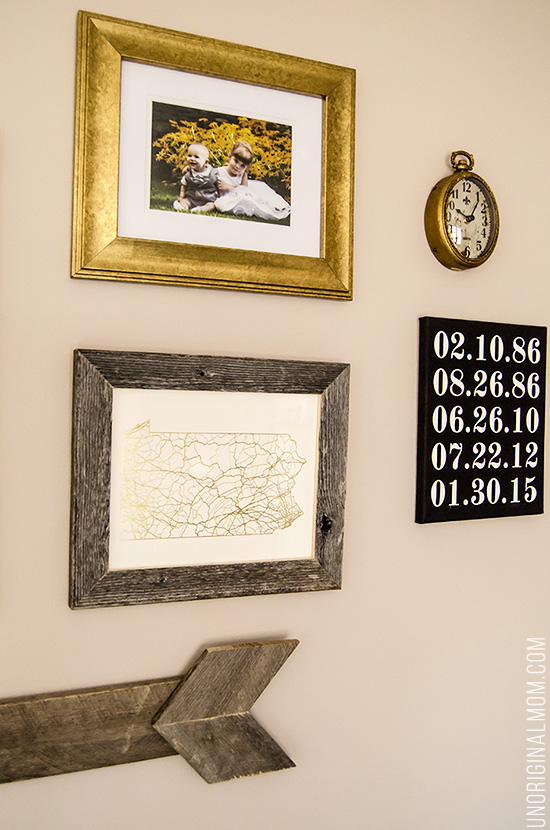
To keep things kind of balanced (and because the canvas I used came in a pack of two), I decided to create another piece of black and white art to put on the other side of the gallery wall. I used my Silhouette to cut a stencil with our wedding anniversary and family birth dates, then painted the canvas using the same PVPP method I detailed in this tutorial. Another cheap and easy DIY element!
I found the gold frames at Michael’s on clearance quite a while ago and filled them with family photos, but I knew I wanted some other art to help complete our gallery wall. I found the perfect pieces at Minted.com! You can find the gold foil map of Pennsylvania here and the ocean art print here. I chose the barn wood frame material for both prints and am thrilled with great they look. They really pull together the rustic elements of the pallet arrow and burlap photo board.
Essentially, I mixed and matched three different elements to create this gallery wall. I started with the shiny gold elements – the 3 photo frames, big letter “L” and small clock (all from Michael’s); then I added the rustic elements – DIY pallet arrow, DIY burlap photo board, plus the barn wood frames of the Minted.com art prints; and then I bookended the gallery wall with the two black and white canvases that I made. The result is not too matchy-matchy but also not too random…not too fancy but not totally rustic…not just family photos but still lots of personality and “us.” It’s like the Goldilocks gallery wall – just right. :-)
I’m already scheming about the next place in our house I can put together a gallery wall! We have a big blank wall on the landing of the basement stairs that I think will be next. Probably not for another year though, at the pace we move, haha. #keepinitreal
What are you favorite kinds of elements to include in a gallery wall? Or if you haven’t done one yet but want to, what is holding you back from creating one in your home?
This post contains affiliate links – click here to read my full disclosure.


Get your copy of my FREE meal planning binder!

Sign up to get a free copy of my meal planning system - an 11 page printable meal planning binder, complete with a pantry inventory, shopping list, and more to help get on top of your menu each week!




I can totally relate to the struggle of procrastinating on home projects! Your gallery wall looks amazing, and I can’t wait to see more of your living room’s transformation. 😊