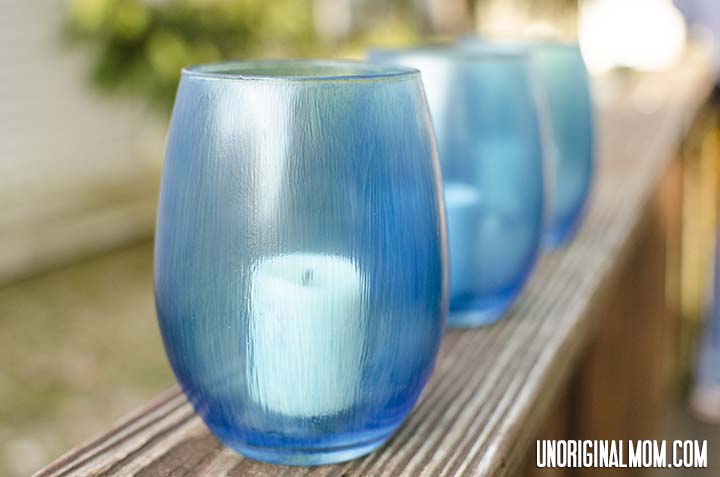
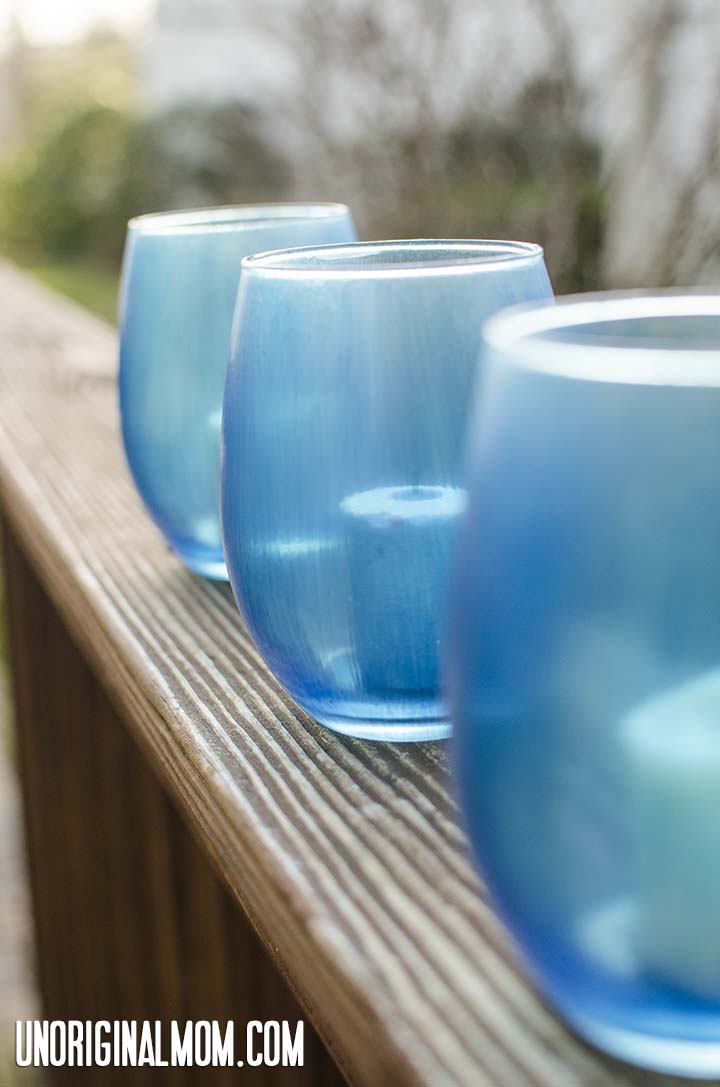
Beautiful painted glass using only Mod Podge, food coloring, and dollar store glasses. It doesn’t get much easier!
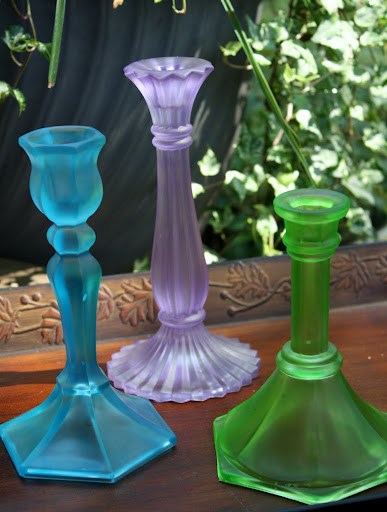
Have you seen these beautiful sea-glass-looking candlestick holders around Pinterest? The caption claimed it only takes Elmer’s Glue and food coloring.
They’ve been on my to-try list for a long time, so I finally decided to give it a shot. Unfortunately, it’s one of those oh-so-sad dead links on Pinterest, so I had to search around for another tutorial. I found this tutorial for using a similar technique to get antique looking blue mason jars using Mod Podge (which I had) instead of Elmer’s glue (which I didn’t). I thought this technique would make great votives, and I had some baby food jars laying around for just that purpose, so I gave it a go.
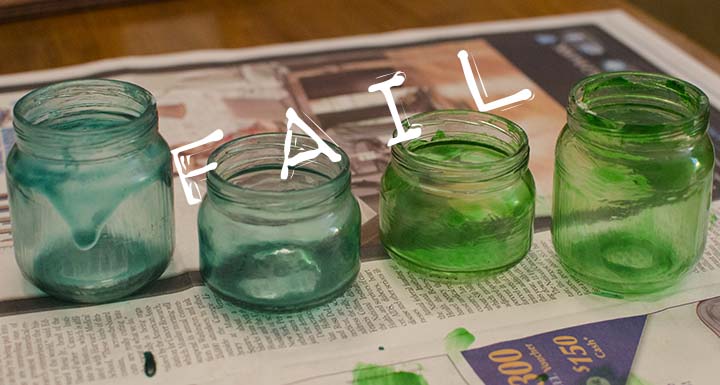
Yeah. That didn’t work very well. I was excited when I started painting – the colors were brighter, it looked awesome. Then it started to drip. And drip, and drip. And not dry. I tried getting as much of the excess mixture out of the jars, but since I was painting the inside it would collect inside the tip curvy part and just keep dripping, no matter what I did. I tried letting them drip out upside down, and that was mildly successful (the green ones) but they looked awful around the top. Needless to say I was very disappointed ..but not ready to give up!
I bought some dollar store stemless wine glasses, thinking they’d make great candle holders. This time, I decided to paint the outside in super-thin coats, and let the brush strokes show through…basically a “if you can’t beat ’em, join ’em” mentality. Here’s what you need to make some of your own!
SUPPLIES (affiliate links):
- Mod Podge (or Outdoor Mod Podge if you want them to be waterproof)
- Food Coloring
- Foam brush or paint brush
- Stemless wine glasses (mine were from the Dollar Store) or any other glass jar/candlestick/etc!
Step 1: Gather your materials. Whatever glass you’re painting, Mod Podge (or Elmer’s Glue), food coloring, and a paintbrush. (If you want to avoid the brush strokes, a foam brush might work.)
Step 2: (not pictured) Mix up your food coloring and Mod Podge to your desired color. I used about 2 spoonfuls of Mod Podge and 4-5 drops of blue food coloring.
Step 3: Paint a VERY THIN layer of the mixture onto the outside of your glass. Use long, straight strokes of your brush. WATCH FOR DRIPS! Make sure you brush them out before it dries…and it dries quickly!
Step 4: Allow to dry (about 5- 10 mins) and then repeat step 3 to add another coat. You can see in the third picture of the sequence above that by the time I had finished the first coat on my last glass (left) the first glass (right) has already dried enough for me to start the next coat. I did 3 coats total – you can do as many as you want to reach your desired level of opacity. It dries MUCH clearer than it looks when you first put it on.
Step 5: Allow to dry completely (I let mine sit overnight, just to be sure.) If you use regular Mod Podge, DO NOT GET YOUR GLASSES NEAR WATER! Mod Podge is water soluble. Remember my baby food jar fails? I just filled them with water, let them sit for a minute or two, then the paint peeled right out. If you drip water on your glasses, they’ll get ruined. If you’d like to make outdoor votives, use outdoor Mod Podge – it’s not water soluble! It is bit shinier than regular Mod Podge, though, in my experience.
Step 6: Display with pride!
I took the photos on our back deck, but won’t leave them there, since I’m sure I’ll forget about them and leave them out in the rain. But, these will be the perfect addition to our screened in back porch. They look lovely when lit at dusk!


Get your copy of my FREE meal planning binder!

Sign up to get a free copy of my meal planning system - an 11 page printable meal planning binder, complete with a pantry inventory, shopping list, and more to help get on top of your menu each week!


Beautiful! I am currently helping plan a Beach themed wedding for later this year…something like this would GORGEOUS at the reception!
It does look very beachy…would be great for that!!
Can you use tea lights or do you have to use battery ones?
I don’t see why you couldn’t use actual tea lights!
I love this idea! I think it would be a fun little activity for summer break kids, too. :)
They are so pretty!!!
I would never have thought to use food coloring ;-) They turned out beautiful – I especially like the marks which the brush made ! Thank you for sharing at our ALL MY BLOGGY FRIENDS party :-)
I’m excited to try some new combinations of food coloring, too…I think pink or blue-green would be lovely too! Endless possibilities!
I’m glad you stuck with it! The glasses turned out great!
Me too! Thanks!
Those are so pretty. Sometimes it just takes trial and error. Thanks for posting yours and giving the scoop on this cool technique. They will look stunning lit at night. Stopping by from Trans. Thurs. Have a lovely week. Blessings! Wanda
Thanks Wanda! They do look great at night, just couldn’t get any good pictures to do it justice.
I have those pinned too! Thought it might be too easy to be true! LOL! But they came out great! Maybe I’ll try it and use a round foam brush to paint on dots or something like that… Thanks for sharing! :-)
I thought about doing dots on the next ones too, I think they’d be super cute! AND the glasses are from the dollar store, so you can do a bunch however you’d like without spending much at all!
Very pretty! How funny, I have a similar project in my Pinterest files as well. That particular post suggested using Mod Podge Gloss so I am wondering if that makes a difference? Thanks for sharing this and it encourages me to give it a try.
Michelle @ On A Wing And A Prayer
Thanks for sharing! I love the way they turned out!
Thanks so much for linking to Make the Scene Monday @ Alderberry Hill. You are being featured later today!
I hope you enjoy your weekend, and join me Sunday evening for Make the Scene Monday #71!
And don’t forget to enter the Cannon Rebel T3 Camera Giveaway!
http://www.alderberryhill.com/a-pre-summer-cannon-rebel-giveaway/
[…] Mod Podge & Food Coloring Painted Glass from Unoriginal Mom […]
[…] Paint candle votives with food color and mod podge. […]
Lovely candle holders and I’m so glad you didn’t give up at the fail stage of the project! Bummer the baby food jars are “wasted” or did you find something else to do with them? Thank you for sharing at A Crafty Soiree. I’ve featured your project this week, it’ll be up tonight at midnight. I hope you come see it and share more of your crafty creations.
Thanks so much, Katie! And the baby food jars weren’t ruined…I just filled them up with water and let them sit for a few minutes, then the mod podge peeled right out! So they are sitting and waiting for the next project, haha.
Who knew Mod-Podge and food coloring could look so amazing! Thanks for the tutorial. Visiting from Anything Blue Friday.
Babs
After the modge podge completely dries, should they still not touch water because I was thinking of making them into a vase to put flowers in?
Yeah even after it dries, if it gets wet it will peel right off, so you’d have to seal it with something else to be able to use it as a vase. If you were really careful with the water, you could paint the outside of the vase though!
Im wanting to do this on some old beer bottles. For a n edging In a flower bed that I got from pinterest…Would a clear coat work to protect from the rain?
Hm, I’m not sure…honestly, I’ve never used any kind of clear coat before, so I don’t have much expertise there! It might work…you’ll have to try it and let me know!
I tried clear coat over modge podge in the past. It held up for a few weeks outside before beginning to peel away. I would stick to the outdoor modge podge and not risk it.
Thanks for letting me share this tutorial of your beautiful blue votives on I’ve Got The Monday Blues, today!
Your votives are gorgeous! Love it!
xoxo
[…] Mod Podge and Food Coloring Votives […]
I’ve been looking all over for votive holders in fall colors, to use my battery-powered tea lights. I’ll just make my own! Thanks.
I like the brush strokes. They add a pleasant texture to the finish of the glass.
Nicely done!! :)
I love what you did here. Beautiful. I have seen some tutorials that say the bake the glass in an oven. Do you think that is to seal them and then they are water proof? Would love to know. Thanks again for your great tutorial.
Hi Joanne, I honestly have no idea about the baking…but you could try using outdoor mod podge, would would probably make make it waterproof (though not food safe). If you try either way, I’d love to hear about it!
Is this process food safe? I thought about staining wine glasses once they are painted.
Hi Malinda, I’d guess with regular mod podge it’s not food safe (and it’s not waterproof either), but you might be able to find some kind of sealant that is and try this method with it! Of course the food coloring would be fine.
I tried this with Elmer’s glue and food coloring and once dried sprayed with modge podge to seal. Turned just like the candle stick! Wish I could post pics. I’m so proud of them. Lol
Add a little glitter as well. Looks really nice! I’ve been nading them for some time now. You can also add some different sized micro beads for texture as well. Very fun to make.
I’m going to try it with the waterproof modgepodge. Hoping the food coloring doesn’t mess with the water-safe aspect.
Let me know how it turns out! I’ve never actually tried to make waterproof versions of this but am curious to know if it works.
P.S. They make outdoor mod podge for items that will be exposed to water. I use it to coat all of my projects just in case and give everything a nice shiny coat
Thanks for the tip Heather! I’ve added it to the post. I actually don’t think they even made outdoor Mod Podge when I wrote this post, or at least they didn’t stock it at my craft store (this was several years ago!) but I have used it on other projects since then and it does hold up really well in the elements!
Anybody use the red food coloring would love to see what it looks like done
Thank you for the wonderful idea! I finished mine and have them in a warm oven. Your lines are so even and pretty. I think I was too impatient. I still like the way they look though. Thanks….it would be really nice to be able to post pictures on here as well. I would love to see everyone else’s finished product. Just a thought…
I dont think there is a way to upload pics ☹
Has anyone tried sealing with clear coat spray?
yep – it works – I took a green “food coloured” candle holder to a friend’s place as a house warming gift and wondered why i had green on everything!!! it was a warm evening and my hands must have been sweating a tiny bit. He sealed it with rustoleum x2 – been on his balcony for 6 months and it is fine.
I put a very thin layer of Varnish or a water sealant. Great an easy to follow Thank you
[…] Mod Podge And Food Coloring Painted Glass from unoriginalmom.com Cute glasses and I like how she showed her fail before she got the win. I have a lot of fails too. […]
[…] Source: unOriginal Mom […]
I have tried and tried and tried. I guess I wasnt using the thin strokes. I made some candles for halloween yesterday and their STILL sticky. I thought modern podge sealed it. Well shoot fire. I need a sealant on them.
I used glitter glue which was also glow in the dark. But I think I used more food coloring than glue so it offset it
I have read that you can bake these in the oven to set. Have you heard of that?
I haven’t heard that before but I’d be interested to see if it works! I’d be really careful with glass in the oven though. Let me know if you try it!
I didn’t realize that Mod Podge was water soluable! Can they be sprayed with a sealant? Will that protect them from water?
They now make an outdoor mod podge that is waterproof – you could try that!
Do you think it would work on the BIG flower vases??
If it had gloss it would be more beautiful.