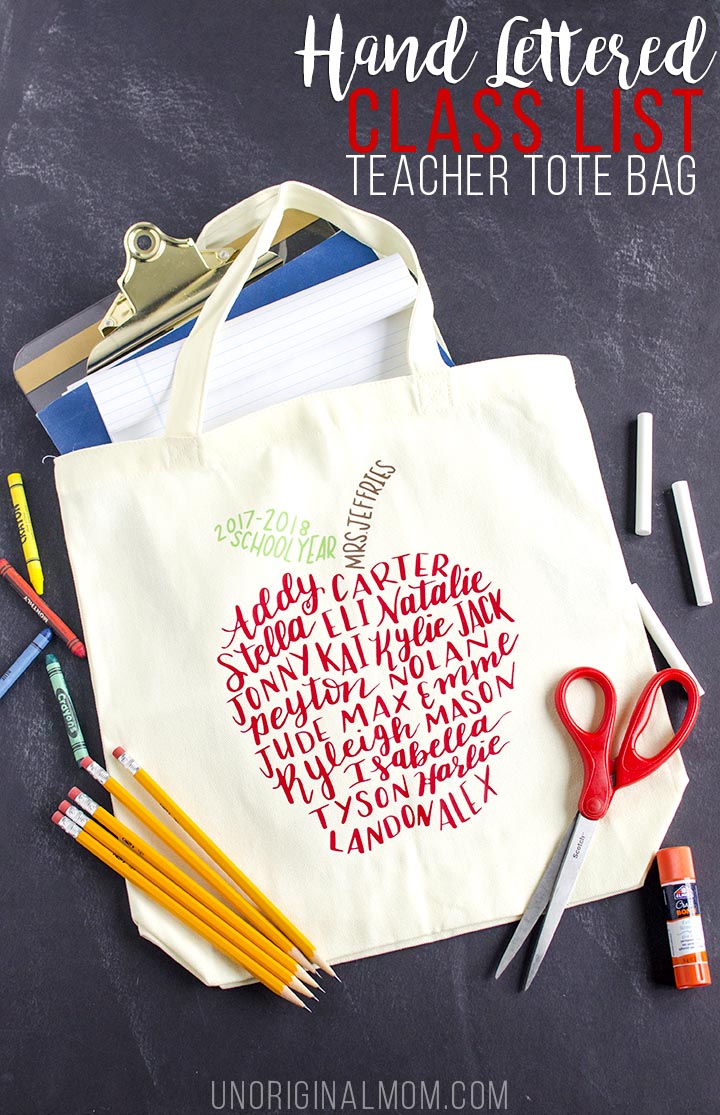
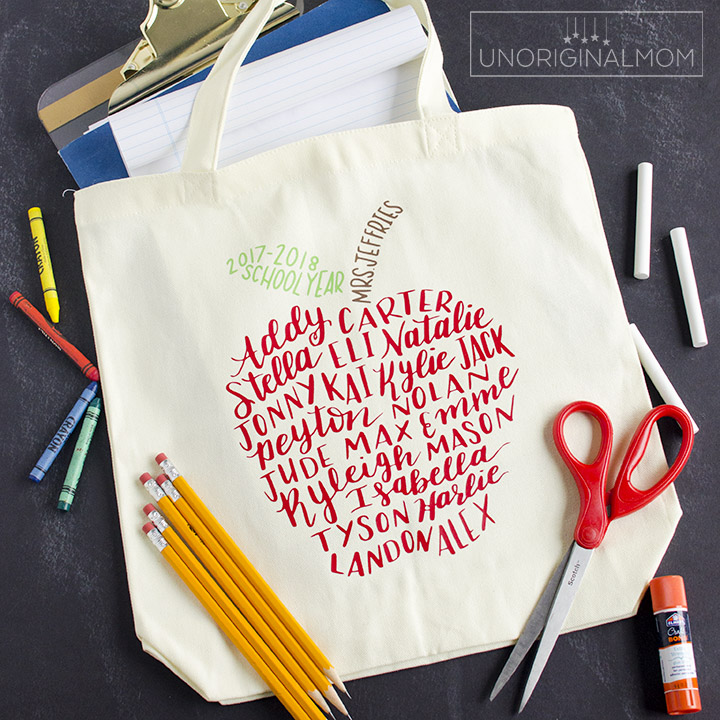
Need an idea for a unique and meaningful end-of-the-year DIY teacher gift? Use hand lettering or word art to create an apple out of the class list, then use your Silhouette and HTV to put it on a tote bag.
This post contains affiliate links. Click here to read my full disclosure.
This design was completely 100% inspired by a local hand lettering artist, Michelle, who I follow on Instagram. She posted a photo of this mug, and as soon as I saw it I knew I wanted to try doing something similar with my daughter’s Kindergarten class list! I mean, how meaningful and special to have something – a mug, a tote bag, a framed photo, etc – with your list of students from a specific year? Generic teacher gifts are nice and all (I’ve given quite a few!) but as a former teacher, I know the most meaningful gifts I received were ones that brought memories of a particular student/class with them.
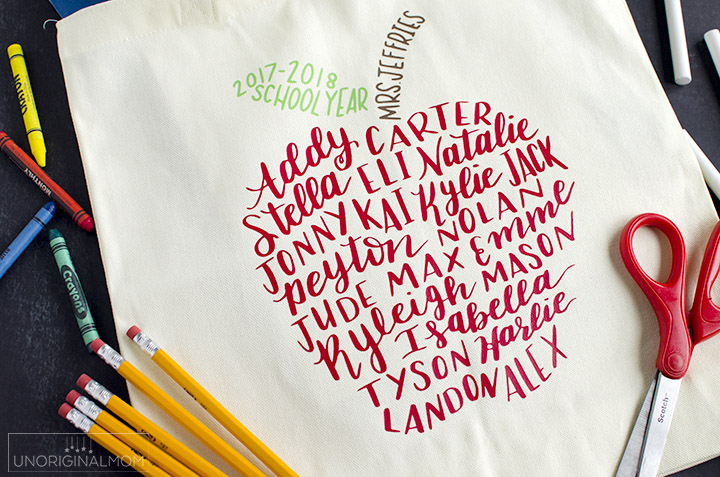
Now, I realize this isn’t the most recreate-able project for everyone, especially if you’ve never tried hand lettering and/or don’t own an iPad and Apple Pencil. But I figured I’d still put this together into a tutorial to help those that want to try to recreate it on their own, either exactly the way I did it or with their own spin on it!
SUPPLIES:
- Method 1 (how I did it): Apple iPad Pro & Apple Pencil with the Procreate App
- Method 2: Brush Pen and Paper (I love Tombow Fudenosuke brush pens)
- Method 3: Word Cloud software (see this tutorial)
- Silhouette or other craft cutting machine
- Heat Transfer Vinyl (I got mine from Expressions Vinyl)
- EasyPress (I love mine!), heat press, or an iron and ironing board
- Plain Canvas Tote Bag
The first step is to actually create the apple word art out of the class list. Here’s where you have a few different options. First of all, if hand lettering isn’t your thing, you could make a typography “word cloud” image out of the class list instead! I actually have a tutorial on how to do that – from creating your word cloud shape to bringing it into Silhouette Studio to cutting it out of vinyl. You can see my word cloud vinyl art tutorial here.
If you want to hand letter it, you can either do it on paper or with an iPad, Apple Pencil, and the Procreate App. I HIGHLY recommend the latter! I just got my iPad about a month and a half ago and I am head-over-heels in love. It is SO much more forgiving than pencil and paper (the two-finger-tap “undo” command and I have gotten very friendly) and it makes it a breeze to digitize your work. But if you don’t own an iPad, you certainly could accomplish something similar with a brush pen and paper.
Okay, if you’re using the iPad and Procreate App, here’s a quick run-down of how I did this. The first thing you need to do is find an apple shape you like and import it into Procreate. (I just did a Google image search for “apple outline clip art” and browsed to find a simple one I liked.) Lower the opacity on the apple layer, then create a new layer. Grab the brush you want to use, and start lettering! I actually started by roughly sketching out the names with a pencil brush, not worrying too much about style – just trying to fit the names inside the apple. There was a lot of trial and error, undoing, and erasing! Once I had something I was happy with, I lowered the opacity on that layer, added another, grabbed the calligraphy brush I wanted, and started lettering on top of the pencil outline. Once I got all the names on there, I deleted the pencil layer, lowered the opacity on the first calligraphy layer, and traced over the names again…fixing imperfections, rearranging names, playing with shape, spacing, size, etc. I repeated that process at least a dozen times, refining and perfecting each time. I probably could have done that indefinitely – that’s where my perfectionist side really comes out – but I had to force myself to stop once the improvements between layers started getting negligible.
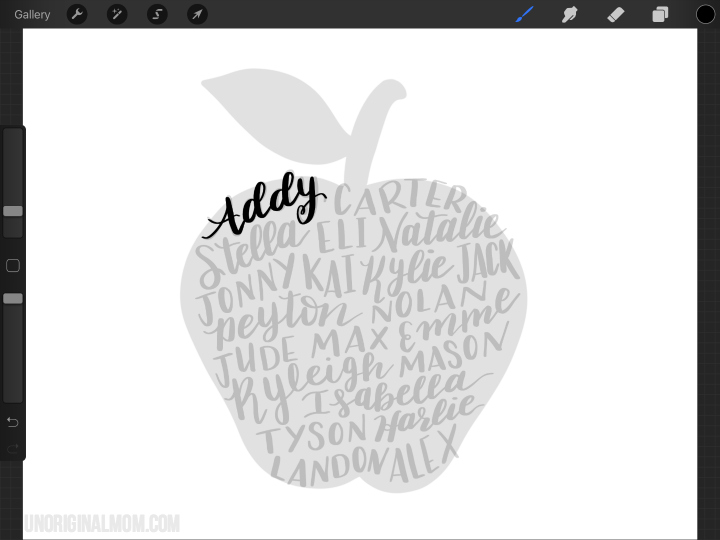
One of the neat things about Procreate is it automatically records a time lapse video of your process, so you can play it back at the end! Want to see my time lapse? You can see how crazy obsessive I got, and how it evolved from chicken scratch into the finished product.
Once I finally had a design I was happy with, I exported it as a PNG file and Air Dropped it from the iPad to my computer. (If you hand lettered your design on paper, you’ll need to take a photo, blow the contrast way out so it’s as pure of a black and white image as possible, then open the image in Silhouette Studio.)
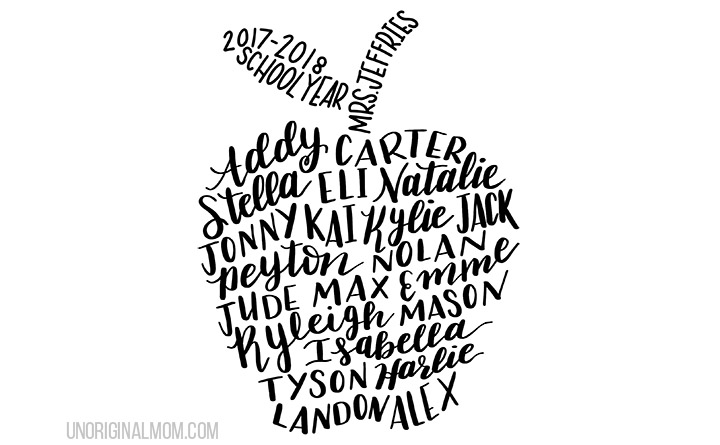
Then I opened the PNG file in Silhouette Studio to trace! I opened the Trace Panel and selected the whole image to trace it. Play with the “threshold” slider until the yellow fills in the whole design, but still gives you clean edges.
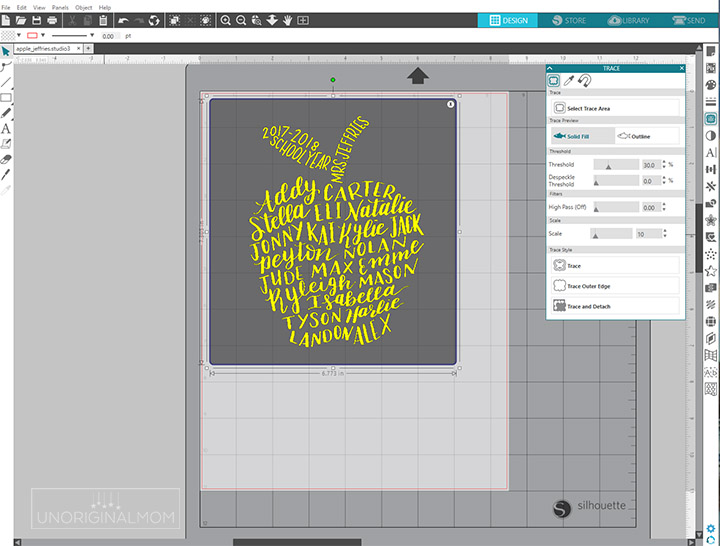
Then, since the stem and leaf are different colors than the apple, I needed to separate them from each other. I selected the image, right clicked, and selected “release compound path.” Then I highlighted just the leaf letters, right clicked, and selected “make compound path.” I did the same with the stem letters, and then the apple letters. Then I was able to fill them with the color I wanted.
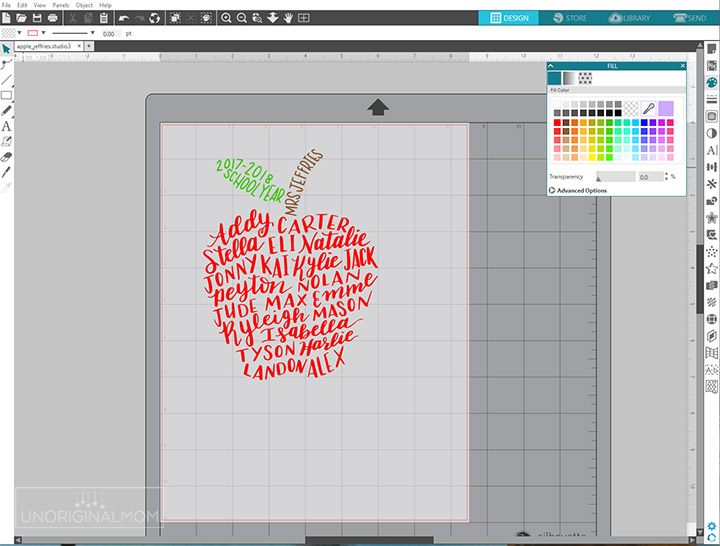
If you’ve worked with heat transfer vinyl before, from here on out is the easy part! I just had to size my design to fit the tote bag, mirror the design (remember HTV cuts with the back of the material face-up, so you always need to mirror your image before cutting!), and then cut each respective section of the design out of red, brown, and green HTV. Weeding took about 15 minutes, but because I used Siser Easyweed (my FAVE heat transfer vinyl by far!) it weeded beautifully.
Then I used my EasyPress to adhere my HTV to the tote bag. Side note: I still can’t get over how much easier and faster it is to use my EasyPress than it was to use an iron. It easily takes me 1/4 the amount of time that ironing did, and it adheres so much more evenly and strongly! I don’t have the space to store a Heat Press, nor do I have the need since I mostly create items for personal use, not for sale, so the Easy Press is perfect for me. I highly recommend it!
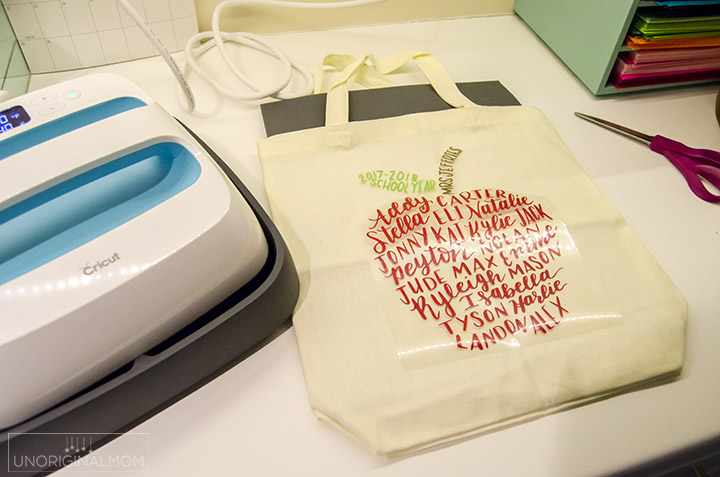
After ALL that, now I have a professional looking tote bag to gift to my daughter’s teacher at the end of the year – but it has so much meaning and memory attached to it! Every time Mrs. Jeffries loads up her bag with books and papers to take home, she’ll think of this 2017-2018 Kindergarten class. I think that’s pretty special!
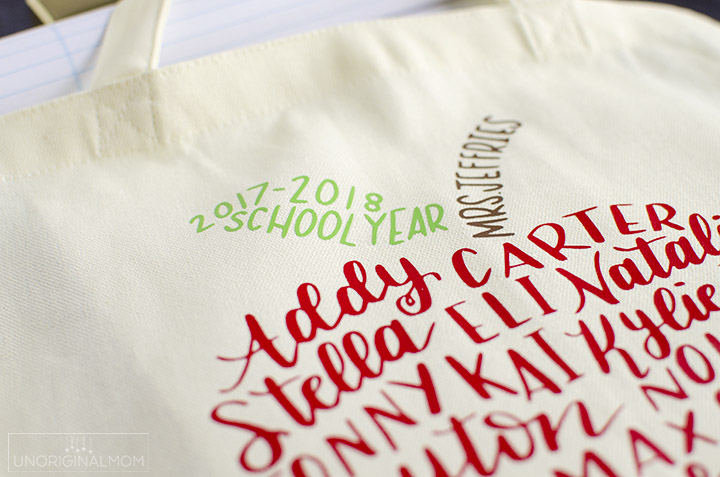
I plan to change the name on the stem and make a few more for the other adults in her classroom as well – the student teacher and two paraprofessionals. I’m thinking of putting it on a t-shirt for my daughter’s last day of school, too. Especially since I already did the time consuming part of creating the design, I might as well get some more mileage out of it, right?
Now before anyone asks…no, I don’t create these for sale. I’d have to charge like $150/bag to make it worth my time, haha, since it takes me so long to do the design! But you can get a similar design printed on a coffee mug from Michelle, and her lettering is much better than mine anyway ;-) Order your mug here!
If you’re looking for some more crafty teacher gift ideas for here’s 20 teacher gifts you can make with your Silhouette or Cricut – for Teacher Appreciation, the end-of-the-year, or any occasion!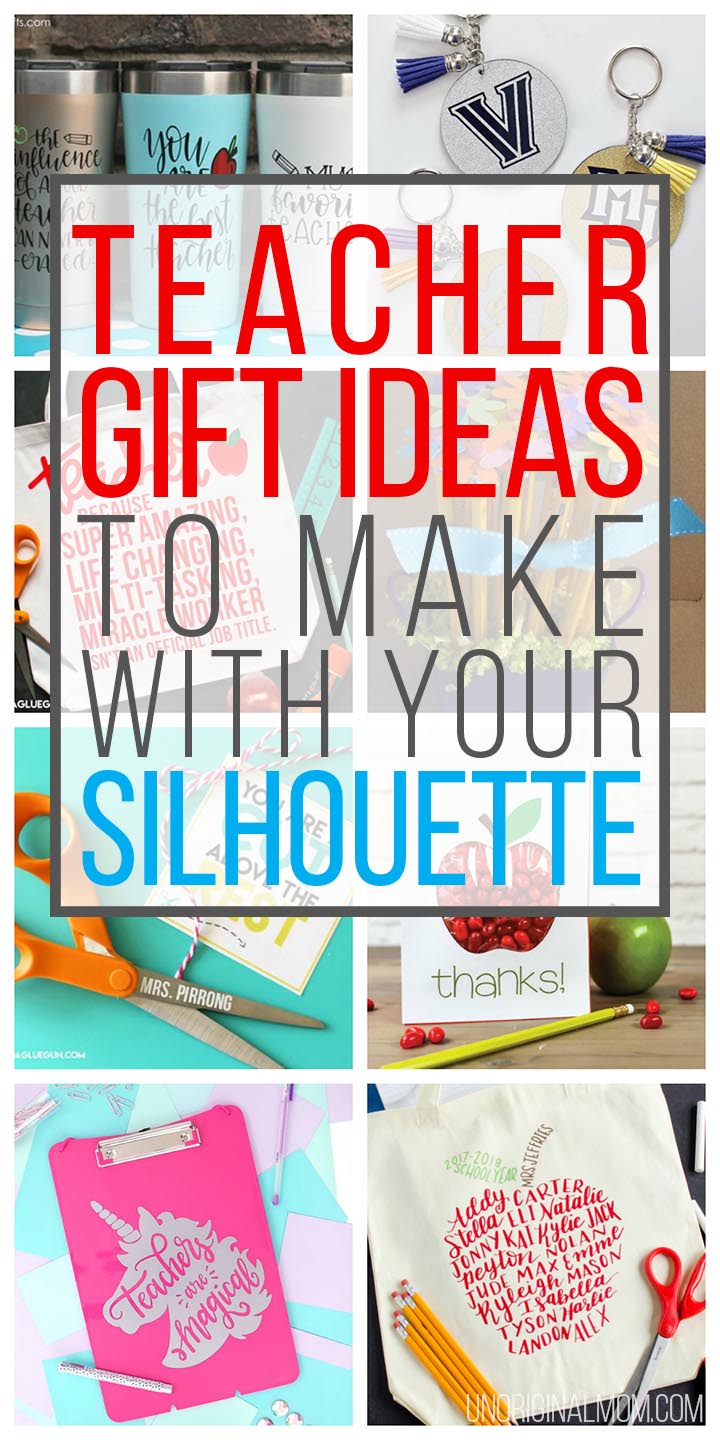
Let’s show those fabulous teachers how much they’re loved!


Subscribe to unOriginal Mom via email and get instant access to my library of FREE Silhouette Studio & SVG cut files - exclusively for email subscribers. Plus there's a new file added every month!


I cannot get this to work for me, but absolutely love the idea. Do you sell an editable version for the technology challenged?
Hi Talisha, this was completely hand lettered from scratch, so there’s no way to make an editable version…sorry! You may be able to find a hand lettering artist on Etsy that will create one for you, though.
[…] Class List Teacher Tote Bag from Unoriginal Mom […]
What a creative and heartfelt DIY teacher gift idea! I love how you used the class list to make an apple. It’s so personal. As a former teacher myself, I know how much these kinds of gifts are cherished. Can’t wait to see more details in the tutorial!