I don’t know about you, but I am loving the wood slice trend! You see them everywhere on Pinterest – ornaments, coasters, wreaths, centerpieces, wedding decor, and more. I actually pinned these beautiful wood slice ornaments from Upcycled Treasures LAST year and have been dying to try my own ever since. Then I first hopped on board the “wood-slice-wagon” last month when I used a large wood slice to make some chalkboard decor for Thanksgiving! You can buy large or small wood slices at craft stores, but they can be pricey. I figured they had to be pretty easy to DIY (especially with the services of my extremely handy hubby), so I started keeping an eye out for a log that would work well.
I didn’t have to look far! Our neighbor had trimmed some nice, round branches from a tree and put them at the curb for brush collection. I thought they would be perfect! In hindsight, though, they were NOT – freshly cut branches have tons of moisture in them. Even though they sat in our garage for a week or so before cutting them up, the majority of them cracked a few days after they were sliced. :-( I am pretty sure that a fallen branch from the woods wouldn’t crack nearly as much, but learn from my mistake – a freshly cut branch is not the way to go.
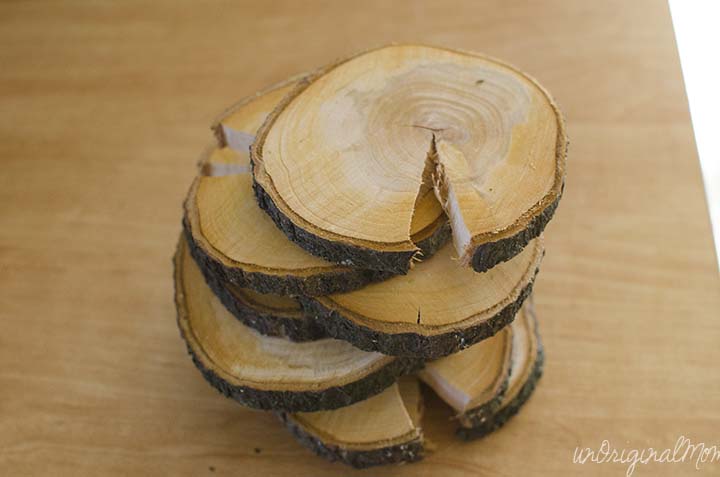
The how-to of creating your own slices is really simple, though! I think it works best with a miter saw – it’s pretty straightforward to just slice up the log into 1/4-1/2″ slices! We used a new blade on the saw to get nice, clean cuts. I had my husband do some straight-on cuts to make perfect circles, and also slightly try some angled cuts to get some more slightly-oval-shaped slices (we cut at 22.5 degrees). I used both, but actually liked the slightly angled cuts for the ornaments – it made the edges a little more interesting and reveals more of the outer ring and bark when you see it straight-on. It just depends on the look and shape you’re going for.
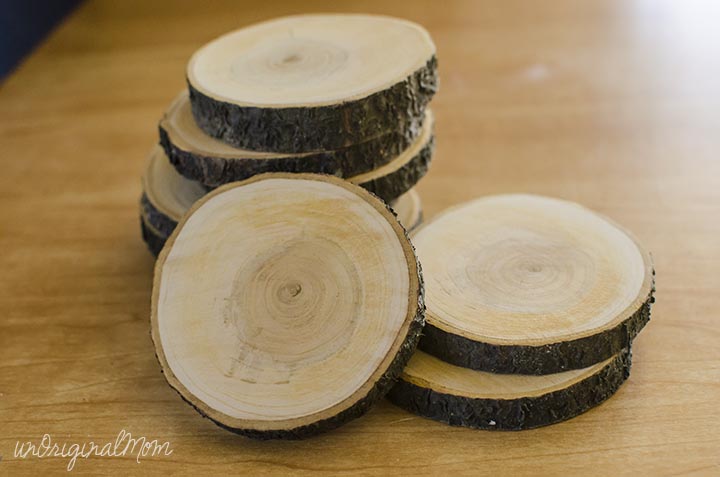
After a few days of drying out, I gave the surviving, not-cracked slices a quick sand on both sides, then wiped off the sawdust with a damp paper towel. Look how beautiful they are!
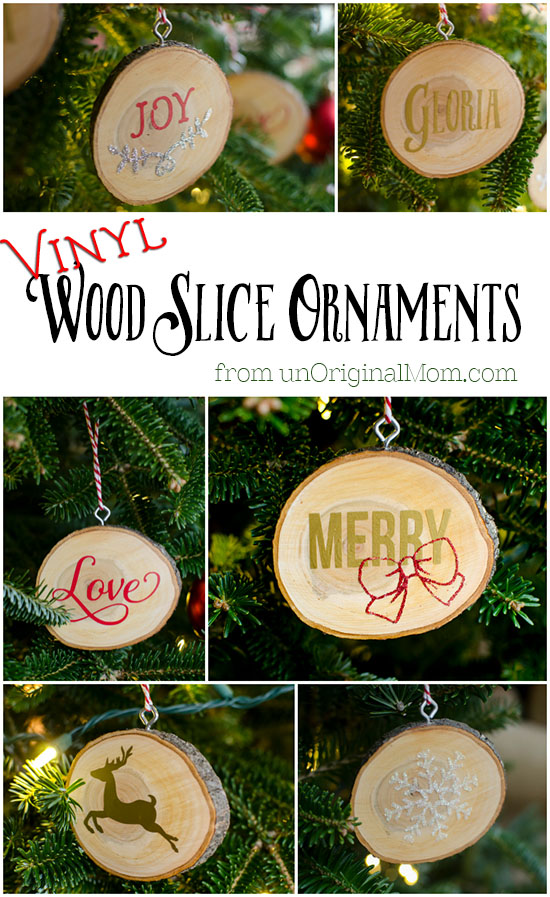
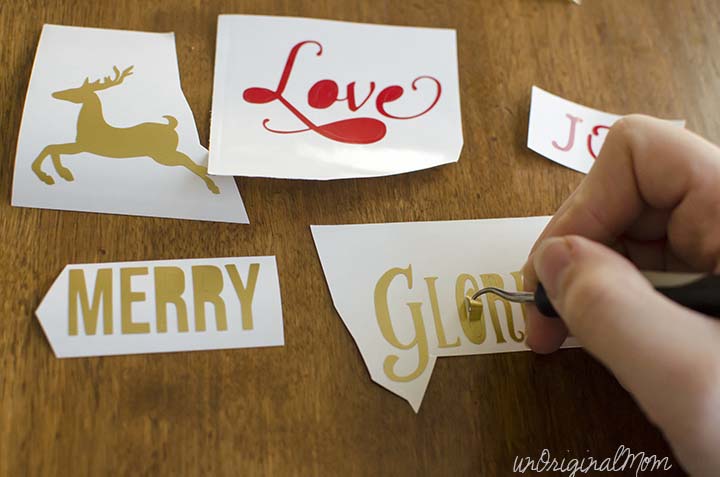
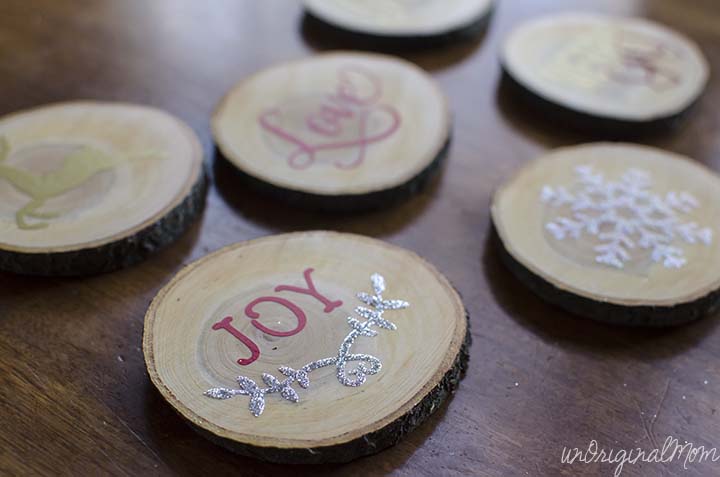
I debated on how to actually create these ornaments…I thought about cutting out stencils and painting them, or even using the image-to-wood transfer method I’ve tried before. I finally decided to keep it simple and use vinyl. I used glossy outdoor vinyl (Oracal 651) in red and gold. If you don’t have a Silhouette, there are still lots of different ways that you could make wood slice ornaments, too – draw or paint on them by hand or with stencils from the craft store, or try a wood burner!
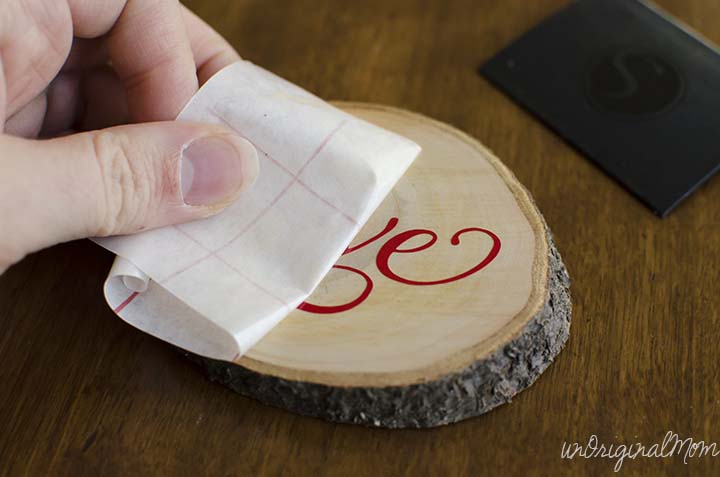
I used transfer paper to apply the vinyl to the ornaments.
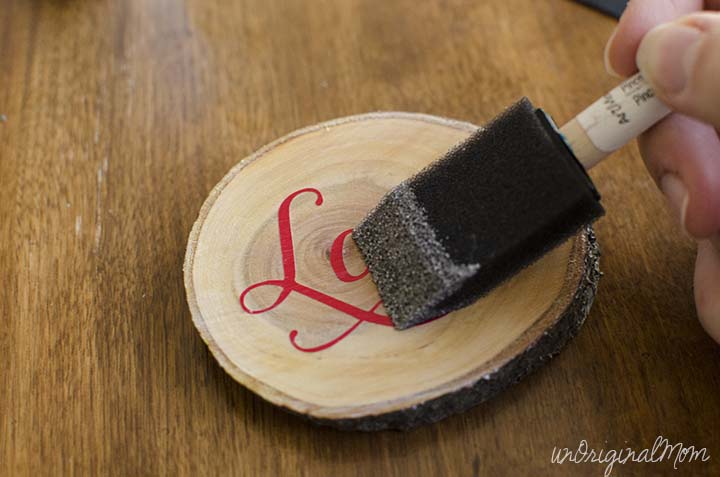
Once I applied the vinyl, I went over the whole surface of the ornament with a coat of Mod Podge. It helped to seal the vinyl down to ensure it wouldn’t peel up, and also gave the wood a nice shine!
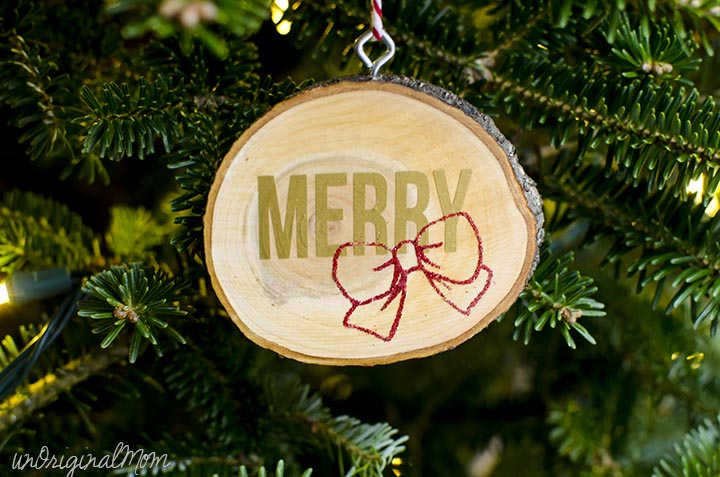
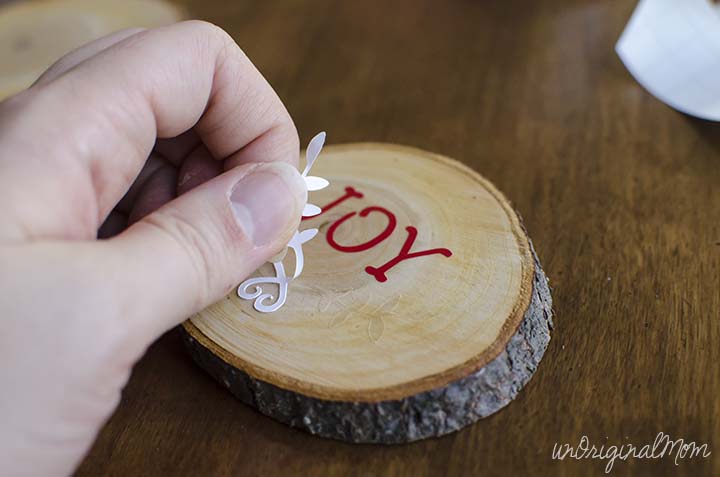
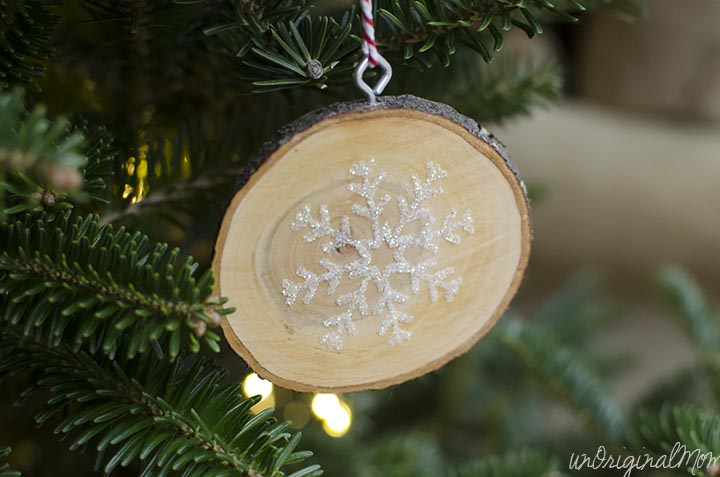
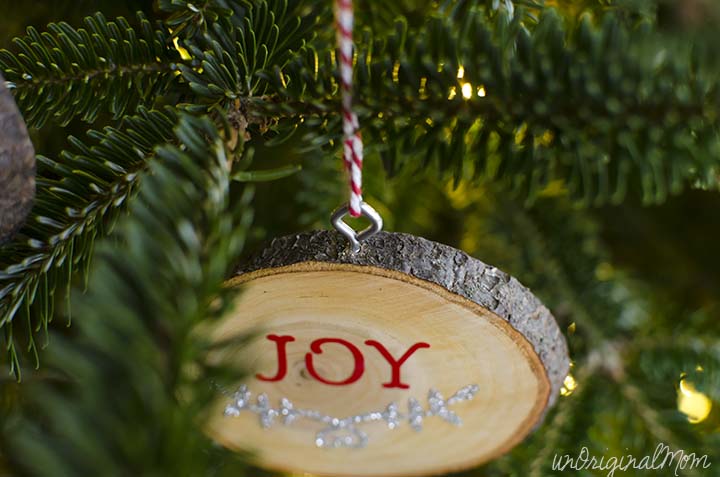
Of course, I couldn’t leave well enough alone and decided that I wan’t to glam up my ornaments a bit – enter Silhouette’s double-sided adhesive. (Remember the Glitter Pallet Sign that I shared last week?) So I used the double-sided adhesive to cut out the snowflake as well as the embellishments on the “Merry” and “Joy” ornaments. If you are new to double-sided adhesive, I have a simple step-by-step tutorial here.
I love the extra glam the glitter adds!
I did an entire snowflake out of glitter – it looks so pretty when it catches the light on the tree.
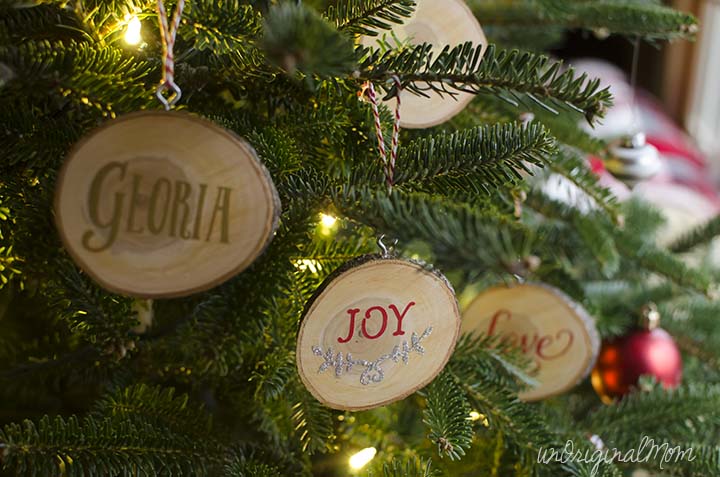
The final step was figuring out how to hang the ornaments. I didn’t want to drill a hole through the face of the ornament, so I drilled a small hole directly down through the top of the wood slice and then screwed in a small screw eye (I found them with the picture hanging hardware at Walmart). I used baker’s twine, but I think regular or jute twine would look nice, too.
I love being able to design in Silhouette Studio using all the fonts I have installed on my computer. I was able to quickly and easily design these ornaments! Because I designed the text ornaments myself, I would be happy to share the cut files with you. They’re available for FREE in my Silhouette library, along with dozens of other designs! Get instant access to all those designs via the form below. (I purchased the snowflake shape and the reindeer shape from the Silhouette Design Store, so hop over there and check them out if you’d like those, too.)
Silhouette Challenge
The inspiration doesn’t stop there, friends – it’s Silhouette Challenge day! That means 36 of my bloggy buddies are sharing Holiday Silhouette Projects on their blog today. You can click on any of the images in the collage below to browse around! 
1. Pineapples and Pinecones // 2. Simply Kelly Designs // 3. Architecture of a Mom // 4. Just a Girl and Her Blog // 5. Two Purple Couches // 6. Chicken Scratch NY // 7. Creative Ramblings // 8. One Dog Woof // 9. Ginger Snap Crafts // 10. The Thinking Closet // 11. Please Excuse My Craftermath… // 12. Designer Trapped in a Lawyer’s Body // 13. weekend craft // 14. Dragonfly & Lily Pads // 15. Practically Functional // 16. Living My Given Life // 17. My Paper Craze // 18. The Kim Six Fix // 19. Home At Eight // 20. Queen of Everything // 21. Tried & True // 22. McCall Manor // 23. unOriginal Mom // 24. Create it. Go! // 25. From Wine to Whine // 26. GetSilvered // 27. It’s Always Ruetten // 28. Nearly Handmade // 29. Mama Sonshine // 30. Silhouette School // 31. It Happens in a Blink // 32. Create & Babble // 33. Sowdering About // 34. Where The Smiles Have Been // 35. My Favorite Finds // 36. Lil’ Mrs. Tori // 37. Designed Decor
Silhouette Giveaway!
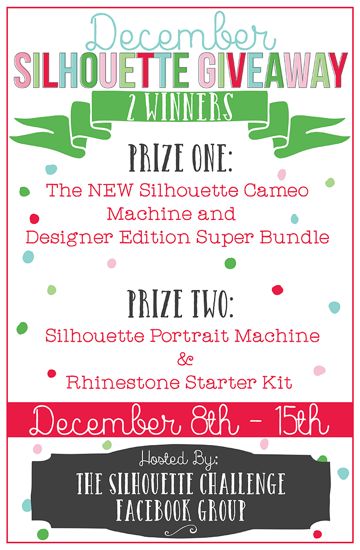
And I’ve saved the best for last. I’ve got another ah-mazing Silhouette giveaway for you this week! My Silhouette Challenge buddies in partnership with Silhouette America are hosting a mega-huge giveaway for not one…but two winners! First prize: The NEW Silhouette Cameo Machine and Designer Edition Super Bundle! $406.93 value.
- Silhouette CAMEO®
- Designer Edition Software
- Dust Cover
- $25 Download Card
- Four Essential Silhouette Tools (hook, spatula, scraper, pick-me-up™)
Second prize: Silhouette Portrait bundle! $219.98 value.
- Silhouette Portrait Machine
- Rhinestone Starter Kit
We want you to have the chance to get that Silhouette machine that might still be on your wish list – or the wish list of a loved one! To enter: just complete the entries in the Rafflecopter widget below or at this link. Because of my many blog friends who helped make this giveaway possible, you have 42 potential entries, which means a lot of winning power. So, hurry up and enter! {This giveaway runs from today through Monday, December 15th at 11:59p eastern and is open to anyone 18 years of age or older with a U.S. or Canada mailing address. You can read the rest of the terms and conditions in the widget below.} a Rafflecopter giveaway
So, what is your take on the wood slice trend? Dying to try it out, or not really for you? Or do you have another type of ornament on your to-craft list?


What if you MADE your Christmas gifts this year instead of buying them? Find out how to set yourself up for success in your Handmade Christmas journey - plus get a free printable gift list planner!



[…] // 19. Home At Eight // 20. Queen of Everything // 21. Tried & True // 22. Mama Sonshine // 23. unOriginal Mom // 24. Create it. Go! // 25. From Wine to Whine // 26. GetSilvered // 27. It’s Always Ruetten […]
[…] // 19. Home At Eight // 20. Queen of Everything // 21. Tried & True // 22. Mama Sonshine // 23. unOriginal Mom // 24. Create it. Go! // 25. From Wine to Whine // 26. GetSilvered // 27. It’s Always Ruetten […]
[…] // 19. Home At Eight // 20. Queen of Everything // 21. Tried & True // 22. Mama Sonshine // 23. unOriginal Mom // 24. Create it. Go! // 25. From Wine to Whine // 26. GetSilvered // 27. It’s Always Ruetten […]
[…] // 19. Home At Eight // 20. Queen of Everything // 21. Tried & True // 22. Mama Sonshine // 23. unOriginal Mom // 24. Create it. Go! // 25. From Wine to Whine // 26. GetSilvered // 27. It’s Always Ruetten […]
[…] // 19. Home At Eight // 20. Queen of Everything // 21. Tried & True // 22. Mama Sonshine // 23. unOriginal Mom // 24. Create it. Go! // 25. From Wine to Whine // 26. GetSilvered // 27. It’s Always Ruetten […]
[…] // 19. Home At Eight // 20. Queen of Everything // 21. Tried & True // 22. Mama Sonshine // 23. unOriginal Mom // 24. Create it. Go! // 25. From Wine to Whine // 26. GetSilvered // 27. It’s Always Ruetten […]
[…] // 19. Home At Eight // 20. Queen of Everything // 21. Tried & True // 22. Mama Sonshine // 23. unOriginal Mom // 24. Create it. Go! // 25. From Wine to Whine // 26. GetSilvered // 27. It’s Always Ruetten […]
[…] // 19. Home At Eight // 20. Queen of Everything // 21. Tried & True // 22. McCall Manor // 23. unOriginal Mom // 24. Create it. Go! // 25. From Wine to Whine // 26. GetSilvered // 27. It’s Always Ruetten […]
[…] // 19. Home At Eight // 20. Queen of Everything // 21. Tried & True // 22. McCall Manor // 23. unOriginal Mom // 24. Create it. Go! // 25. From Wine to Whine // 26. GetSilvered // 27. It’s Always Ruetten […]
[…] // 19. Home At Eight // 20. Queen of Everything // 21. Tried & True // 22. McCall Manor // 23. unOriginal Mom // 24. Create it. Go! // 25. From Wine to Whine // 26. GetSilvered // 27. It’s Always Ruetten […]
These are so neat! I love the rustic/glam combo thanks to the addition of the glitter on the wood….very pretty! I need to try me some of that double-sided adhesive soon. Thanks for this inspiring tutorial!
[…] // 19. Home At Eight // 20. Queen of Everything // 21. Tried & True // 22. Mama Sonshine // 23. unOriginal Mom // 24. Create it. Go! // 25. From Wine to Whine // 26. GetSilvered // 27. It’s Always Ruetten […]
[…] // 19. Home At Eight // 20. Queen of Everything // 21. Tried & True // 22. McCall Manor // 23. unOriginal Mom // 24. Create it. Go! // 25. From Wine to Whine // 26. GetSilvered // 27. It’s Always Ruetten […]
[…] // 19. Home At Eight // 20. Queen of Everything // 21. Tried & True // 22. McCall Manor // 23. unOriginal Mom // 24. Create it. Go! // 25. From Wine to Whine // 26. GetSilvered // 27. It’s Always Ruetten […]
[…] // 19. Home At Eight // 20. Queen of Everything // 21. Tried & True // 22. McCall Manor // 23. unOriginal Mom // 24. Create it. Go! // 25. From Wine to Whine // 26. GetSilvered // 27. It’s Always Ruetten […]
[…] // 19. Home At Eight // 20. Queen of Everything // 21. Tried & True // 22. McCall Manor // 23. unOriginal Mom // 24. Create it. Go! // 25. From Wine to Whine // 26. GetSilvered // 27. It’s Always Ruetten […]
I’m a big fan of wood slices too! Yours look great and I love the finishing touch of glitz!
These are just lovely! I’ve never used the double-sided adhesive, but this makes me want to.
I LOVE the use of vinyl instead of wood burning! :)
I have being wanting to do a wood slice project for a long time. This one is lovely!
You are a wiz with that double-sided adhesive. I would have thought that was glitter vinyl you used! Oh and those wood slices make the rustic-lover in me SWOOOOON. Good thing we don’t live closer; I’d be stopping by your house to “borrow these” off of your tree. Lol. So glad you joined our December Silhouette Challenge and Giveaway, Meredith! Thanks for adding so much creativity into the mix.
This is such a cute idea. A great way to use the cut offs on the bottom of a tree.
[…] // 19. Home At Eight // 20. Queen of Everything // 21. Tried & True // 22. McCall Manor // 23. unOriginal Mom // 24. Create it. Go! // 25. From Wine to Whine // 26. GetSilvered // 27. It’s Always Ruetten […]
[…] Vinyl Wood Slice Ornaments […]
[…] // 19. Home At Eight // 20. Queen of Everything // 21. Tried & True // 22. McCall Manor // 23. unOriginal Mom // 24. Create it. Go! // 25. From Wine to Whine // 26. GetSilvered // 27. It’s Always Ruetten […]
[…] // 19. Home At Eight // 20. Queen of Everything // 21. Tried & True // 22. McCall Manor // 23. unOriginal Mom // 24. Create it. Go! // 25. From Wine to Whine // 26. GetSilvered // 27. It’s Always Ruetten […]
[…] DIY Vinyl Wood Slice Ornaments | UnOriginal Mom […]
[…] DIY Vinyl Wood Slice Ornaments from Unoriginal Mom […]
[…] Vinyl Wood Slice Ornaments / Unoriginal Mom […]
[…] DIY Vinyl Wood Slice Ornaments | unOriginal Mom […]
[…] DIY Vinyl Wood Slice Ornaments | UnOriginal Mom […]
Beautiful ornaments!! Several years ago I did wood slice ornaments but wood burned the design. It was fun and I could create almost anything with my wood burner. Did names too by hand. Short first names made this one easier. Happy 2020/2021 Everyone!! Thanks for the excellent tutorial!
You know, I’ve had a wood burning tool sitting in my craft cabinets for years and I’ve never gotten around to opening it! I really should though, and that’s a wonderful idea for wood slice ornaments. Maybe this year I’ll actually have enough time to try it! Thanks for sharing!
Now I am wanting to do a wood slice project for so long time. This one is pretty!
[…] // 19. Home At Eight // 20. Queen of Everything // 21. Tried & True // 22. McCall Manor // 23. unOriginal Mom // 24. Create it. Go! // 25. From Wine to Whine // 26. GetSilvered // 27. It’s Always Ruetten […]
They’re so cute.
Did you apply Modpodge on top of the glitter adhesive as well?
[…] Vinyl Wood Slice Ornament […]