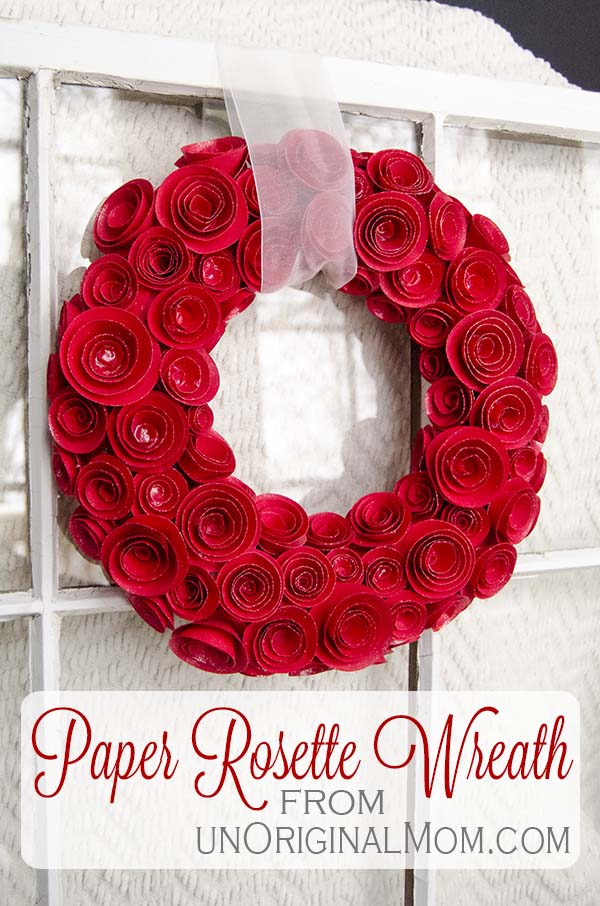
This idea was completely and 100% inspired by this breathtakingly beautiful wreath created by I’m a Yarner. She’s got a great step-by-step tutorial on how to make a wreath like this completely by hand, so be sure to stop on over and check it out!
I’ve made felt rosettes before, but never tried paper…and I knew I certainly didn’t have the patience (or time!) to cut out all those rosettes by hand! Now, if only there was a machine that would cut all that paper for me… ;-)
You guessed it, I used my trusty Silhouette Portrait to cut out over a hundred paper rosettes for my wreath! There are several designs in the Silhouette Store that you could use, but since it was such a simple design, I made my own cut file. Would you like to have it? Here you go!
Fine print: This design is for personal use only. I’d love for you to follow me via Facebook, Pinterest, or Twitter in exchange for the download…of course, it’s not mandatory, but very much appreciated!
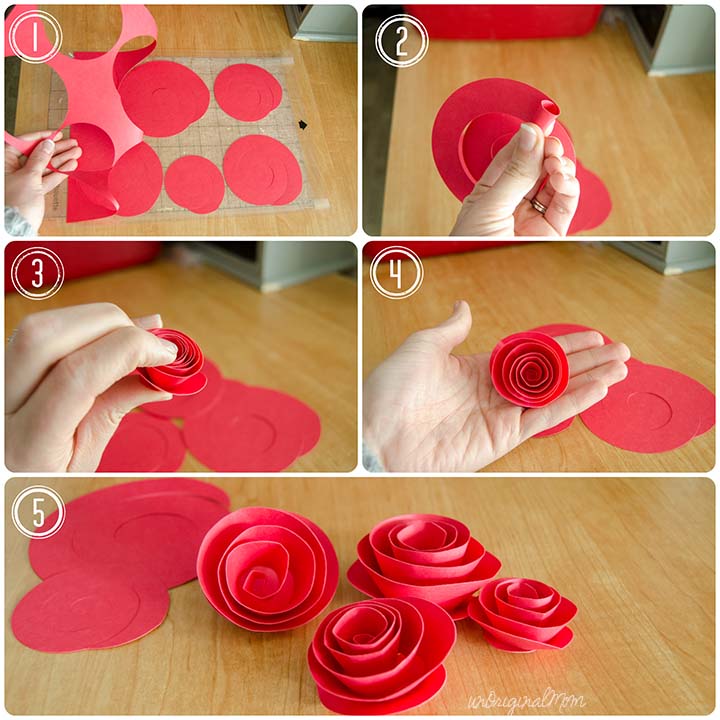
You can visit I’m a Yarner for the full tutorial on how to assemble your roses once they’re cut, but here’s a quick photo-tut for you:
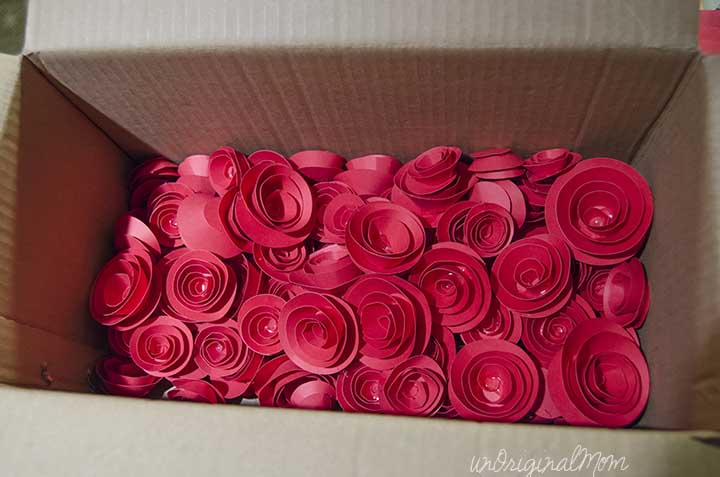
By re-sizing the file, I created several different sizes of rosettes to work with. I used about 16 or 17 pieces of card stock to create this many rosettes:
(Sorry, I didn’t count them…and I didn’t always cut 6 to a sheet like in the photo above…but I’d guess there are about 120ish there, and I used almost every one of them!)
Yes, it was a bit time consuming to create all the rosettes, but since the Silhouette did all the work to cut them, I just had to roll them up and glue them together. You can roll a bunch at one time and glue them later (even the next day, if you want), so I spent an episode of Downtown Abbey just rolling rosettes :-)
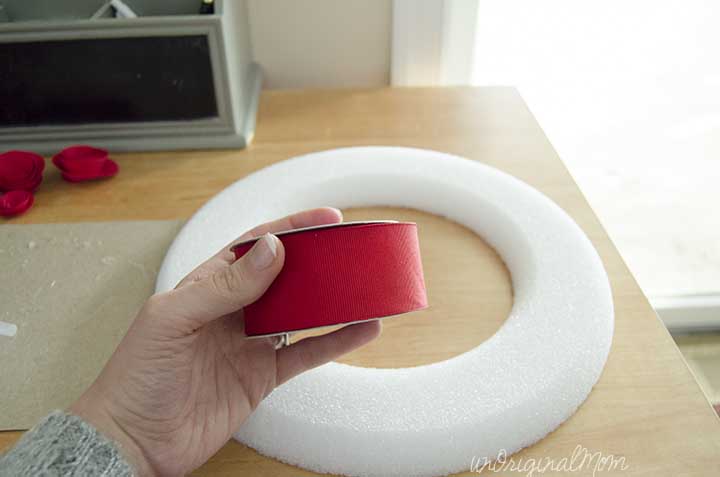
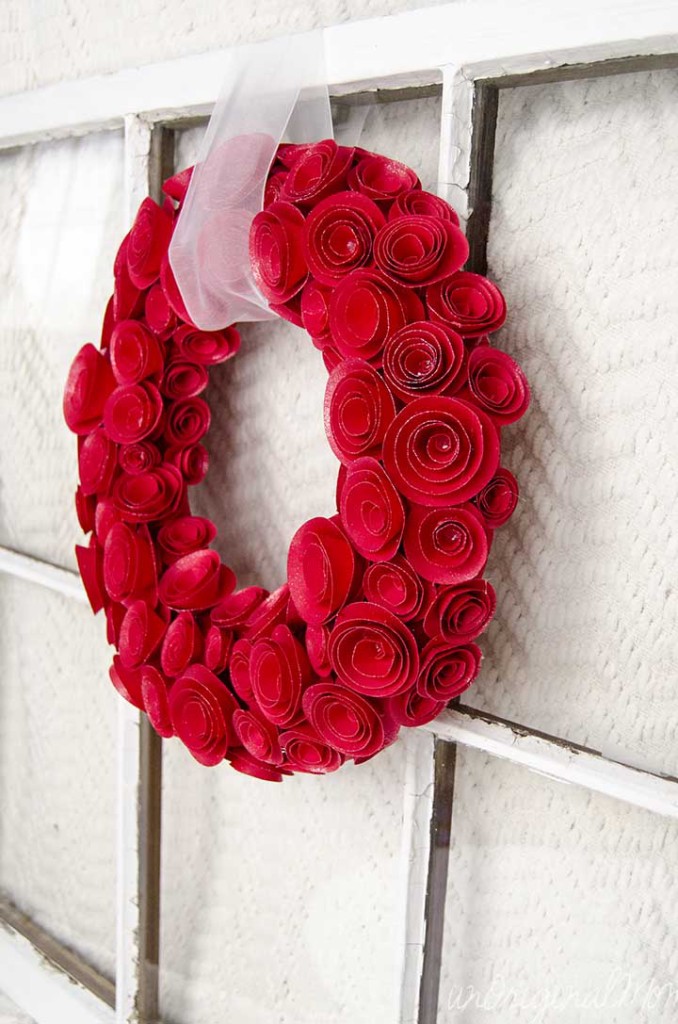
I used a 12″ foam wreath wrapped in red ribbon as my base. I’m SO glad I decided to wrap it in ribbon first so I didn’t have to worry about bits of the white styrofoam showing through.
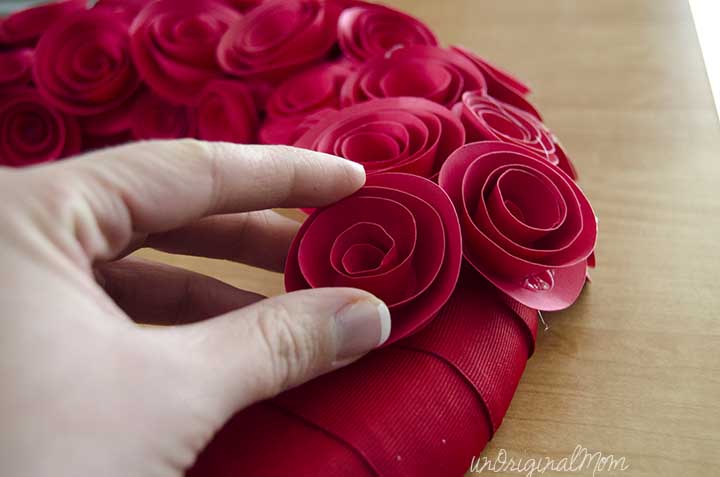
There wasn’t much rhyme or reason to gluing on the rosettes…it was just like putting together a puzzle, trying a bunch of different pieces until you find the one that fits perfectly!
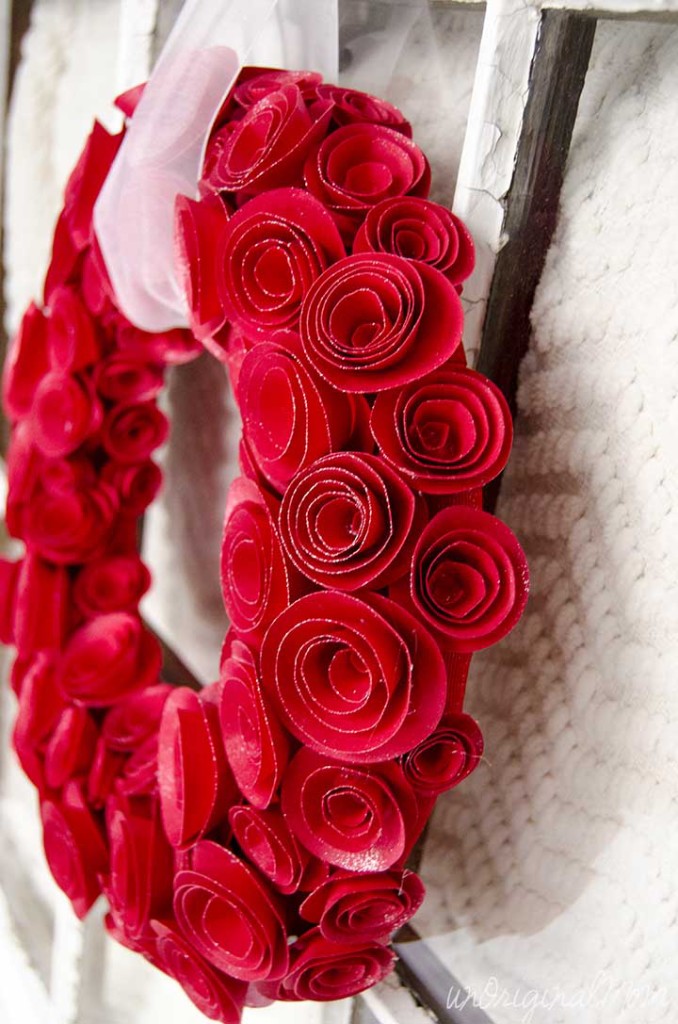
I didn’t try to roll my rosettes super tightly, just for sake of time and sanity. I do like the look of the tightly rolled rosettes, but it probably would have taken twice as many to cover my wreath and I simply didn’t have the patience for that. Because of that, you could see the hot glue in the center of my rosettes after they were assembled, which I wasn’t a huge fan of…not to worry, though, I found the PERFECT solution!
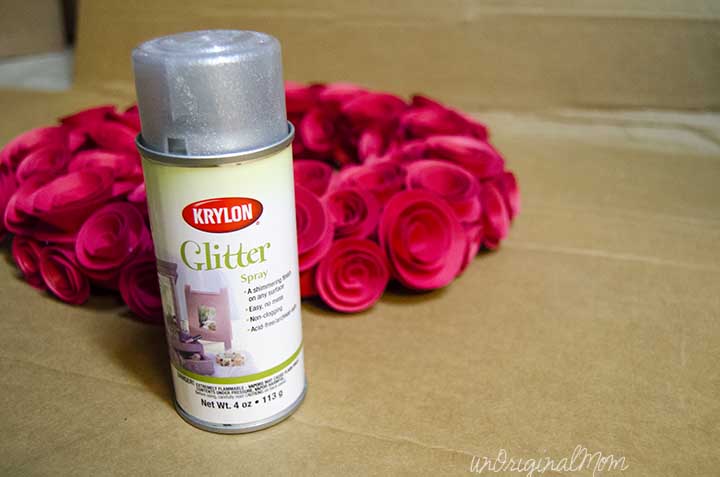
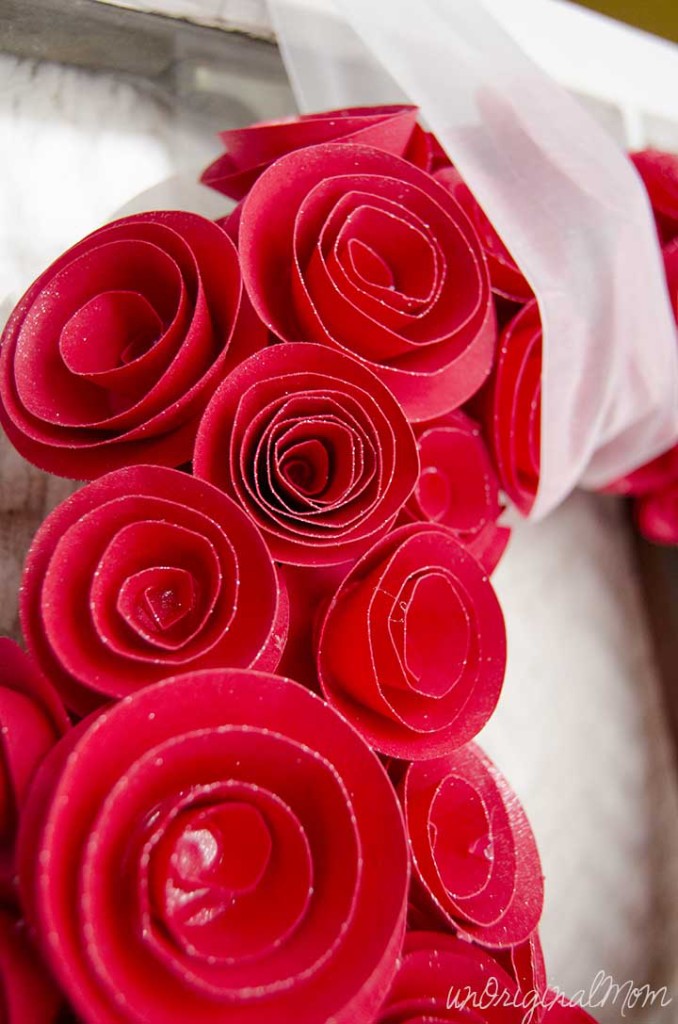
Glitter spray! This is the first time I’ve tried it, and I am in LOVE. It’s basically just like a can of spray paint, only it’s glitter! It added the perfect layer of sparkle without looking overly glitzy. And the best part – it totally disguised the hot glue! You can see it if you’re up close and looking for it, but otherwise you’d never notice it at all. (It’s actually even more visible in these photos than it is in person!)
The wreath looks lovely on my antique window pane, and will be living on my mantle for the next month! I’ve got several other pieces to my Valentine’s mantle display that you’ll be seeing pop up over the next week, so stay tuned to see how this lovely wreath fits into all of that!
Are you doing any decorating for Valentine’s Day? I’ll be honest, this is the first time I’ve ever done it…but it’s fun to have something to replace the Christmas decorations! ;-)


Get your copy of my FREE meal planning binder!

Sign up to get a free copy of my meal planning system - an 11 page printable meal planning binder, complete with a pantry inventory, shopping list, and more to help get on top of your menu each week!



What a beautiful wreath! I will be trying these flowers, I’ve done them by hand before but using the SIlhouette seems much more efficient. Thanks for sharing. (oh and I have that glitter spray and love it, it’s so fun)
Love this wreath. It is beautiful. Now, I will have to try this. Thank you for sharing. I will have to try the glitter spray, I love glitter. Anything that sparkles is fun!! Thank you for sharing.
Sooooo pretty, Meredith! Thanks for the free file and the tutorial. I ADORE glitter spray!
So gorgeous, Meredith! I’ve been wanting to make some spring themed projects with flowers cut by my Cameo, and this is inspiring me to do it. Thanks! I shared on Put A Bird On It’s FB page. :)
xo
Daniela
Put A Bird On It
This might be one of the most breathtaking wreaths I have ever seen. Amazing work, my friend! I am SO in love with everything about this. And the fact you used your Silhouette? Well, bonus!
What a spectacular wreath! This is absolutely stunning. Well worth all the effort. Thank you for the cutting file too.
Beautiful wreath. Can’t wait to make one for myself. Thanks for sharing the cut file.
Oh, I LOVE this! I am pinning this–gonna use this cut file later!
Girl, this is STUNNING! Seriously, I love it so much! I made a white felt flower rosette wreath for Christmas and cut and rolled all of the flowers by hand, so I hear ya on the time consuming thing! Mine had about half the amount of flowers yours did, though, so it wasn’t too too bad. :-D Thank you for sharing this gorgeous creation! Pinning!
~Abby =)
This is so pretty! I’ve made rolled paper rosettes before but now I wish I had a Silhouette because that would make my life a zillion times easier.
Your wreath turned out amazing! (like amazing, amazing!!) Great job!!
This wreath is swoon worthy! I would love it if you linked this up to The Makers, http://upcycledtreasures.com/2014/01/the-makers-link-party-2/
Hope to see you there!
~Katie @ Upcycled Treasures
i love this- soo perty!
Your wreath is super cute! I love the paper roses!! I’d love for you to share it with us at Sewlicious Home Decor! http://sewlicioushomedecor.com/saturday-showlicious-craft-showcase-party-3. :)
Marti
This is so beautiful! Love the glitter spray too, it finishes it off beautifully! :) X
This is so pretty! It looks lovely on the window frame. Thanks for sharing at The Inspiration Exchange – we’ll be featuring it this weekend!
Thanks Jenn! I am so pleased with how it turned out, and how nice it looks on the window frame. Thanks so much for the feature, too!
[…] Via Unoriginal Mom […]
[…] 3. DIY Paper Rosette Wreath (with Free Cut File!) […]
I love this so much! Thanks for the file! I will definitely use it! Thanks for linking up with us at the Create Link Inspire party! You were featured today!! http://www.marvelousmommy.com/2014/02/10-valentines-day-diy-projects/
Thanks so much, Amy! Glad you like it!
[…] Paper Rosette Wreath {with free cut file} from Unoriginal Mom. Hug and Kiss Pillows from Masion De Pax.Free Printable Valentine’s Day Envelopes from Ella Claire.Valentine’s Day Coupon Printable from Elegance and Enchantment.Etched Glass Valentine’s Day Mason Jars from Essentially EclecticHeart Thumbprints from Restoration Beauty.DIY Burlap Gift Bags from The Casual Craftlete. […]
[…] Paper Rosette Wreath {with free cut file} from Unoriginal Mom. Hug and Kiss Pillows from Masion De Pax.Free Printable Valentine’s Day Envelopes from Ella Claire.Valentine’s Day Coupon Printable from Elegance and Enchantment.Etched Glass Valentine’s Day Mason Jars from Essentially EclecticHeart Thumbprints from Restoration Beauty.DIY Burlap Gift Bags from The Casual Craftlete. […]
This is such a pretty wreath!!! I can’t believe it is paper! You did such a great job. I am pinning!
Wow! That is really pretty. The glitter spray is a nice touch. Thanks for sharing the cut file!!
[…] DIY Paper Rosette Wreath with Free Cut File from UnOriginal Mom […]
Paper rosettes are so much fun.. They add life to just about every craft.. I love your rosettes wreath.. Thanks for linking up.. :)
[…] […]
W-O-W, so beautiful and creative. I just got my Silouette Portrait up and running yesterday and was looking for a craft to do for tonights Friday night fun…. this is it!! Thanks so, so very much!!! Just lovely.
Hi Meredith,
This wreath is spectacular!!! I absolutely LOVE how it looks hanging on the vintage window. Perfect!!!
Peace, Love and Joy,
Joyce
http://peaceloveandjoyce.com/silhouette-cameo/
[…] Wreath to display on my Valentine’s Mantel. Doesn’t it look lovely? You can see my Paper Rosette Wreath (also made with my Silhouette) and Thumbtack Heart Art too! I am looking forward to swapping […]
Brilliant. I’ve never made a wreath like that before because of the time I’d have to spend with the scissors–but using the Silhouette would take out the drudgery. And so would Downton Abbey… :)
Hi Meredith,
I wanted to promote all of our partners in the Silhouette Portrait Giveaway. Thanks for letting me feature your fabulous wreath along with projects from the others today on http://www.peaceloveandjoyce.com today!
Peace, Love and Joy,
Joyce
Peace, Love and Joy,
Joyce
[…] | 56.DIY Wedding Origami Cranes 57.DIY Wedding Paper Flowers | 58.DIY PAPER HOLIDAY WREATH 59.DIY Paper Rosette Wreath | 60.DIY Tutorial: Kusudama Paper Flowers […]
[…] DIY Paper Rosette Wreath (with Free Cut File!) via UnOriginal Mom […]
I can’t believe I was looking for a spiral rose over at the SIL store earlier today! Thank you so much I can get cutting now :)
So glad this is helpful for you! Enjoy!
This turned out so beautiful! Love the little bit of glitter at the end. Great touch, everything needs some glitter :-)
I definitely agree, glitter makes everything better! :-)
Gorgeous wreath! This would be such a fun wreath to hang up all year long with different paper centered towards the different holidays and seasons. Thanks for sharing! PINNED!
Thanks, Michelle! I just got it out again this year for my Valentine’s mantel and thought the same thing…I don’t know why I put it in a box for a year when I could have used it some more, I have a feeling it won’t be going back in the box for a while :-)
This is super gorgeous!!! WOW! Thanks for the idea and inspiration ++ the free cutting file!
That’s so gorgeous! I love how it turned out!
Absolutely beautiful! It is perfect! The vibrant red looks gorgeous against the white! Would love it if you linked up with us tomorrow morning please! Hope you’re having a wonderful week :)
This is just SO gorgeous!!! I loooove making rosettes, but haven’t tried paper before either. The glitter is a perfect touch, too!
Really love this wreath. beautiful.
[…] Paper Valentine Treats || Summer Scraps DIY Paper Rolled Wreath || Unoriginal Mom Valentine’s Day Mailboxes || This Girl’s Life Blog How To Make […]
[…] Paper Valentine Treats || Summer Scraps DIY Paper Rolled Wreath || Unoriginal Mom Valentine’s Day Mailboxes || This Girl’s Life Blog How To Make […]
Love the wreath. The only problem is I don’t have a Silhouette! I have the Scan N’ Cut. Is there any way to conver the .studio file into a .svg??? I am way too lazy to cut out all the circles myself.
Wonderful idea, loving this project! Featuring you tomorrow at WIW. Hope to see you back!Xo
[…] DIY Paper Rosette Wreath <<< unOriginal Mom […]
[…] DIY Paper Rosette Wreath <<< unOriginal Mom […]
[…] DIY Paper Rosette Wreath <<< unOriginal Mom […]
[…] DIY Paper Rosette Wreath <<< unOriginal Mom […]
[…] […]
[…] DIY Paper Rosette Wreath from UnOriginal Mom […]
[…] […]
[…] DIY Paper Rosette Wreath by unOriginal Mom […]
[…] Paper Rosette Wreath by Unoriginalmom / Drop Cloth Heart Pillows by Posed Perfection / Valentine’s Day Ideas by The seasoned homemaker […]
How lovely! I will definitely be making one of these this weekend, and subscribing to your blog! I’d love it if you would take a look at mine, too! Have a great weekend!
Meredith I love this so much and so didn’t everyone at Creative Spark Link Party it was our most clicked this week! Hope you stop by again today! bit.ly/1EqDIug
So pretty!!!! Pinned
I was hoping someone would ask a question about how to do this :) Once you roll the rose do you only use the hot glue to affix it to the wreath or do you glue the rose together somehow. I I
Hi Susan, I did use hot glue to glue the rose together – check out the tutorial I linked to in my post (from the blog “I’m a Yarner”) – I followed her step by step instructions on putting the roses together and she describes how to glue the roses together!
Can I make a similar file with my silhouette cameo!?
Hi Ashley, you should be able to use the Studio file that I included in this post! Download it and open it in Silhouette Studio.
[…] 48 Adornos navideños con papel […]
[…] Paper Rosette Wreath […]
[…] via designimprovised.com via housebyhoff.com via unoriginalmom.com via onsuttonplace.com via nap-timecreations.com via […]
[…] Photo Source & Tutorial […]
[…] Photo Source & Tutorial […]
[…] 49. Paper Rosette Wreath […]
[…] Paper Rosette Wreath – This wreath looks so expensive but really it’s so easy and inexpensive to make. […]
[…] 49. Paper Rosette Wreath […]
[…] Image Source […]
Thank you so much! I was looking everywhere for a cutfile like that!