These DIY Family Mario Halloween costumes have been a big hit! Super Mario characters are so timeless and recognizable, they’re a perfect DIY family costume theme for Halloween. We have a Mario riding Yoshi, Luigi riding Yoshi, Toadette, Princess Peach, and the iconic question mark block! Read on to learn more of the DIY details.
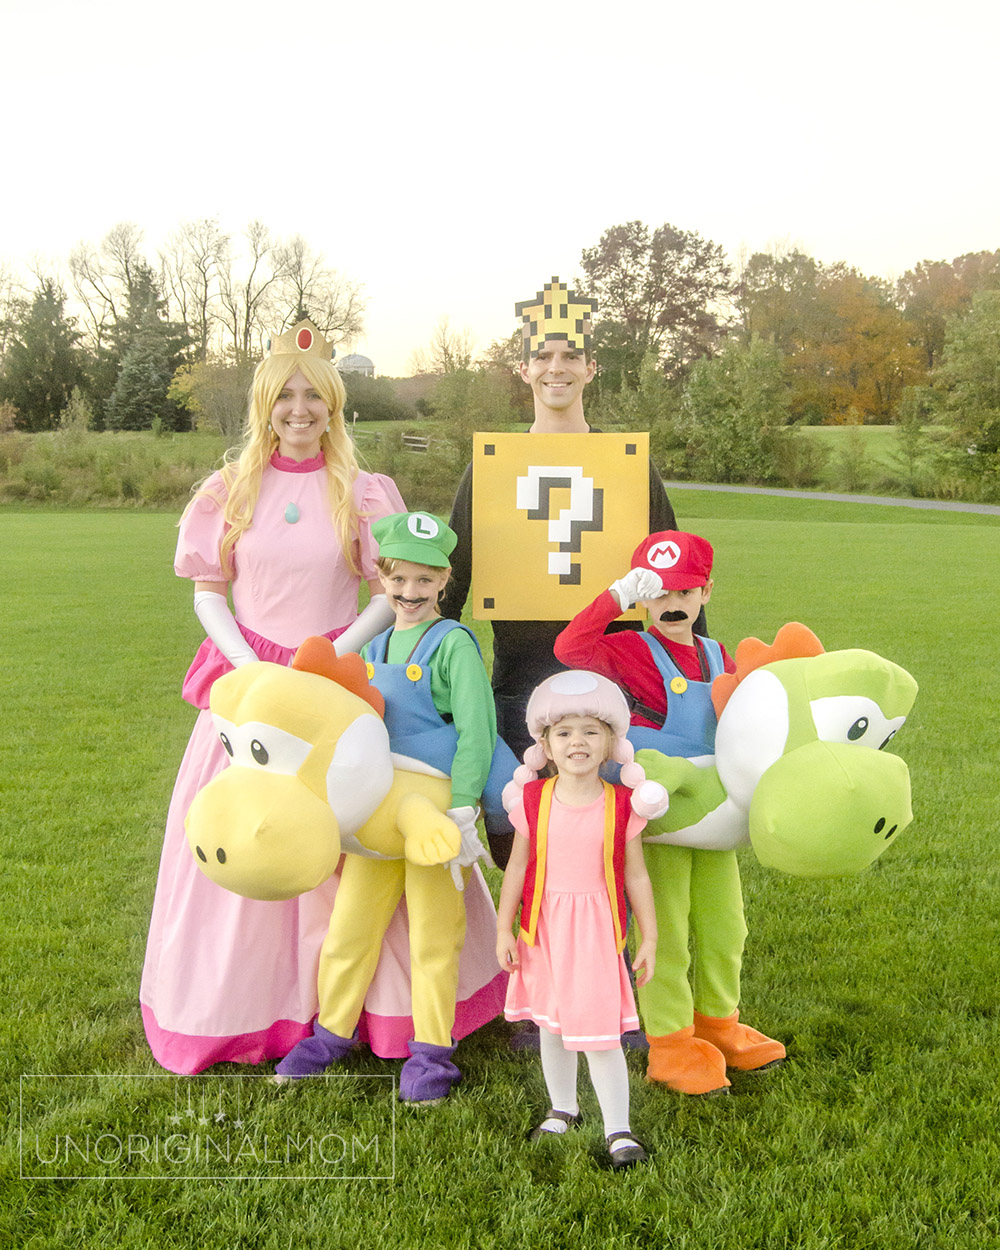
DIY FAMILY MARIO HALLOWEEN COSTUMES
We’re baaaaack! After a year off from handmade Halloween costumes last year (2020 – need I say more?), we decided to “go big or go home” this year with epic handmade Super Mario themed Halloween costumes for the entire family. We’ve actually never all dressed up together…my husband and I were a little reluctant to get in on the fun at first, but the kids convinced us to go all in! The older two kids are very into Super Mario and Mario Odyssey games on the Switch, which made Mario the perfect theme. So I dug out my sewing machine and set about creating DIY family Mario Halloween costumes for all of us. It was a labor of love, to be sure!
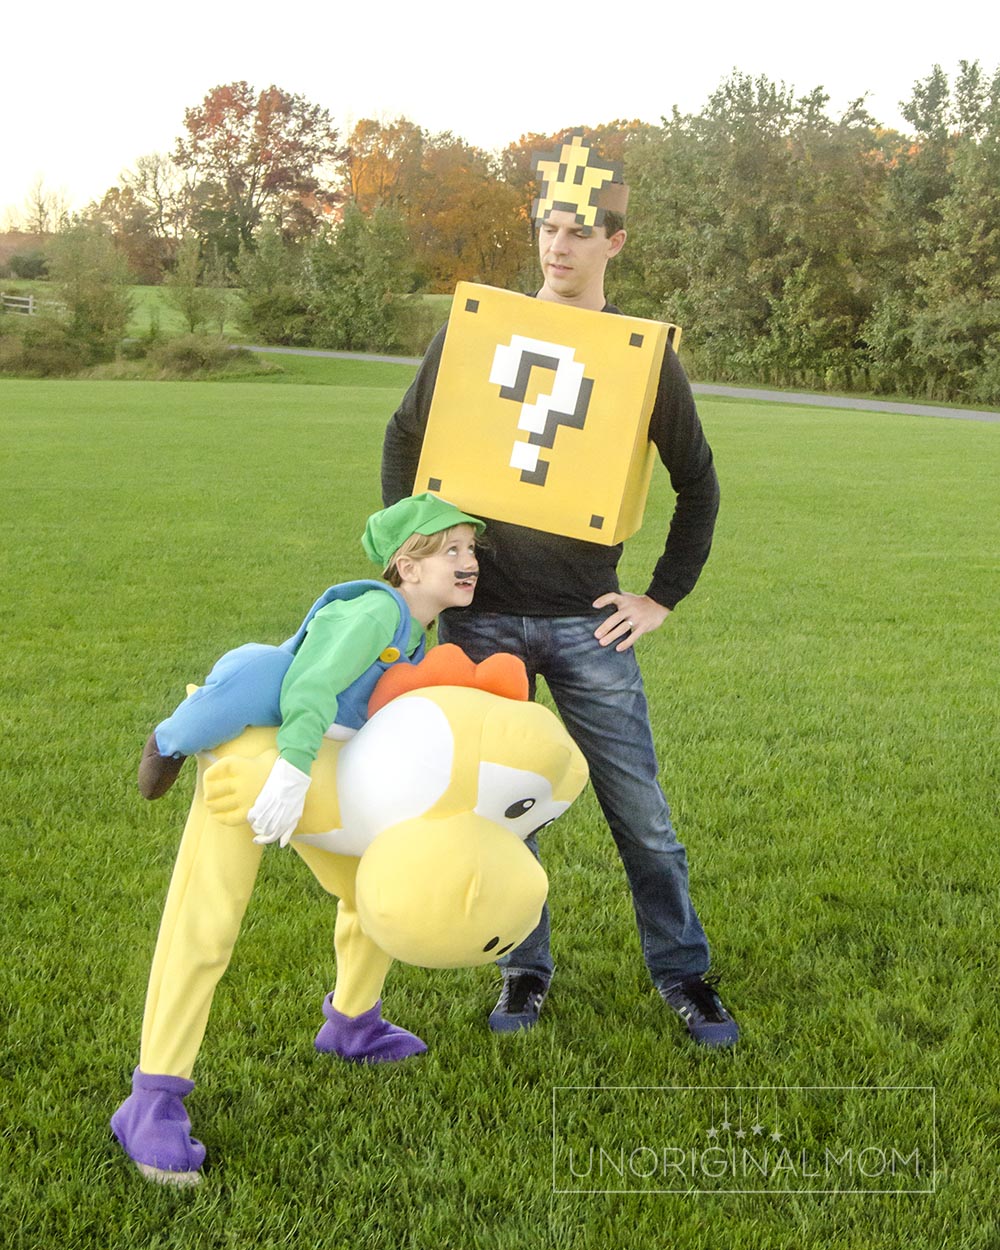
DIY MARIO & LUIGI RIDING YOSHI COSTUME
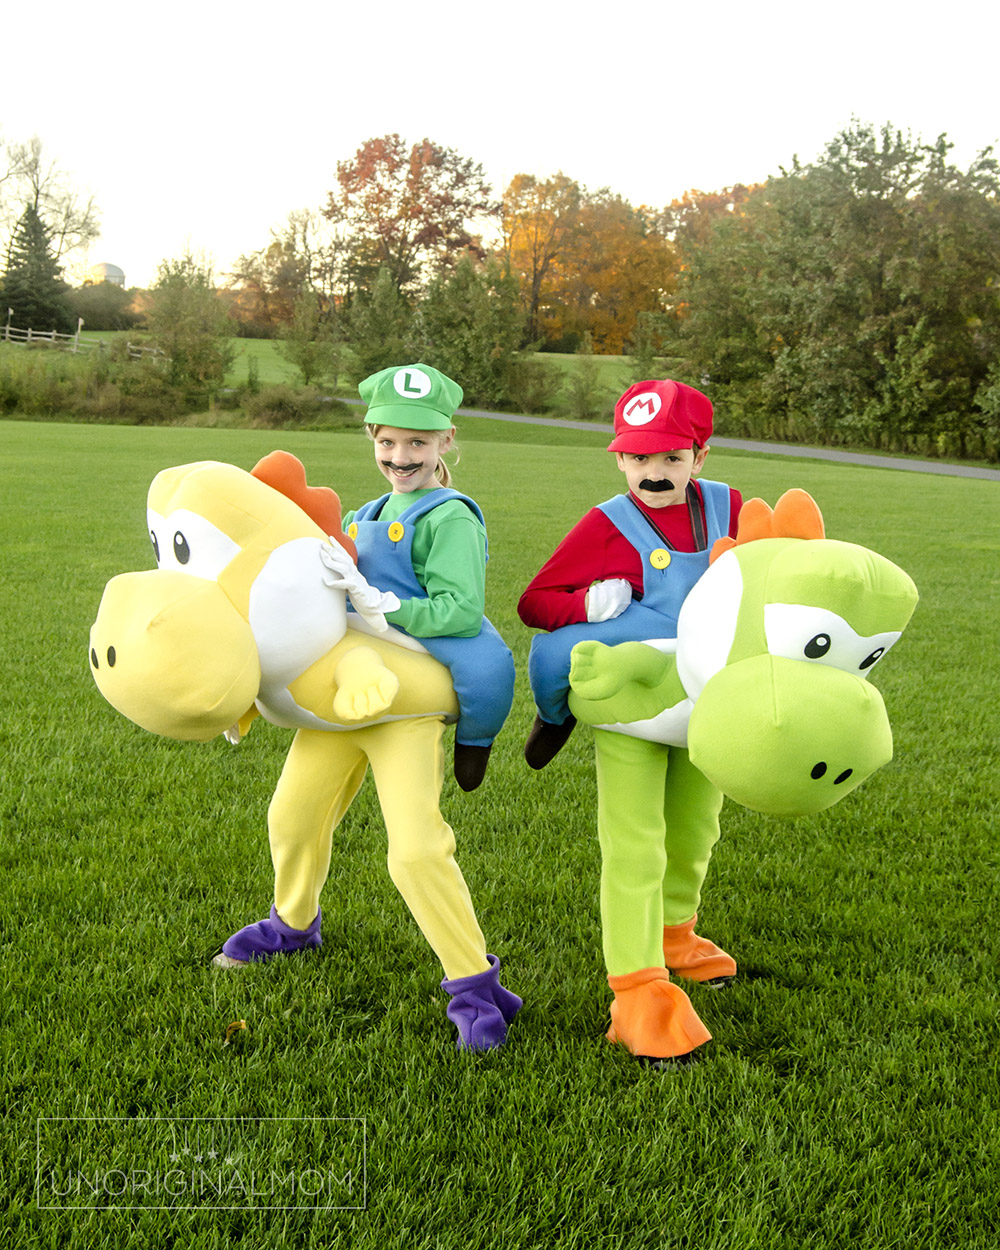
While browsing for DIY family Mario Halloween costumes, the kids and I happened upon these epic Mario riding Yoshi costumes and the kids were obsessed. I am a mediocre seamstress at best, so this was a pretty daunting undertaking…but of course my optimistic late-August self thought it would be a great idea! In the week or so leading up to Halloween, though, not so much, haha. Yes, these costumes are ENTIRELY handmade, 100% from scratch.
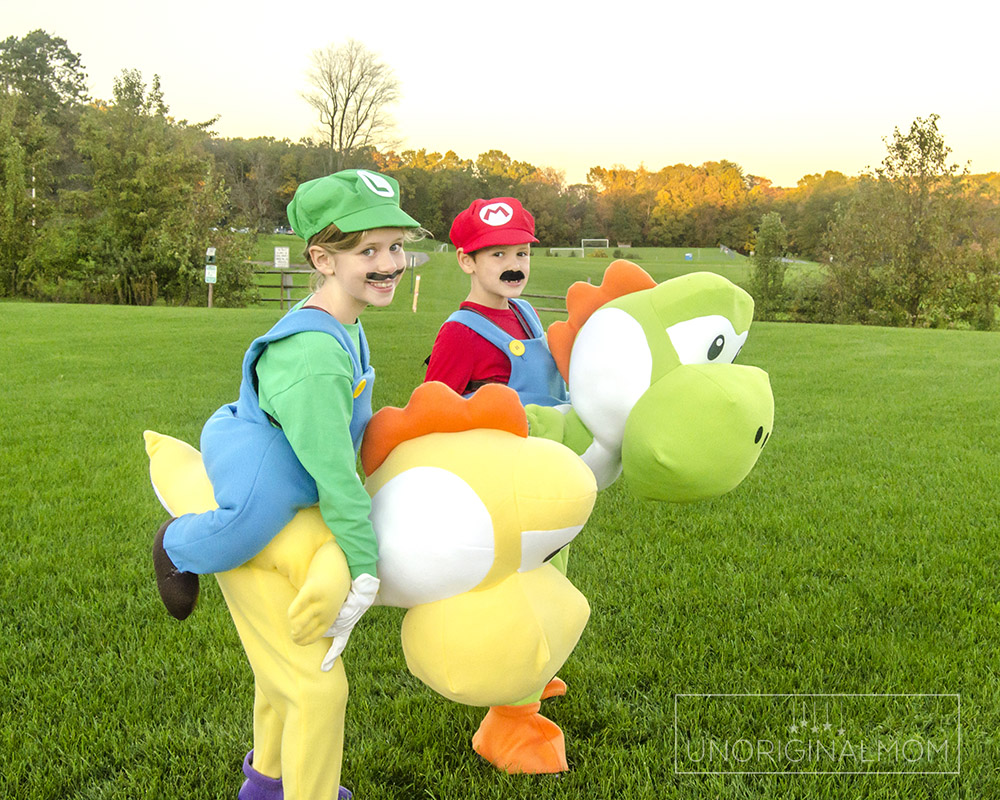
I never would have attempted this without a pattern for the stuffed Yoshi. Thankfully I found this pattern, which I used to create the Yoshi head and body. The rest was all guesswork. I wish I could give you a full and detailed DIY tutorial here, friends, but I was really flying by the seat of my pants for most of this! I will give you some details, but let me caution you here – this was a TON of work. I spent probably a hundred hours of labor over the last two months on these two costumes alone. The yoshi was actually the easy part. The pants/overalls were pretty tricky to figure out, and then the engineering to get them to stay up was darn near impossible. Quite honestly I’d urge you strongly NOT to attempt these – just go buy the Amazon version and save yourself the headaches, haha! But if you absolutely will not be swayed, here are some of the DIY details…
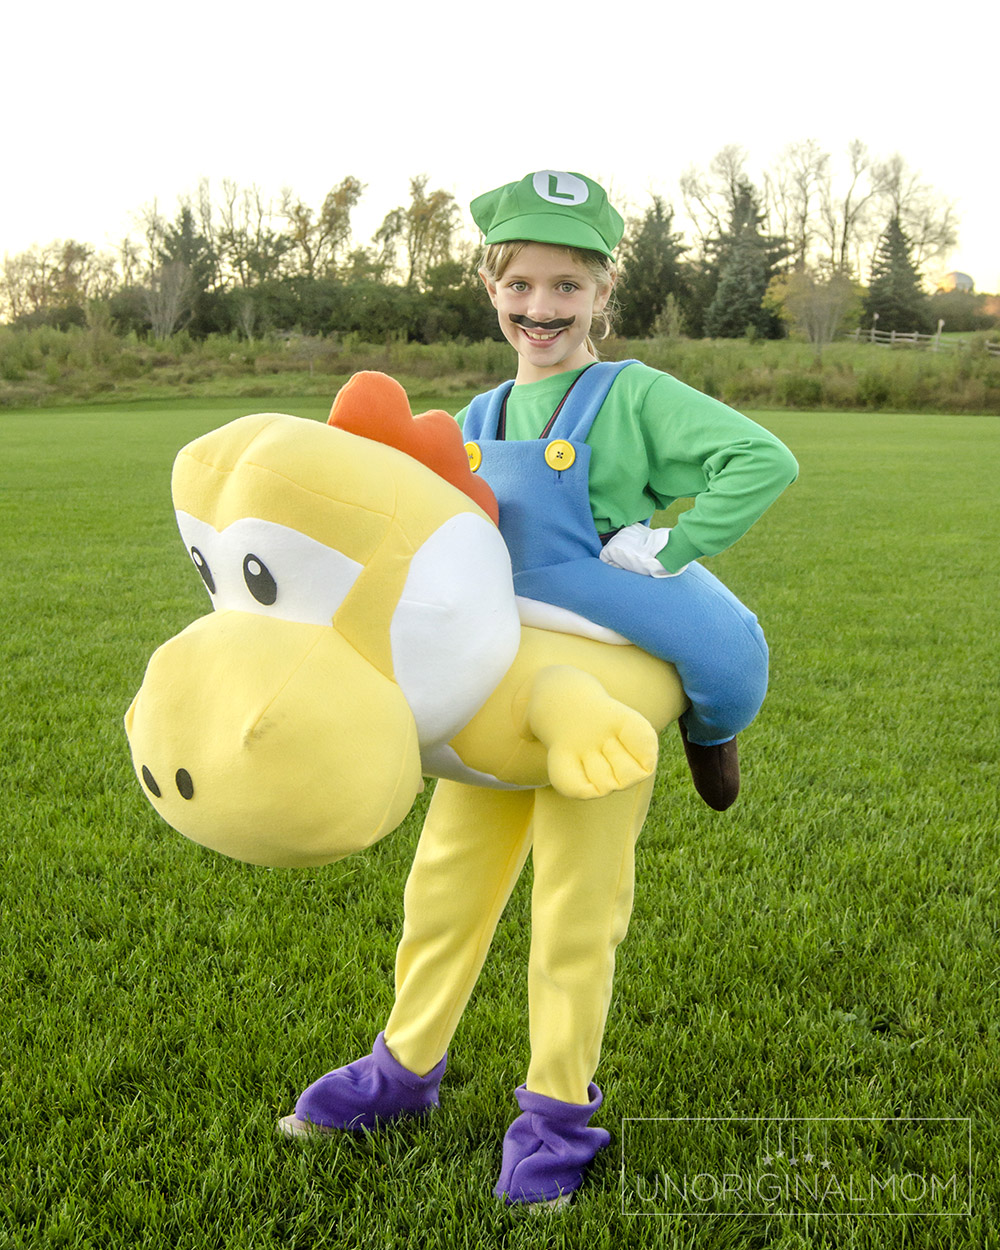
DIY Mario Riding Yoshi Costume Details:
- Yoshi head/body – I used this pattern, printed at 70%, although if I had to do it again I’d probably do the head slightly smaller (maybe 60%) and the body slightly larger (probably 80%). I assembled it all exactly as instructed in the pattern, except I didn’t sew the bottom belly together, I skipped the legs completely, and I adjusted the shell to just be a narrow strip of red around the top edge. I used basic fleece fabric from JoAnns.
- Yoshi pants – I used a pair of my son’s and daughter’s pants as a guide to make a basic pair of pants, but made the waist extra high. I cut out an oval shape in the bottom of the belly to sew them onto the Yoshi body, matching around the bottom of the crotch seam at the front and back – I just had them try on the pants and then pinned the body to about where it seemed like it should go without limiting their walking too much. (I should add that I waited to stuff yoshi until the very end!) The yoshi feet are the feet from the original stuffed yoshi pattern, modified slightly to fit over shoes. I added a piece of elastic over the bottoms to hold them down over the kids’ shoes as they walked.
- Overalls – this was tricky, but I ended up creating a lining for the bib part only – the bottom edge of the bib lining is what I sewed onto the top of the yoshi pants inside the body. That same seam is what I sewed to the top of yoshi’s body to create the stuffing lining, which I hand sewed together once yoshi was stuffed.
- Mario legs – this was the very last step, after yoshi was stuffed. I had sewn them onto the overall bib before sewing the bib on, but left them unstuffed while doing all the other steps. Then I had the kids stand in their costumes while watching a movie and I just stuffed and hot glued them until they looked right! The brown shoes I sewed together separately and glued into the bottom of the legs at the end.
- Yoshi support – we went through SEVERAL iterations of engineering to figure out how best to support the weight of Yoshi’s head. Eventually, my husband came up with a v-shaped PVC pipe frame. The angled part of it went inside Yoshi’s head up to the top of his eyes, and the vertical part went up inside the overall bib. Then we used luggage straps to attach to the vertical pipe and pull it against the pelvis of the costume wearer – the straps went under their arms, around their backs, and over their shoulders. If we’d figured this out farther in advance I might have tried to find red and green straps so they blended in better with their shirts, but since it was last minute we were at the mercy of whatever was in stock locally.
- Mario hats – I saw several tutorials for super simple circle hats, but I wanted something a little more custom, so I made more of a “newsboys” style cap. This YouTube tutorial was very helpful, and I used the pattern making instructions in this tutorial. I used my Silhouette to cut the “M” and “L” out of flocked heat transfer vinyl for the hat logos.
DIY TOADETTE COSTUME
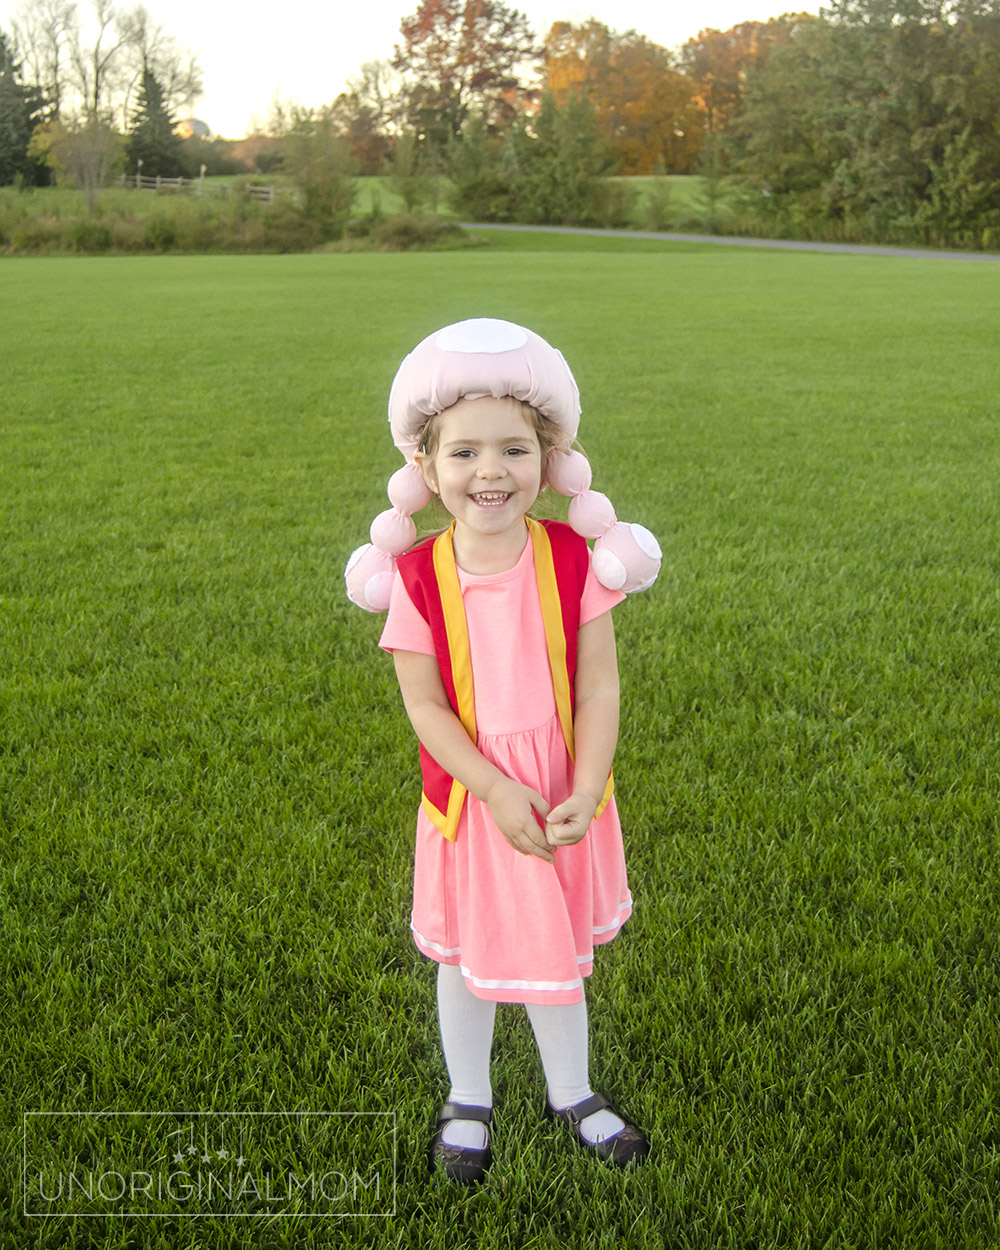
Our 3 year old waffled between wanting to be Toadette and Princess Peach…but ultimately landed on Toadette. Isn’t she adorable??? And the best part is, compared to the Yoshis, this costume was an absolute breeze to make!
DIY Toadette Costume details:
- I found a short sleeve pink dress on clearance at Target and added a white ribbon trim around the bottom – easy peasy.
- I drew my own lined vest pattern using a few different YouTube tutorials and sewed it myself. After it was completed I sewed on yellow bias tape for the trim.
- The Toadette hat is actually an old toddler-sized bike helmet! Lots of hot glue, some quilt batting, pink knit fabric and white felt ovals. The hanging balls are just Styrofoam balls from the craft store – I used four 1.8″ balls and two 2.8″ balls. I cut a long rectangle of pink fabric and wrapped it around all three balls, stretching and hot gluing as I went, and then tied the fabric tightly between each ball with some pink embroidery floss. Some hot glue inside the helmet at the top of the fabric rectangle, and voila! Toadette hat.
DIY PRINCESS PEACH DRESS
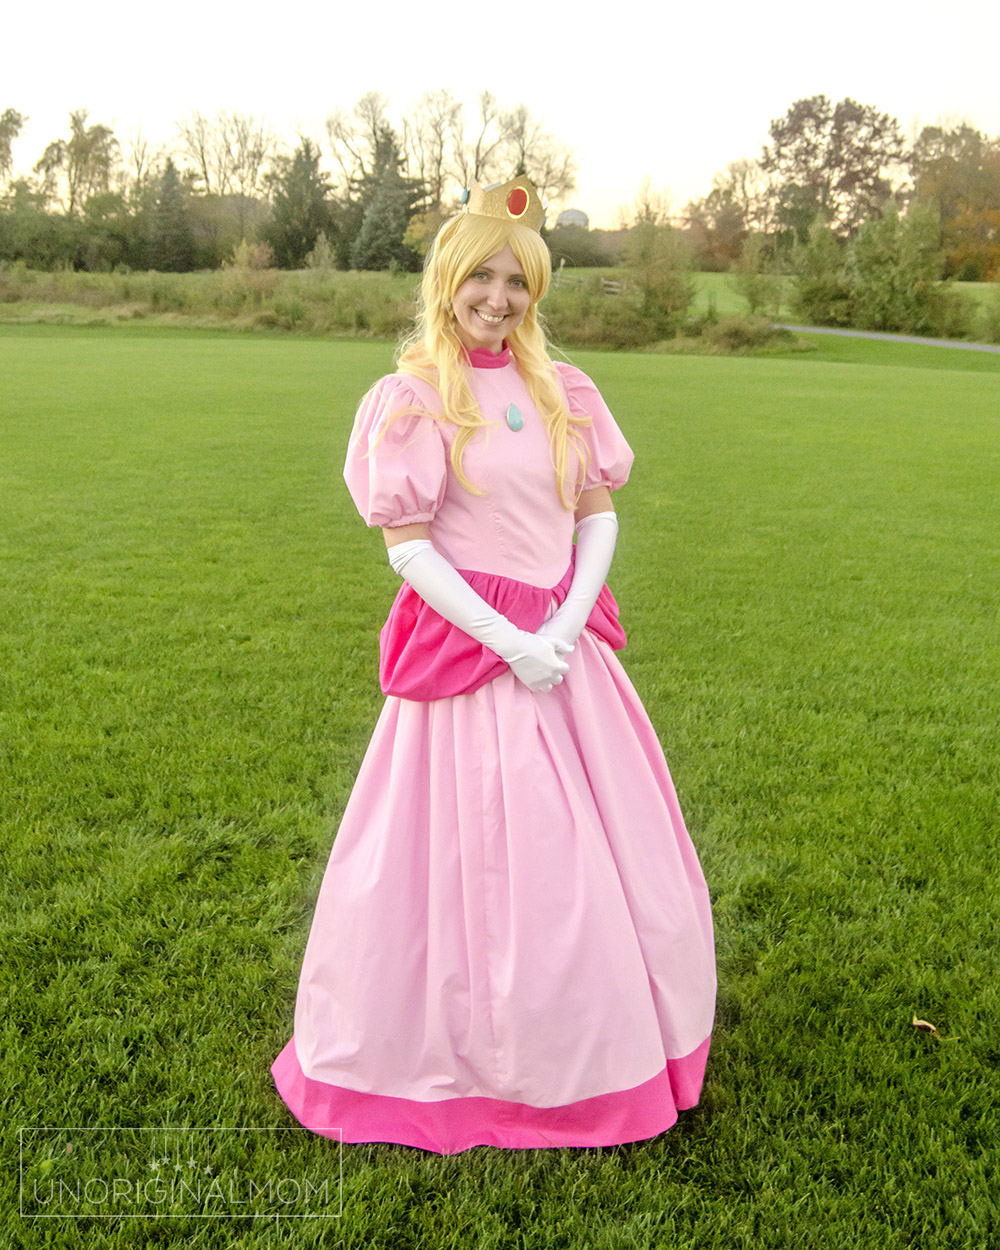
Once the 3 year old decided on being Toadette, she insisted that I dress up as Princess Peach…who am I to say no to that? And of course, how could we do DIY family Mario Halloween costumes without the iconic Princess Peach? The problem I ran into was that there are lots of princess dress patterns for kids, but not many for adults – especially ones that could be easily modified (by a novice seamstress like me, anyway) to look like Princess Peach with the bustle, high neck, and big puffy sleeves. I found a Princess Peach dress pattern by Simplicity that must have been recently discontinued, because it’s listed online in a lot of places but not available anywhere! Thankfully I tracked one down on Mercari for a few dollars.
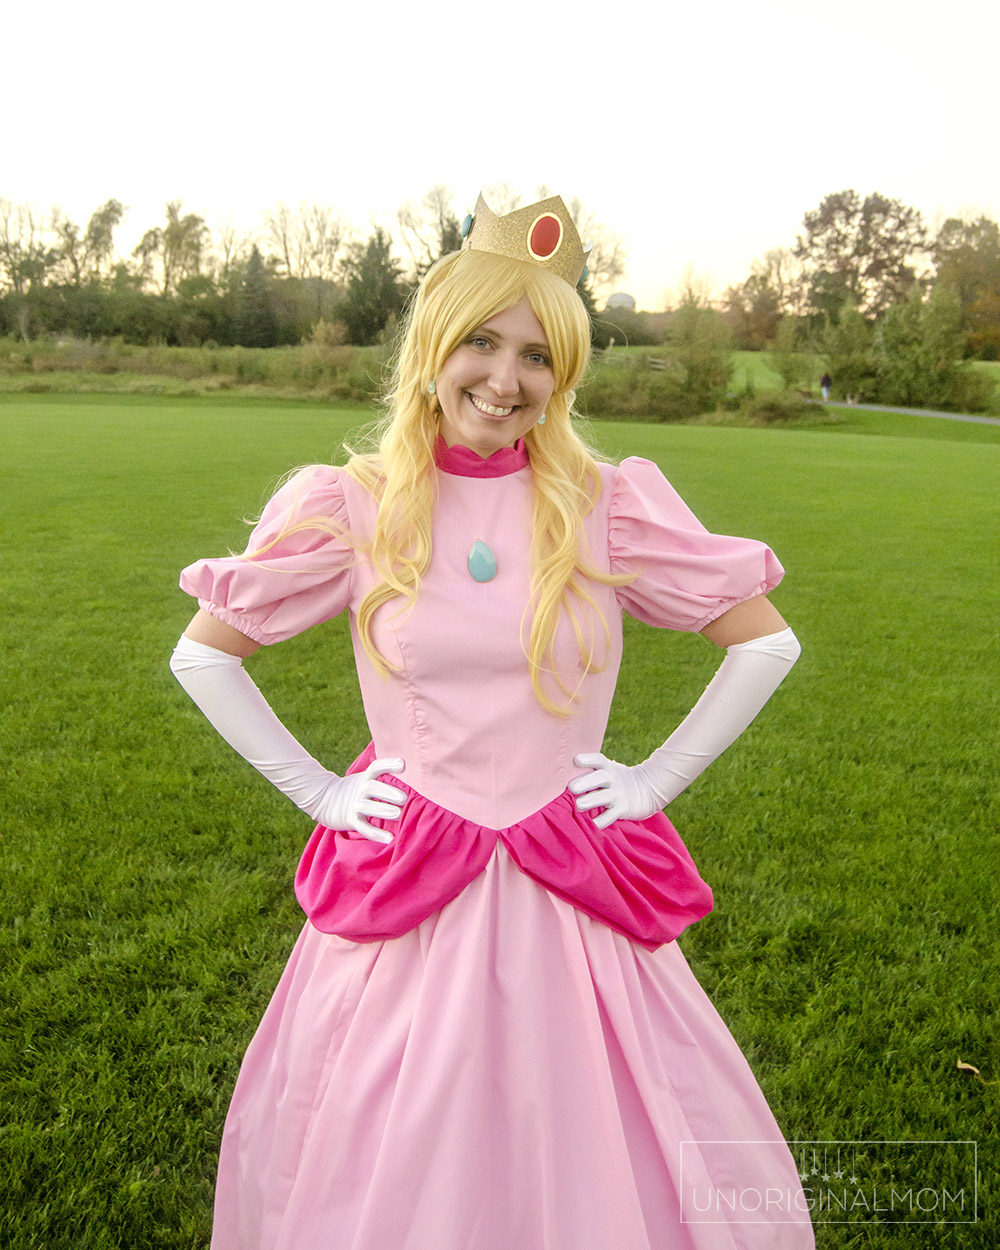
DIY Princess Peach Dress details:
- Dress – I used this pattern and stuck with two shades of pink cotton broadcloth instead of satin…I didn’t think my mediocre sewing skills could handle that. I went off the measurement guide on the pattern and made a size 14 dress – I’m normally a size 8 – so just be aware as you’re ordering dress patterns that sizing is not typical. (I didn’t realize that, and the pattern I bought was for sizes 6-14, so I’m glad I barely fit in it!) I also used the petticoat from my wedding dress underneath – I knew I’d been holding onto it for 11 years for a reason!
- Crown – There was a pattern for the crown in the dress pattern, so I used that to trace and cut out of gold glitter cardstock. The “gems” I made out of polymer clay and glued them onto the crown with hot glue.
- Brooch – I lucked out in the jewelry aisle at Michael’s and found this pendant! I just hot glued a bar pin on the back to turn it into a brooch.
- Wig and gloves – from Amazon. I got wig in the the “gold” color.
DIY MARIO QUESTION MARK BLOCK COSTUME
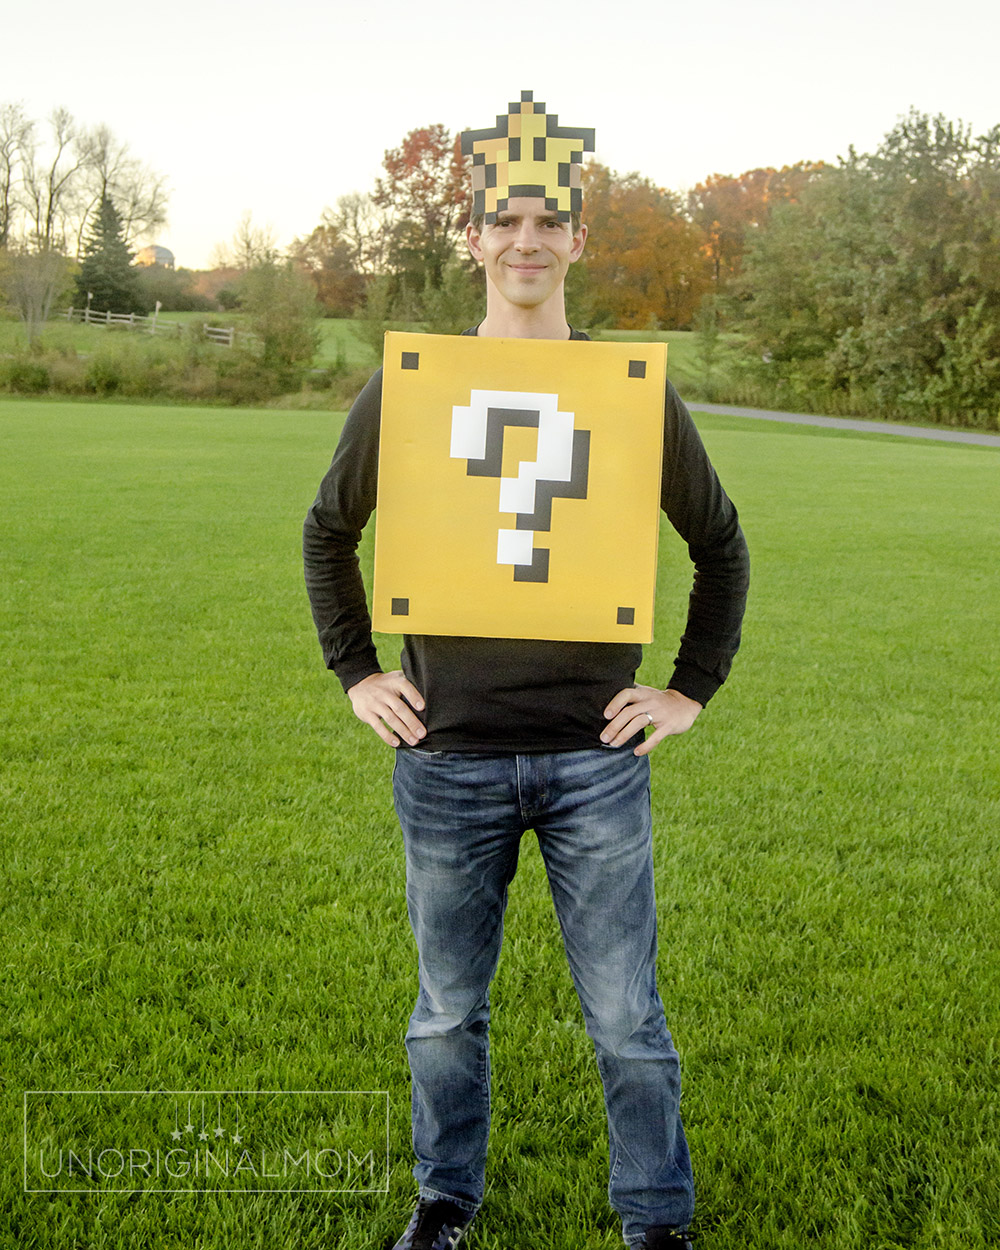
This was by far the easiest costume, but I think it’s so cool! We went for more of the classic Mario vibe with a pixelated look for the question mark. It’s just a box that my husband cut head and arm holes out of and spray painted yellow. Then I used my Silhouette to cut out the black and white card stock and glue it on. The star headband was a last minute addition – my daughter’s idea! Isn’t it fun? Again, it’s just card stock cut out with my Silhouette and glued together.
DIY FAMILY MARIO HALLOWEEN COSTUMES
Each piece by itself is really fun, but all together? It’s like a whole level up. Pun intended ;-)
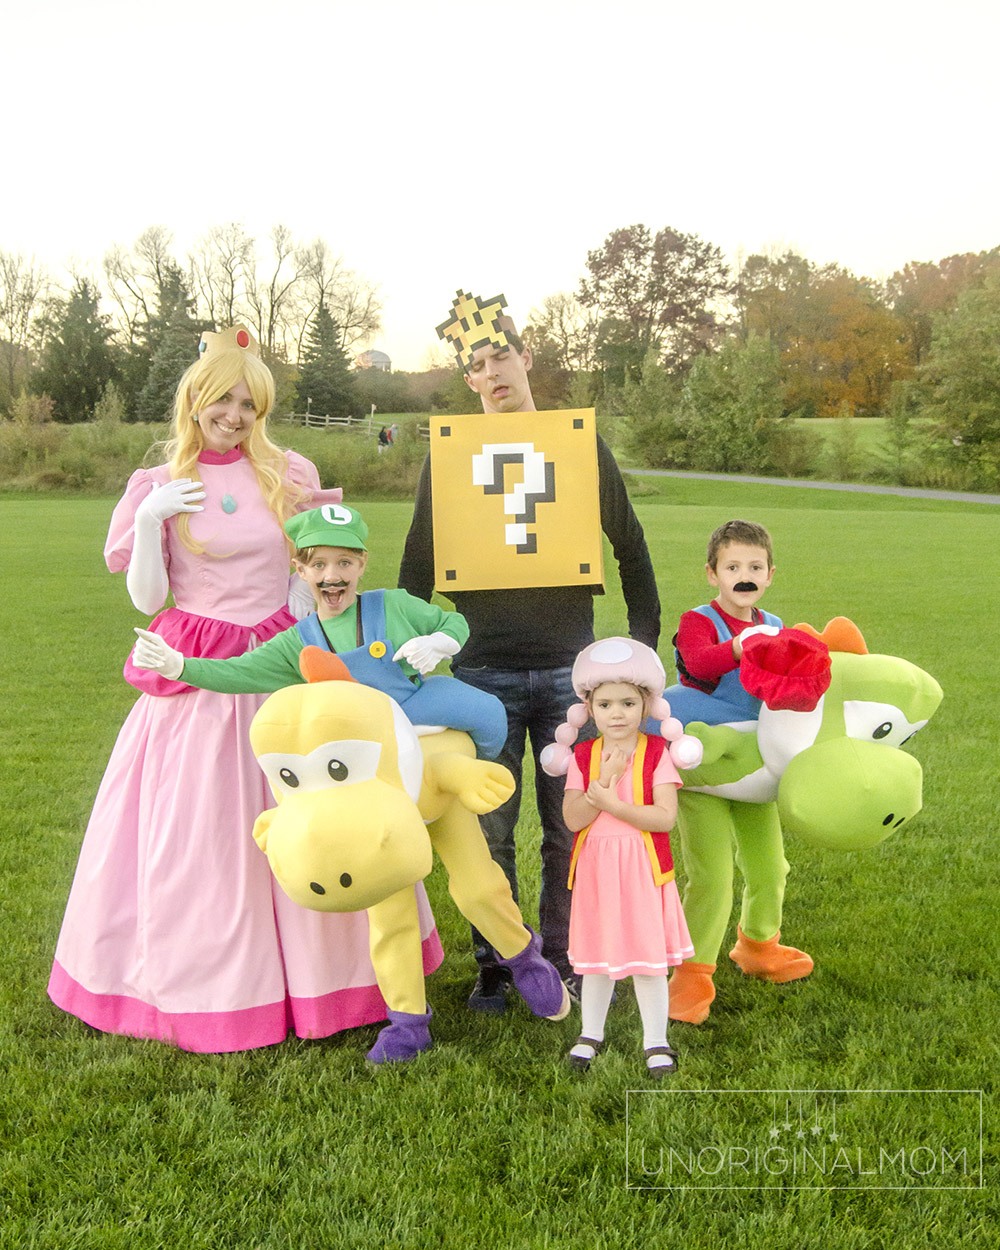
I keep telling the kids, this is it. This year is the peak. I don’t expect that we’ll ever be able to top these DIY family Mario Halloween costumes in scope and scale! I’ve instructed them that they are to remember this Halloween FOREVER. Ha. But really…these are the memories that childhood is made of. It was a ton of work, but now that we’re on the other side of it, so totally worth it.
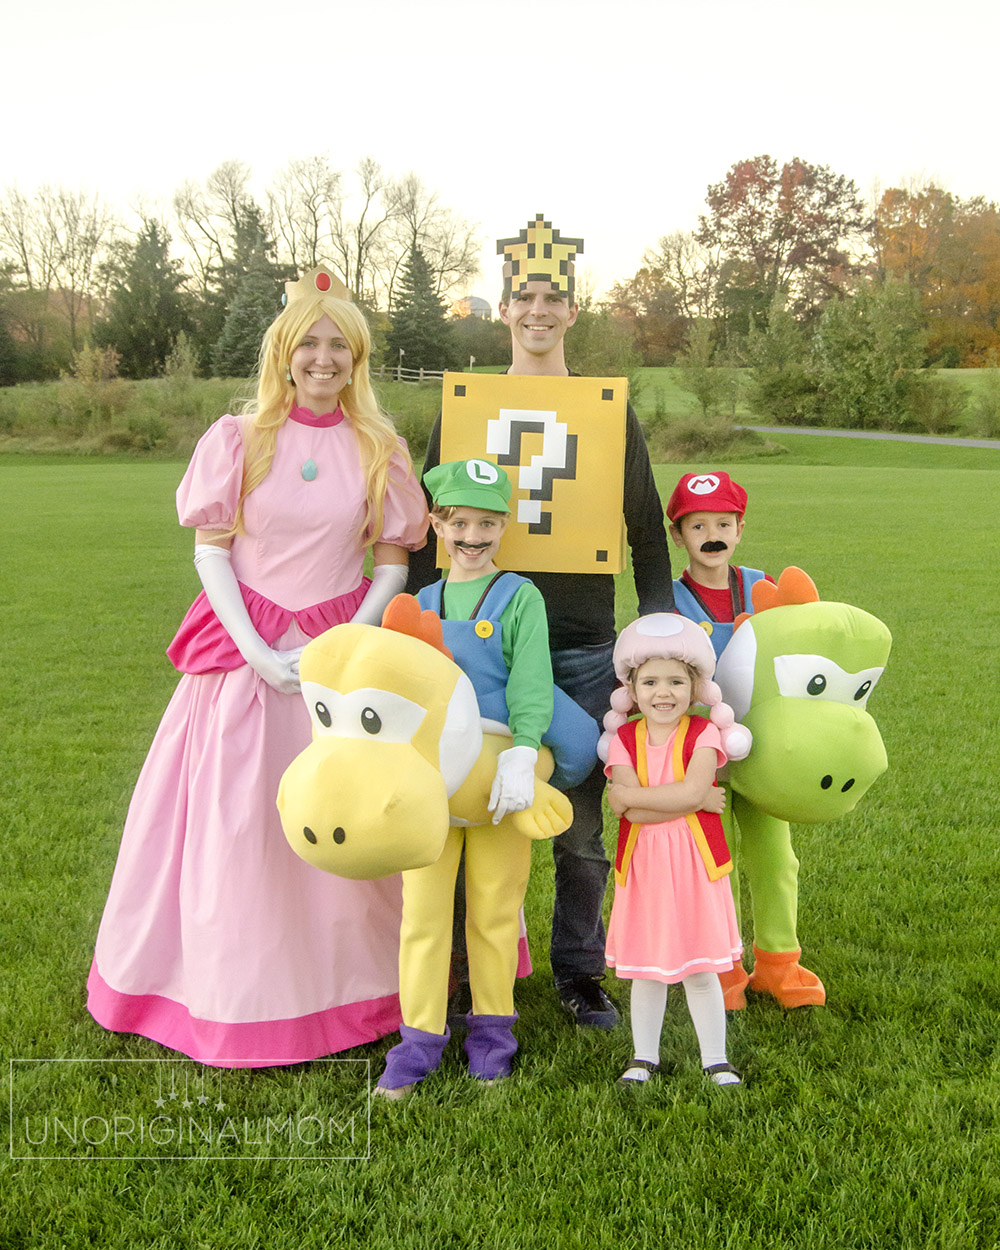
Happy Halloween, everyone!


Subscribe to unOriginal Mom via email and get instant access to my library of FREE Silhouette Studio & SVG cut files - exclusively for email subscribers. Plus there's a new file added every month!




Amazing costumes! Love them!
Thank you so much, Donna!
Fantastic job on the costumes!
Thank you! :-)
Love the costumes!! Great job mom!!
Thanks Liz!!!
Wonderful job! Hope you have fun trick or treating as a family.
Thank you, Diane! We had a great time :-)
yeah so you definitely need to stop calling yourself a “mediocre seamstress” now… hot dang!
Sooo cute! You did a great job!
Thanks Erika!! :-)
Great Job 👏you’re all looking absolutely fabulous 🥳
I don’t dare to show this to my family.. they could get some ideas 😆
Greetings from Cologne, Germany
These Halloween costumes are so cute. I love all of them!
Great costumes! Can you sell them to me?
Would you be willing to share the template for the question mark and star. Just because I am a kindergartener teacher doesn’t mean I am crafty!
Thanks
I used my Silhouette, so I have it as a digital cut file – if you have a Silhouette or Cricut, I’m pretty sure I still have it somewhere and I can share it for you to use! If you’re cutting by hand, I started by just sketching it on graph paper and then enlarged it to the dimensions I wanted it on the box.
Absolutely amazing!!!Any chance you’re looking to sell them?
Thanks! Sorry, they’re not for sale :-)
Oh my gosh, I love this great family costume idea. You all look so cute in your Mario Bros costumes!