Do you have a unicorn-obsessed little girl? This DIY Unicorn Hoodie Costume is easy to whip up, either with some really simple sewing or even hot glue! Add a rainbow tutu for some extra fun. Here’s a detailed, step-by-step tutorial on how to make your own DIY unicorn hoodie costume, for any age!
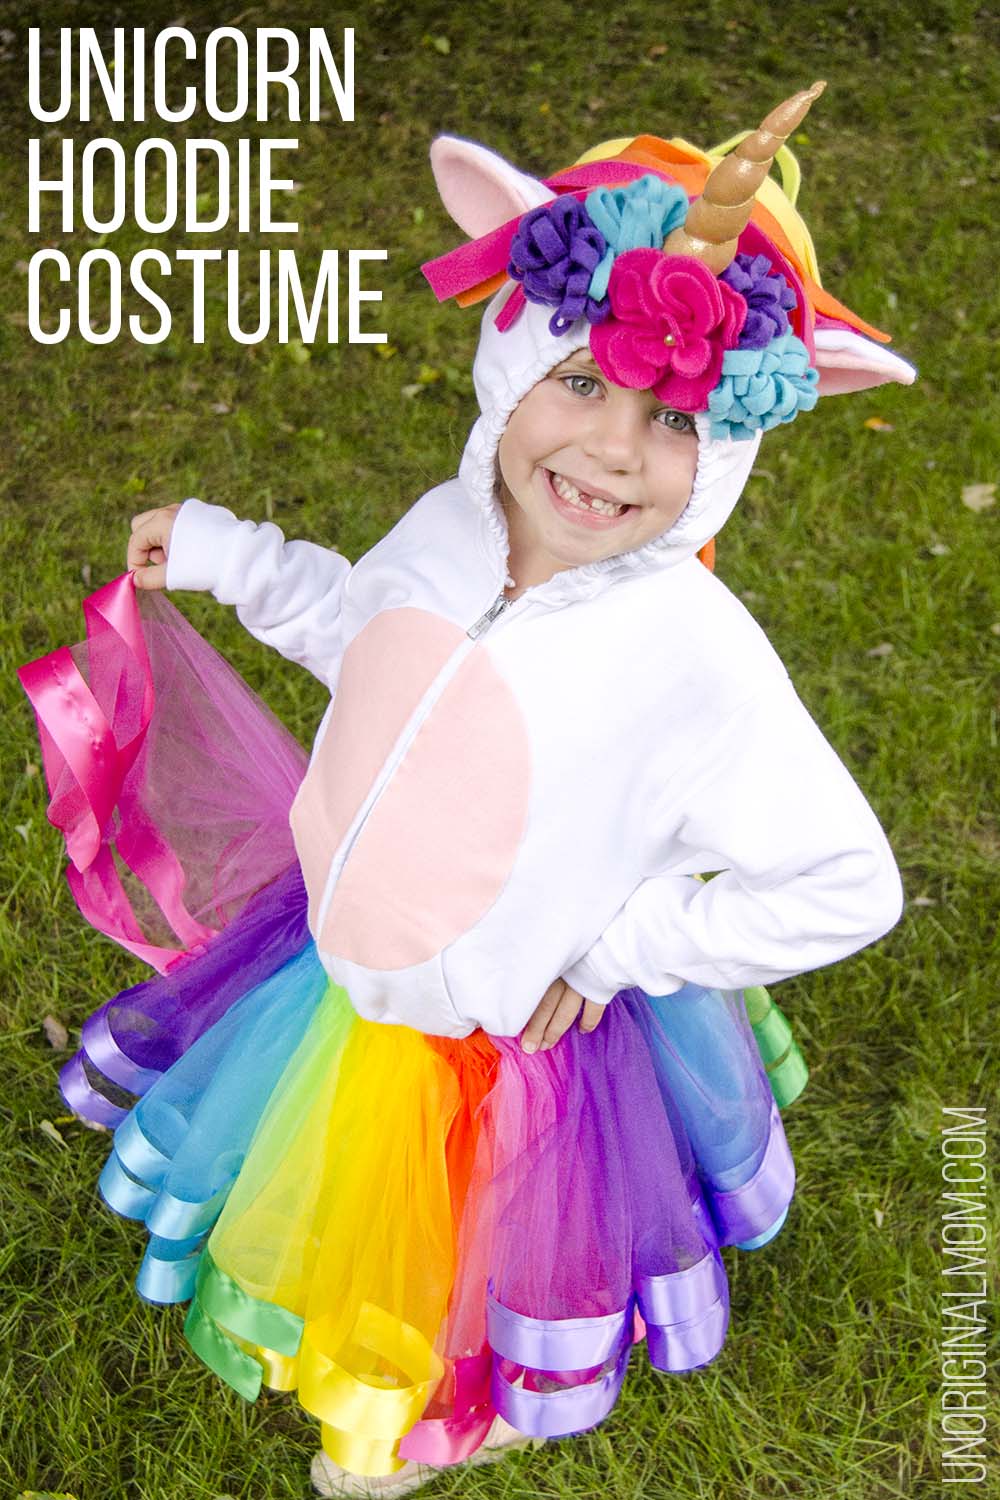
This is a new record, y’all. My kid’s Halloween costumes are DONE. (All THREE of them!!) And it’s September. Boom. Now, before you start singing my praises, you should know that my sole motivation was knowing this baby is going to be showing up sometime in early October, which means any chance of last-minute homemade Halloween costumes is pretty much zero. I knew if I was going to make costumes this year, I’d have to be working ahead…so I actually started working on them in July. (Yeah, even the ladies at JoAnn’s were impressed.)
It was hard to get my daughter to nail down exactly *what* she wanted to be for Halloween so far ahead of time, and there were several ideas she kept wavering between. Eventually, though, she decided on a unicorn…in no small part because of the promise of a rainbow tutu. I was happy about it, though, because I knew I’d be able to make a unicorn costume out of a white hoodie sweatshirt, which meant no sewing completely from scratch – that’s a big win for this mediocre sewer!
I browsed Pinterest for a few different unicorn costume ideas, but in the end my daughter decided she wanted a mix of pretty much every unicorn costume that we found – a rainbow mane and tail (made out of strips of fabric, not yarn), a sparkly gold horn with flowers around it, and of course that big poofy rainbow tutu to make it extra girly. So I sort of made it up as I went along. I think we succeeded in bringing her vision to reality, don’t you?
DIY UNICORN HOODIE COSTUME SUPPLIES:
*This post contains affiliate links – click here to read my full disclosure.*
- white hoodie
- white leggings
- less than 1/4 yd of stretchy gold fabric for the horn
- gold embroidery thread for the horn
- 1 sheet of white felt for the ears
- pink felt for the tummy and ears
- fleece in 6 different colors, 1/2 yd. of each (or you could use 3 colors and get 1 yd each, etc.)
- tulle in 6 different colors, 1 yd of each
- 1.5″ satin ribbon in coordinating colors, 2-3 yds of each (depends on the size of your skirt)
- thread in coordinating colors
- wide elastic for tutu waistband
- narrow elastic for hood
- OR – buy a ready-made rainbow tutu from Amazon here!
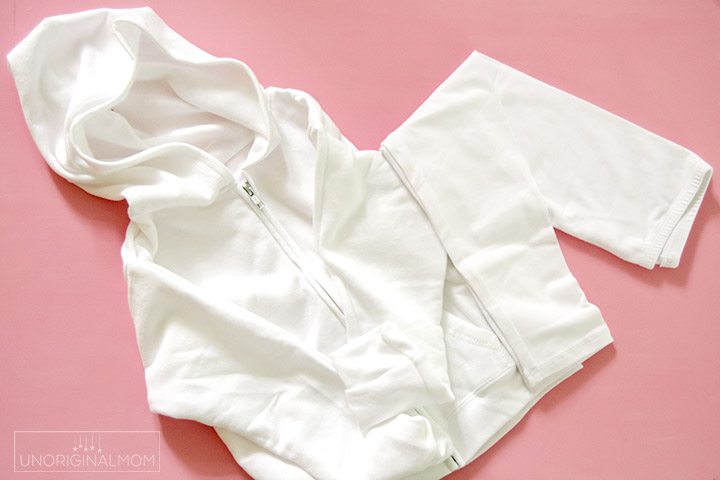
THE UNICORN HOODIE – MANE & TAIL
I saw several different versions of a DIY unicorn hoodie costume that used felt instead of fleece – if that’s what you want to use, go for it! You can still use this same technique. I really liked the softness of the fleece and how it had a little bit more flexibility and “flow” to it, which is why I went with fleece. Basic solid color fleece wasn’t too pricey, either.
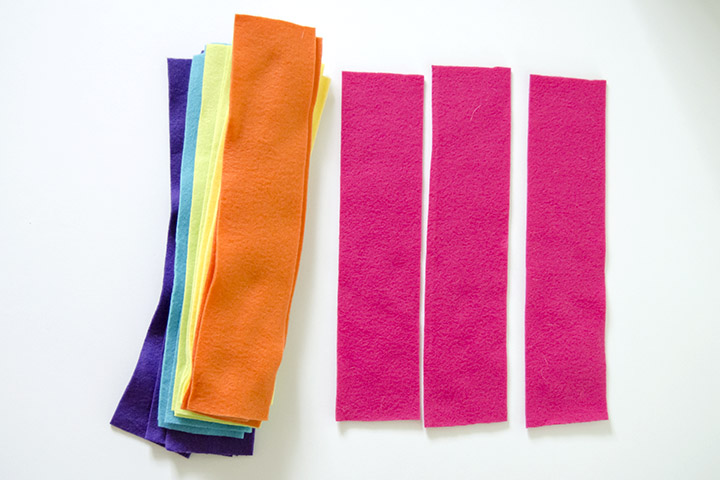
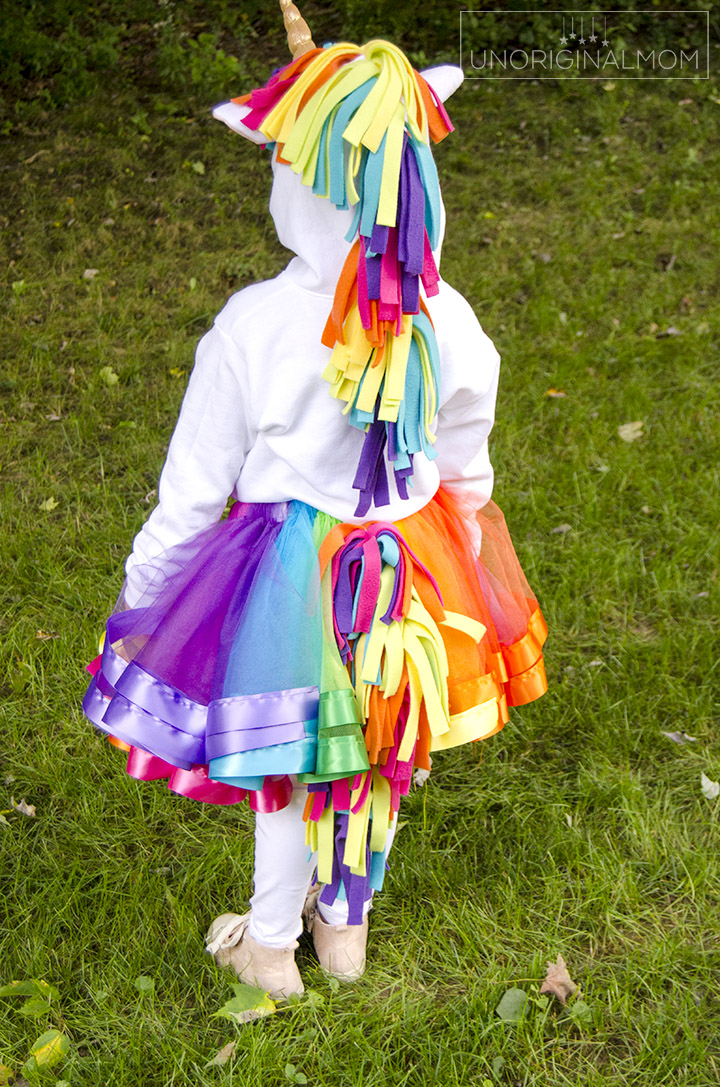
You’re basically doing the same thing for both the mane and the tail – cutting wide strips of fleece, arranging them together in a rainbow pattern, sewing together, and then trimming into skinnier strips. I started with wide strips measuring 14″ x 3″ – though I wasn’t too careful about my width measurements, since I gave them all a trim again with my rotary cutter once I had them lined up. I overlapped each strip by one inch, trimmed the edges, and then pinned them together. The length of both the mane and tail are up to you! To make sewing in a straight line a little bit easier (I need all the help I can get!), I actually used a fabric pencil to draw a straight line right down the middle of my pile.
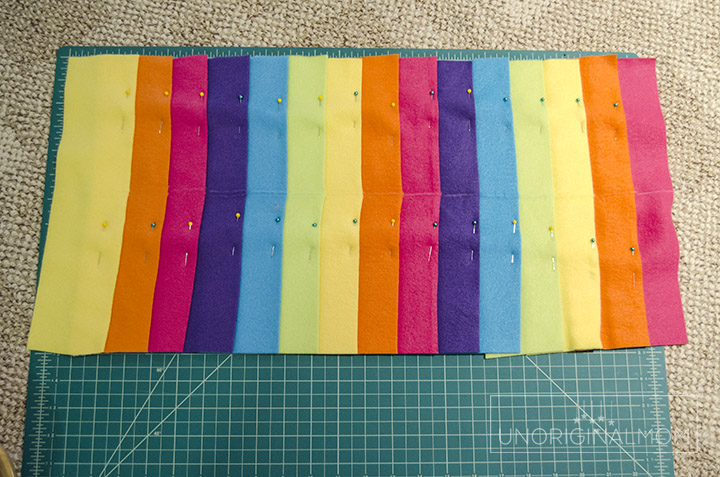
The next step (for both the mane and the tail – you’ll have to decide how long you want them both to be) is to sew the fabric strips together down that center line.
Now, for the mane – pin it onto the hoodie, matching up the seam of your mane with the seam of the hoodie, and continuing down to the shoulders. You can decide where to begin and end your mane – I started mine about 2 inches back from the top edge of the hood, and continued it down to about 5 inches below the shoulders.
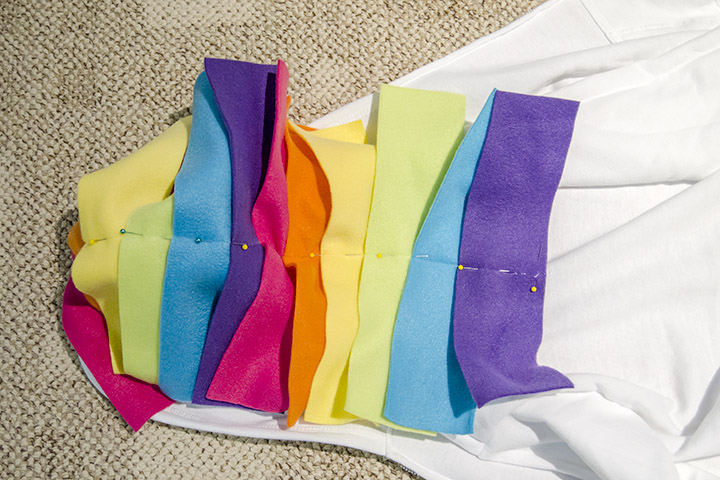
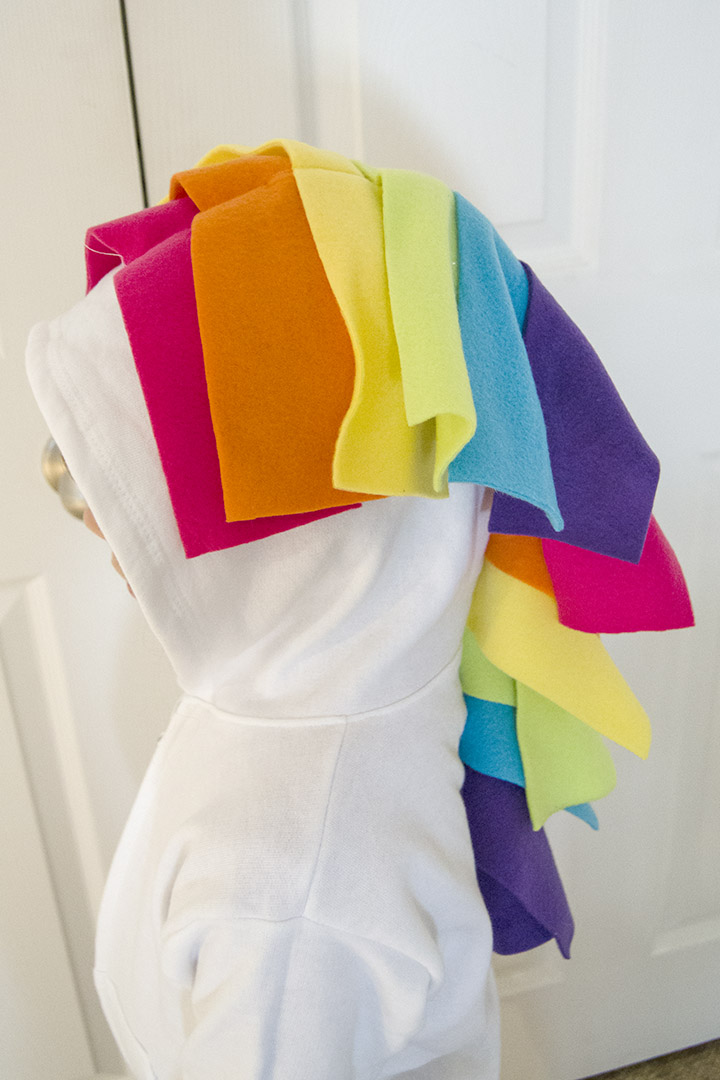
Once the mane is attached, cut your fleece into narrower strips – I cut each 3″ wide strip of fabric into fourths, so about .75″ strips. But you can do whatever you’d like! Just be careful not to snip into your seam.
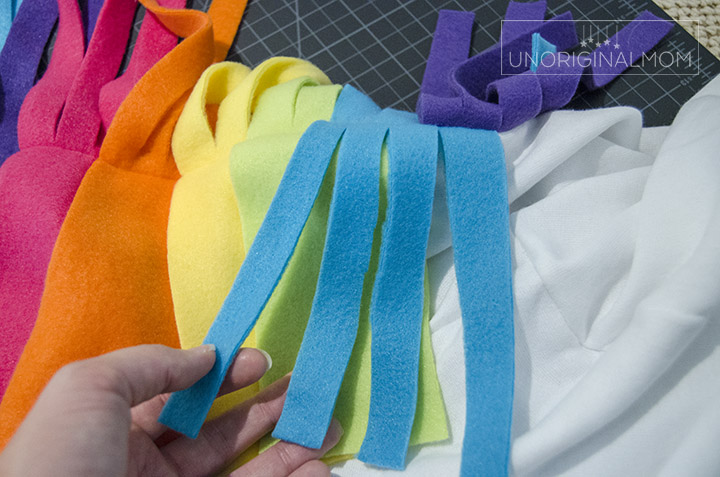
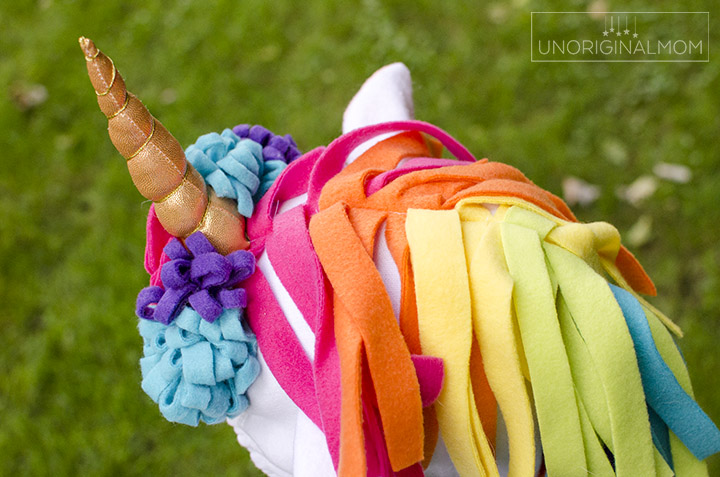
Now for the tail – go ahead and cut it into narrower strips, just like the mane. But, if you’re doing a tutu, it’s a good idea to wait to decide where to actually attach the tail until you can see where the tutu will land around the waist of your Unicorn. Then, just securely tack it onto the back of the hoodie.
THE UNICORN HOODIE – HORN, EARS & TUMMY
I found a great tutorial along with templates for the horn and ears at GYTC designs. Head over there to download and print the templates and follow her instructions for making and attaching the horn! One quick tip – I found it easier to actually hot glue the bottom of the horn shut BEFORE hand sewing it onto the hoodie, so I wasn’t fighting with the batting spilling out while I sewed it on.
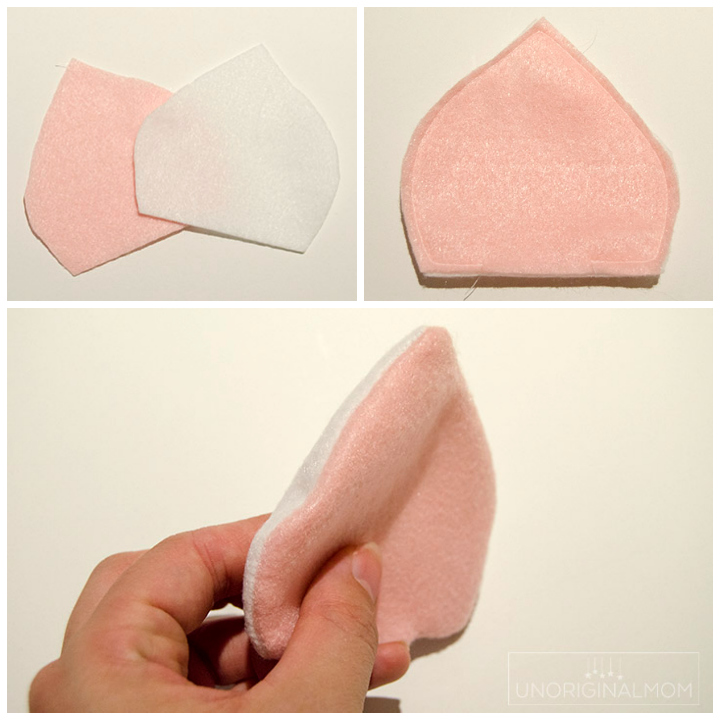
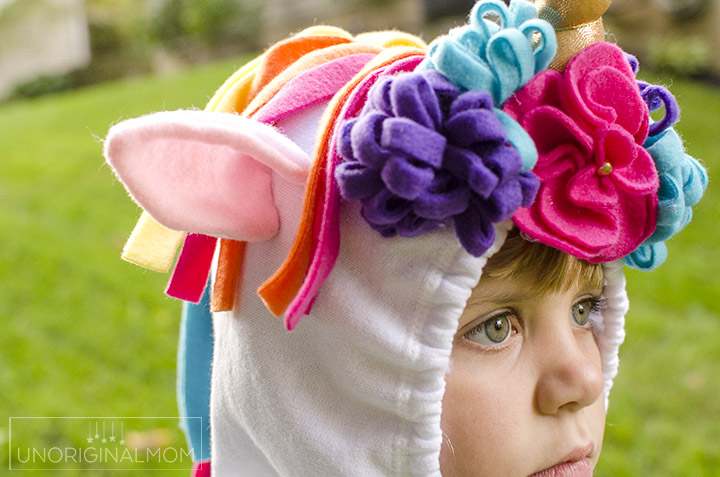
For the ears, I used her template…but I wanted a more finished look, so I cut one ear triangle out of white felt and one out of pink, sewed them together on the long sides and around the corners, and turned them inside out. Then I folded them at somewhere between a 45 and 90 degree angle to hand sew the bottom edge onto the hoodie.
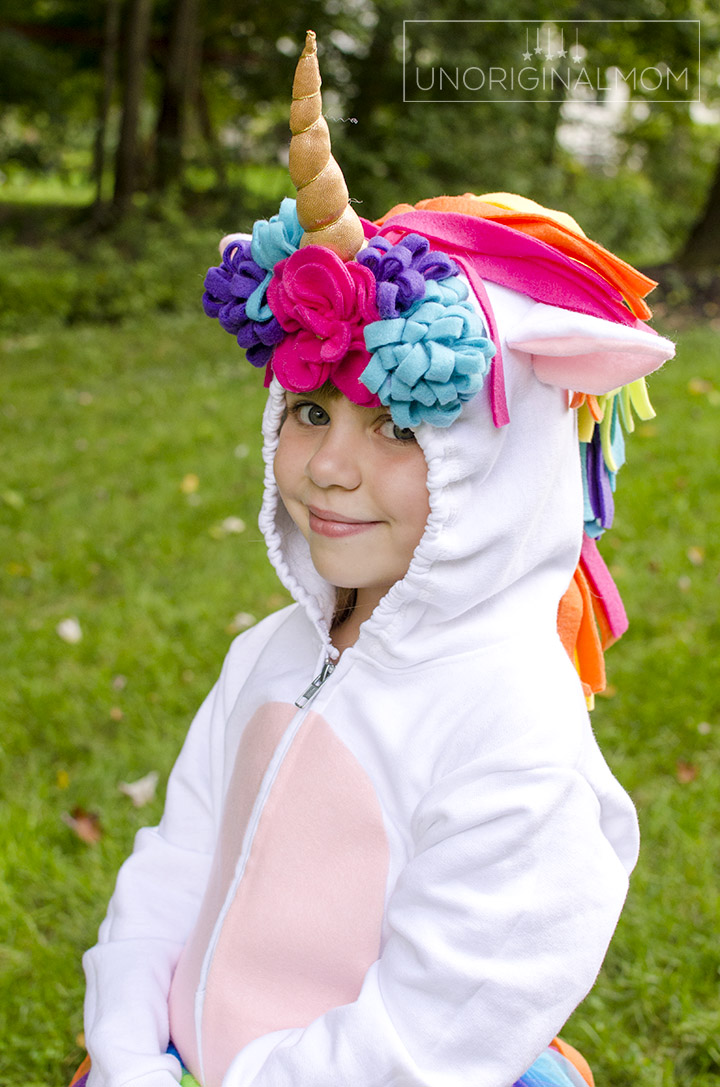
The tummy is really simple – cut an oval to fit on the front of the hoodie, cut it in half so it will fit on either side of the zipper (unless you’re using a pullover hoodie, in which case you can skip that step), and attach it to your hoodie! You could use hot glue, or even sew it on, but I used HeatnBond Ultra for a nice, smooth, permanent adhesion. If you do that, be careful you don’t melt your felt with the iron, though – I used a thin cloth overtop of the felt, lots of pressure, and lots of patience to get the HeatnBond to firmly and evenly adhere the felt to the hoodie.
THE UNICORN HOODIE – FLOWERS
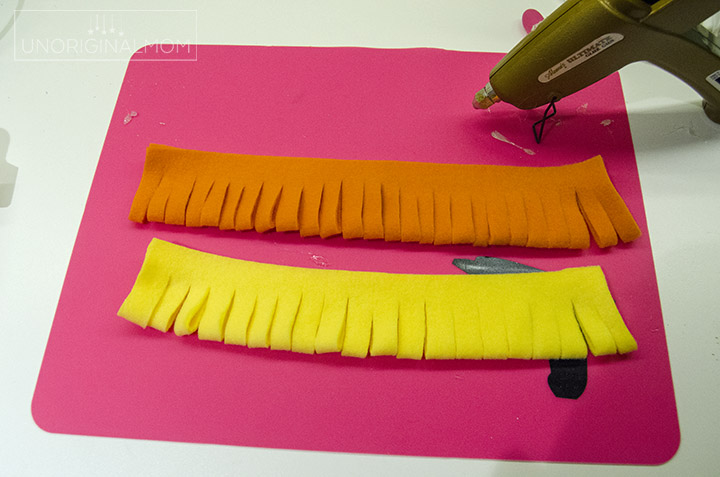
Of course, my girly girl wanted flowers around her horn, so I used some leftover scraps of fleece to make a few. The big pink one in the middle I made following this YouTube tutorial (I don’t have a die cutter so I just cut out the circles by hand – the sizes I used were 2″ circles, 1.5″ circles, and 1″ circles). The other flowers are just a simple fringe flower – fold over a strip of fabric, hot glue it together on the ends, and cut slits on the folded side. Then just roll it up, using hot glue as you go.
I made a few different sizes and colors of fringe flowers and played around with what fit together best before hand sewing them onto the hoodie around the horn. (You could just hot glue them if you’d rather.)
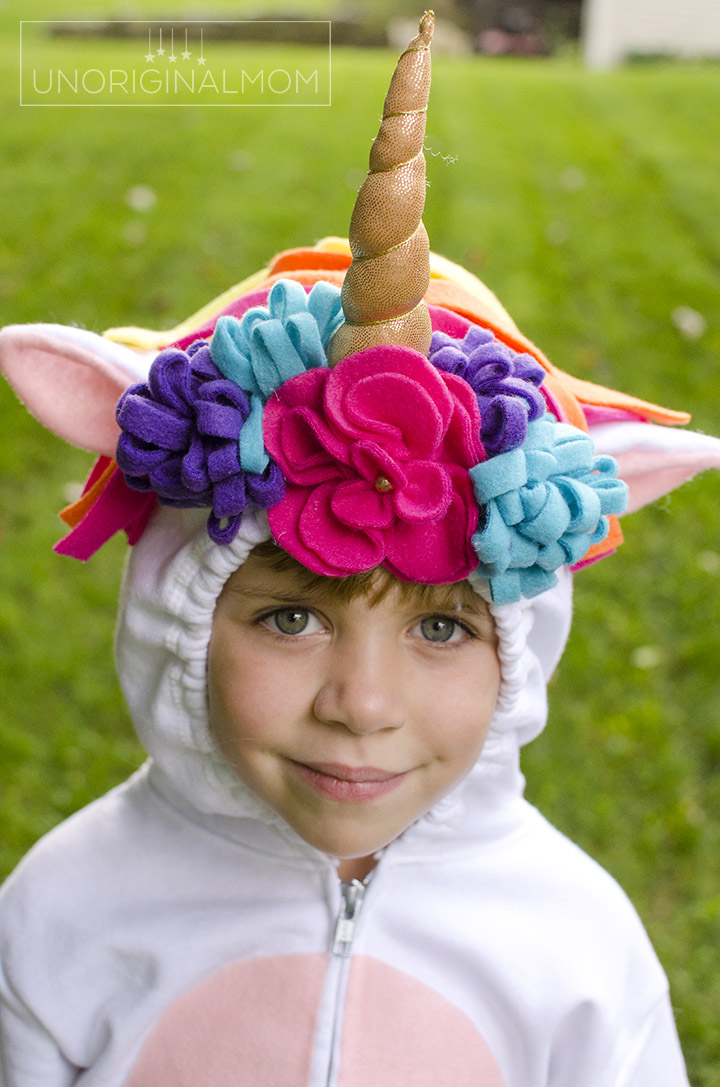
Oh, and while I was attaching the flowers I realized that the hood wasn’t staying up on her head very well because of the weight of the horn and the flowers, so I added some elastic around the edge of the hood. It was really simple – I just snipped into the into the “hood hem” at the base of the hood on both sides, threaded some elastic through, pulled it tight enough that the hood stayed up on her head, and then tacked down the elastic on both ends. Easy peasy. And it worked well! The hood doesn’t slide off her head at all.
Now, this costume would actually be very complete WITHOUT a tutu! You’ve got a horn, flowers, mane, and tail just on the hoodie. Pair it with some white pants or leggings, and you’re good to go!
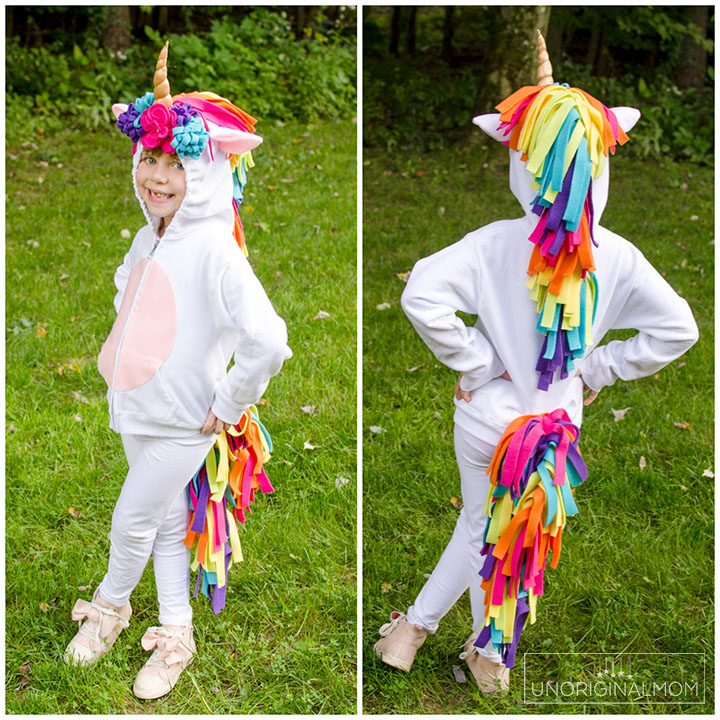
But if you want some extra poof and girly-ness, adding a tutu is the way to do it!
THE RAINBOW TUTU
This was the most labor intensive part of the process…everything with the hoodie went fairly quickly, but working with the tulle was not very fun! Probably because I don’t have much experience with it, but still – I was glad to get the rainbow tutu finished. There are a GAZILLION tutu tutorials out there (and several no-sew options), so depending on how picky your Unicorn gal is, you can certainly choose to do something simpler!
I am definitely NOT qualified to walk you through a detailed tutu making tutorial, so I’ll just point you here to this YouTube video tutorial I followed.
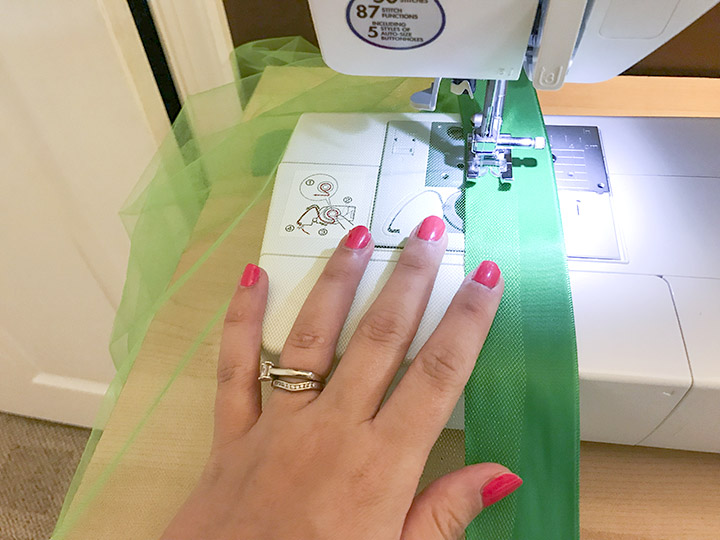
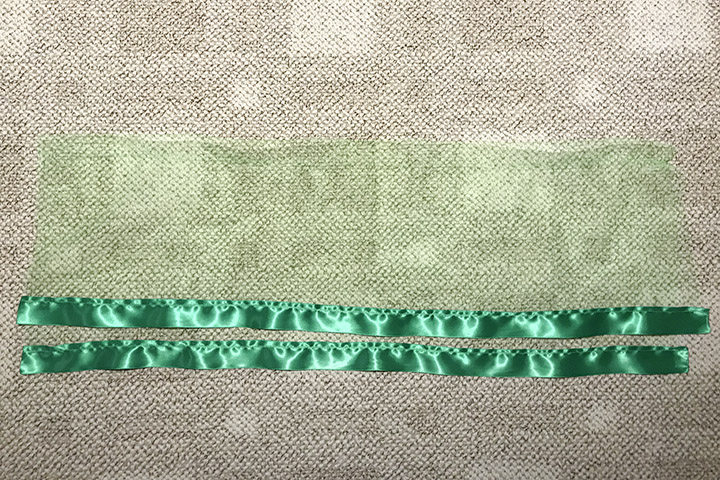
My tulle rectangles measured 23″ tall x 36″ wide – but that will depend on the length and width you want your skirt to be. (For reference, this skirt is 13″ long and 22″ around – my daughter is wears a size 6.) Basically, you’re cutting two rectangles of every color, folding them in half just offset enough so the ribbons lay next to each other instead of on top of each other, sewing on your ribbon, and then sewing a channel at the fold wide enough to fit your elastic through. (I used a lighter to melt my ribbon on either end so it didn’t fray.)
My cuts and seams aren’t all straight, but luckily you can’t tell in the slightest! Tutus are very forgiving. And I have one happy little Unicorn.
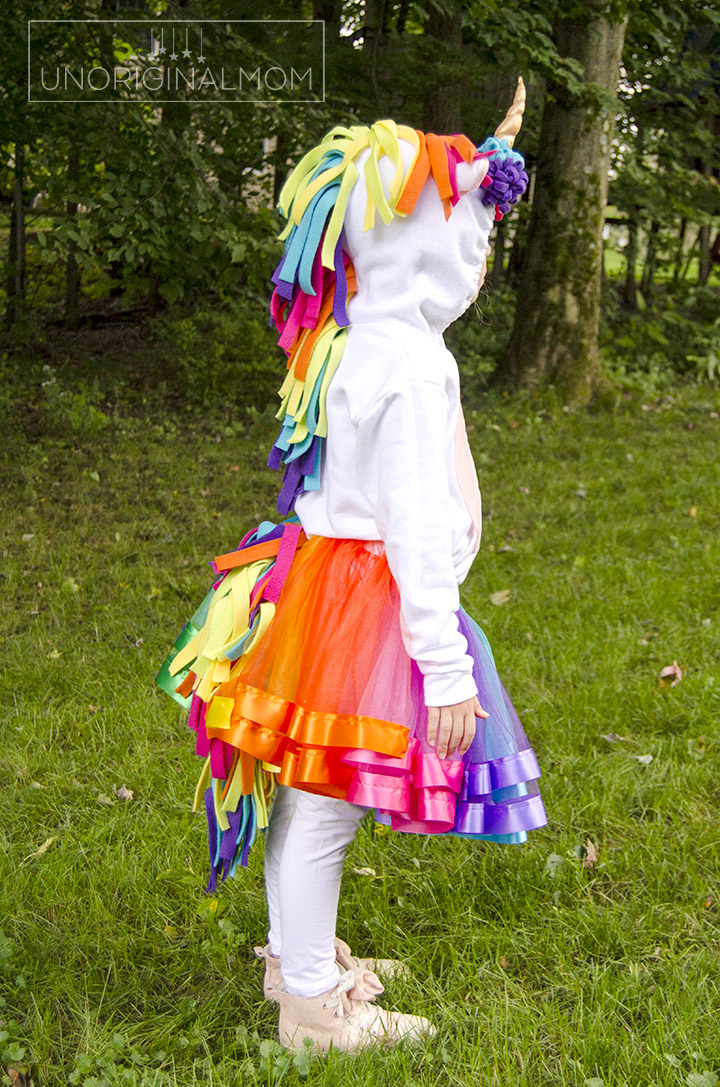
Doesn’t she look adorable?? I love how practical this DIY Unicorn Hoodie costume is, too – it will be easy to layer up underneath the sweatshirt for trick-or-treat night. And since she has some room to grow into the hoodie, I’m hopeful that this will have some dress-up potential for a long time!
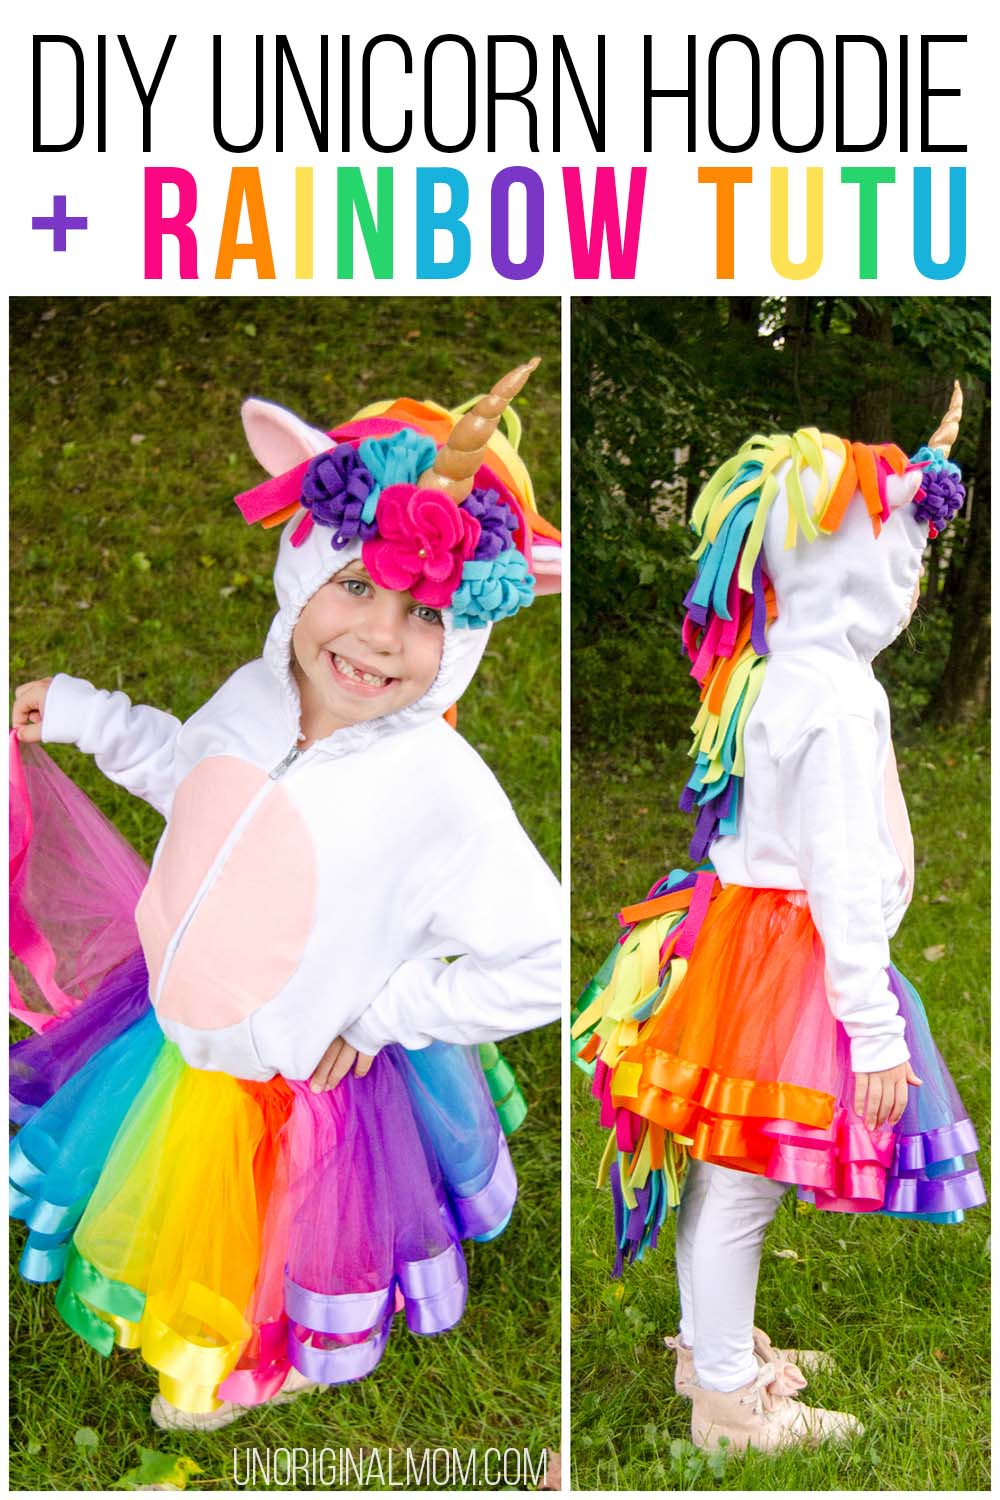
Take a walk down memory lane with me to browse through all of my daughter’s DIY Halloween Costumes!
Age 1 – Little Black Cat
Age 2 – Toddler Tinkerbell
Age 3 – The Perfect Minnie Mouse Dress
Age 4 – Little Mermaid + Flounder Costumes
Age 5 – Elena of Avalor
Age 6 – Unicorn Hoodie + Rainbow Tutu
MORE ADORABLE HALLOWEEN COSTUMES FOR GIRLS:
Here are some great ideas and tutorial from some of my blogging friends!
No Sew Fairy Costume – Sugar Bee Crafts
Peacock Tutu – Life Sew Savory
Homemade Witch Costume – Sew Simple Home
Scrappy Unicorn Costume – Twin Dragonfly Designs
Shopkins Shoppie Costume – Made by a Princess Parties
No-Sew Captain Marvel – Tried & True
Lego Friends Outfits – Simple Practical Beautiful
Cupcake Baker Costume – Design Dazzle
Scaredy Cat Costume – Polka Dot Chair
Happy Halloween-Costume-making to you, crafty friends!


Get your copy of my FREE meal planning binder!

Sign up to get a free copy of my meal planning system - an 11 page printable meal planning binder, complete with a pantry inventory, shopping list, and more to help get on top of your menu each week!





Bravo! You rock!
Thanks, Stacy! :-)
Would you say the hoodie is a beginner project? Or more advanced?
I think it’s a beginner project! The hardest part (sewing wise) was attaching the mane to the hoodie and getting it on straight with no wrinkles…but you could easily just hot glue it on instead of sewing.
Wow- You are seriously Mom of the year! It turned out magnificent!
I don’t know about that, haha. But thanks, Robin!! :-)
[…] Unicorn, Lego Friends, Cupcake Baker, Cat Costume, Greek Goddess, Owlette Mask, Toddler Tutu, Unicorn Hoodie, […]
[…] DIY owlette and cat boy masks DIY octopus costume No-sew fairy costume How to make a tutu skirt Unicorn hoodie costume Peacock tutu skirt Scrappy unicorn […]
Did you wash the mane and tail fleece first? How do you wash the outfit without the colors bleeding onto the white hoodie?
I didn’t wash the fleece since I wasn’t interested in making the costume washable, but if you’re concerned about being able to wash it after you make it then I’d definitely prewash the hoodie and fleece before you start sewing.
With the tail, can you go into how you attached it? I don’t see pix and I’m trying to make this for my kiddo! Thanks
I just tacked it onto the bottom of the hoodie with a few stitches, nothing fancy!
[…] Image Source/Tutorial: Unoriginal Mom […]
[…] unoriginalmom […]