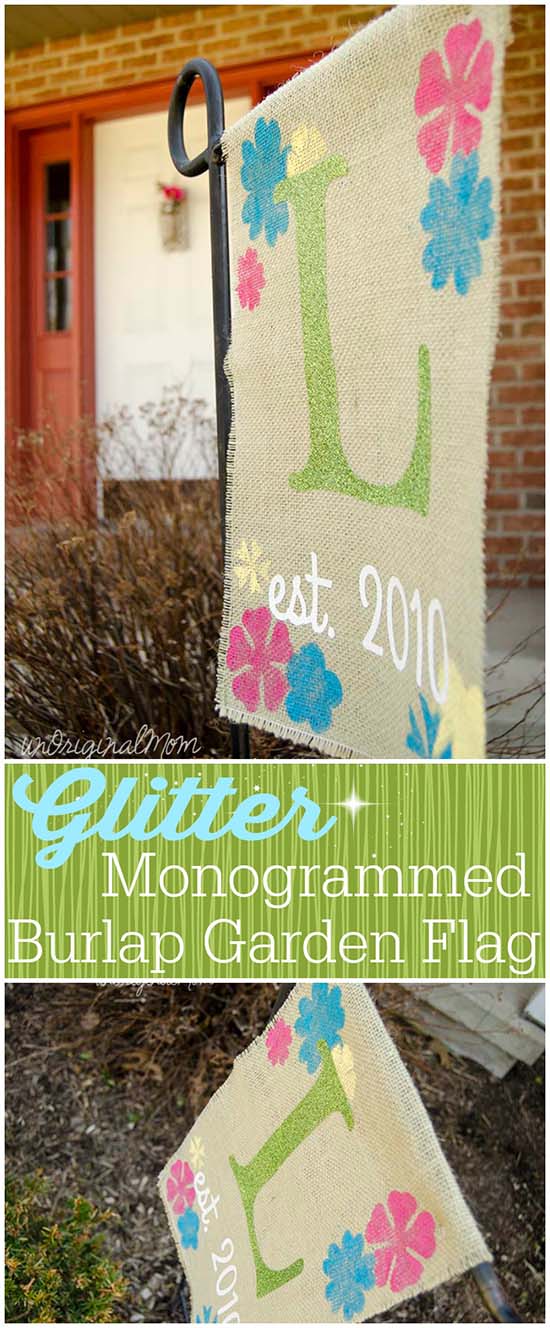
Happy Spring, y’all! We had two incredibly beautiful spring days in a row this weekend, and I think it’s safe to say spring time has finally arrived in central Pennsylvania! We even had people over for a cookout to “christen” our deck and backyard…the first time we’ve been able to use it since we moved in 4 months ago. I have a feeling we will be spending a lot of time out there in the coming months!
So, inspired by the tulips and hyacinths sprouting up in our front yard, I whipped up a little spring burlap garden flag this week with the help of my Silhouette!
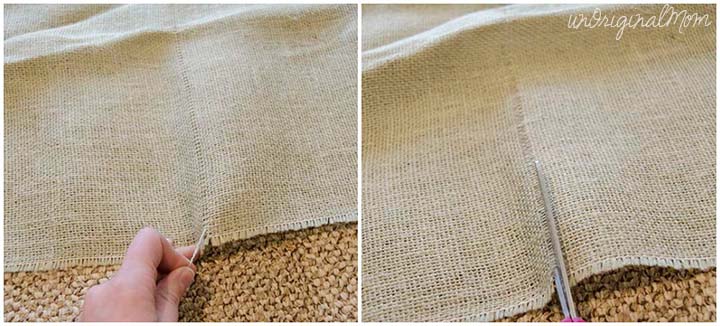
The first step was to cut the burlap to size – I made mine 10″x 15″ to fit our garden flag stand. Do you know the trick to cutting burlap so it doesn’t fray? Pull out one of the burlap strands where you want the cut – you’ll be able to see the “hole” of the missing strand and cut along it. That will give you a nice straight line with no fraying.
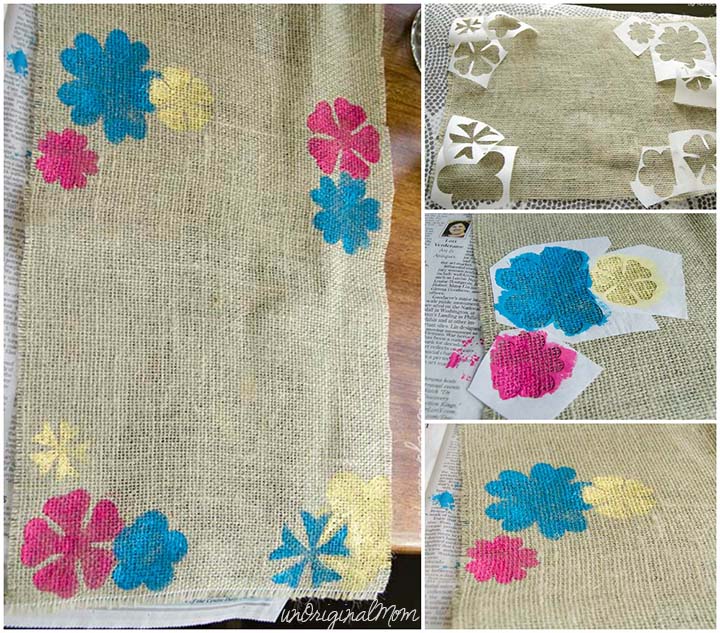
I decided to use freezer paper stencils to paint some flowers on the burlap. (You can find a great step-by-step tutorial on freezer paper stencils along over at The Thinking Closet!) I cut out a variety of flowers in different sizes, ironed them on, and painted them. Since I wanted a few of the flowers to be overlapping, I had to freehand some of the painting around the edges after I peeled up the stencils…that was a bit tedious. If I had to do it again, I’d probably paint one whole flower, let it dry and peel of the stencil, then apply another flower stencil and paint over top of the first one. Ah well…next time!
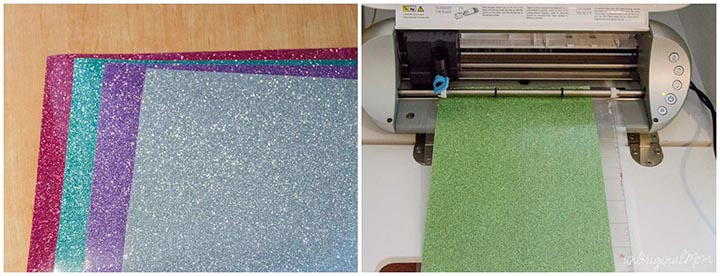
At first I had planned to paint everything on the flag…but then I remembered the glitter heat transfer vinyl I had ordered from Expressions Vinyl! I really love the look of rustic glam…and putting some glitter HTV on a burlap garden flag would be a fun bit of unexpected glitz! I decided to go with green glitter HTV for the monogram, and regular white HTV for the “est. 2010” text. (And this isn’t the first time I’ve tried a glitter monogram project, either!)
After laying out the HTV where I wanted it on the flag, I ironed it on. The trick to ironing HTV is keeping your iron in one place while applying pressure for about 20 seconds or so, letting it cool for about 30 seconds, then repeating until it is fully adhered. I had no trouble getting it to stick to the burlap!
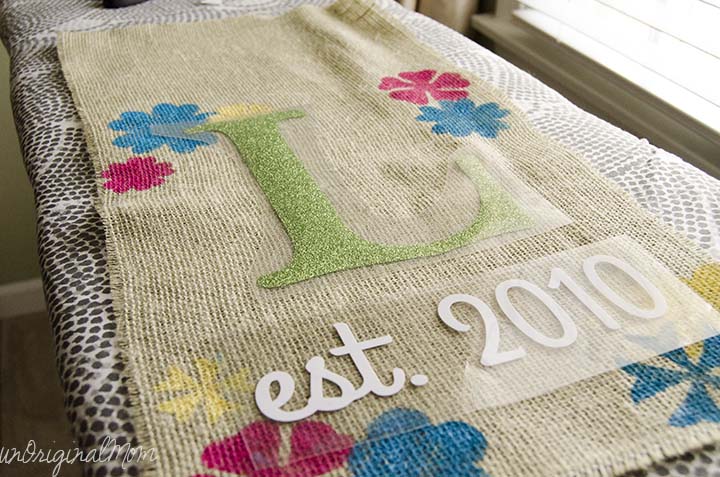
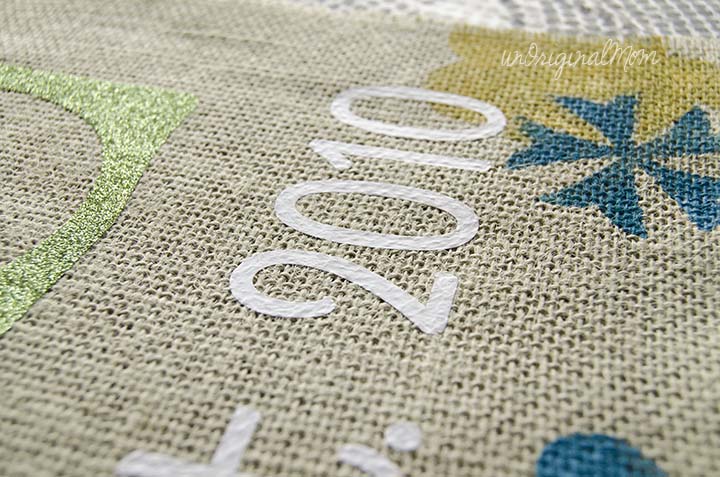
You can see that the texture of the burlap is visible through the regular HTV, but the glitter HTV is much thicker so it doesn’t show through. It works fine for my garden flag, but might not be the look you’re going for on particular projects…so just keep that in mind when trying out HTV on burlap!
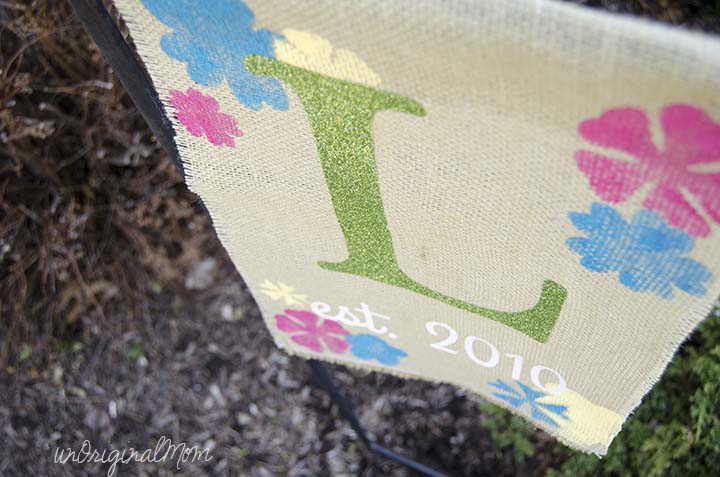
I folded over the top edge of the burlap and hot glued it to create a sleeve that would slide onto the garden flag holder. It was hard to photograph…but it looks SO great in the sun! With the colorful flowers and the glitter monogram, this flag is cheerful and welcoming!
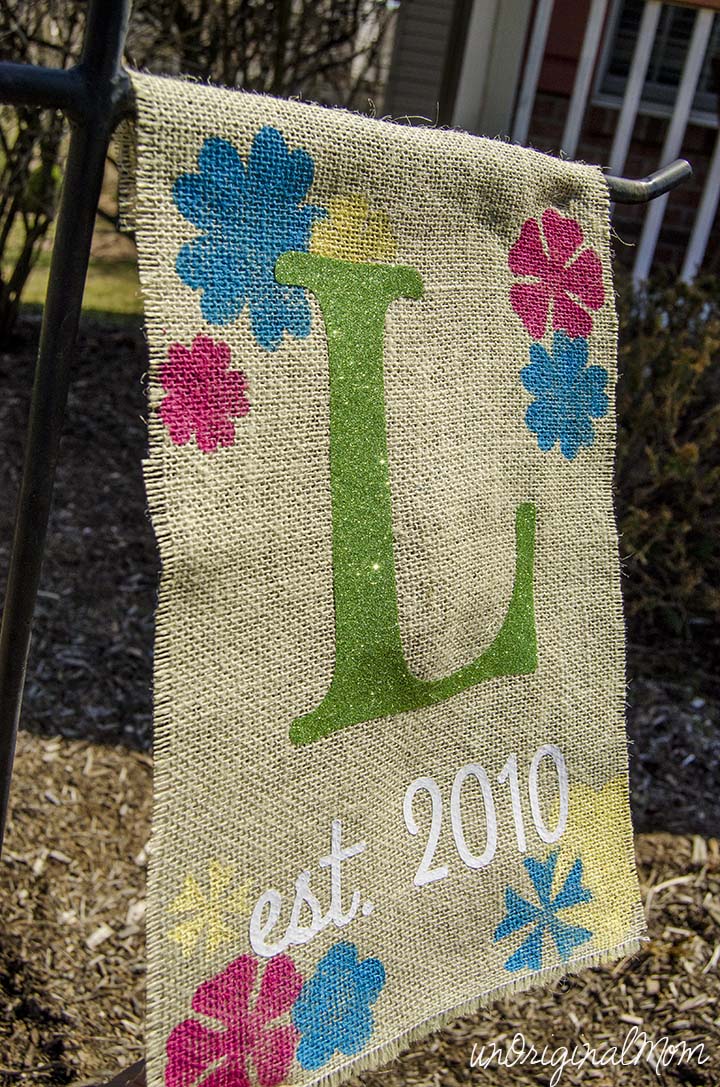
I am so excited about how the heat transfer vinyl worked on burlap – it looks great! And what possibilities…I don’t think this is the last time you’ll see a burlap and vinyl project from me!
Aaaaand that’s NOT all, folks – the inspiration doesn’t stop here! A bunch of my buddies from the Silhouette Challenge Facebook Group are all sharing spring silhouette projects on their blogs today. Click through for some great project ideas, or pin it to come back and browse later!
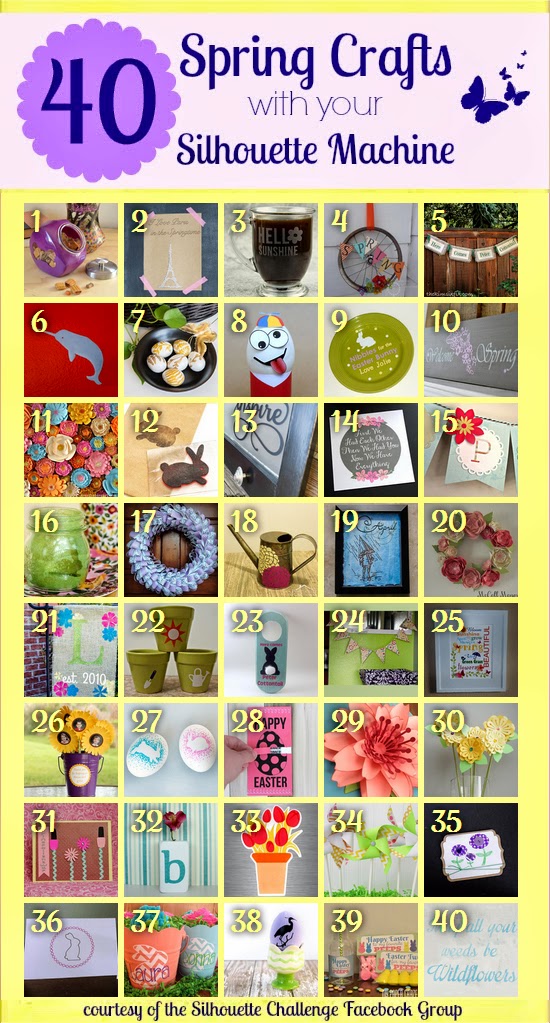
1. Dream a Little Bigger // 2. So Much Better With Age // 3. Adventures in All Things Food // 4. Creative Carnival // 5. The Kim Six Fix // 6. feto soap // 7. One Dog Woof // 8. The Experimental Home // 9. From Wine to Whine // 10. Architecture of a Mom // 11. Grey Luster Girl // 12. Minted Strawberry // 13. Designed Decor // 14. Tried & True // 15. Silhouette School // 16. Bringing Creativity 2 Life // 17. Weekend Craft // 18. Practically Functional // 19. Please Excuse My Craftermath… // 20. McCall Manor // 21. unOriginal Mom // 22. Creative Ramblings // 23. A Tossed Salad Life // 24. A Glimpse Into Barb’s Life // 25. Kate’s Paper Creations // 26. Simply Kelly Designs // 27. Cutesy Crafts // 28. Persia Lou // 29. Whats Next Ma // 30. Two Purple Couches // 31. The Frill of Life // 32. Nearly Handmade // 33. Get Silvered // 34. Ginger Snap Crafts // 35. Life After Laundry // 36. The Sensory Emporium // 37. Monograms & Cake // 38. The Thinking Closet // 39. My Paper Craze // 40. Chicken Scratch NY
What’s on your spring “to-craft” list? Maybe something rustically glamorous with burlap and glitter? ;-)
Disclosure: I was not compensated for this post, but I did receive product from Expressions Vinyl to complete this project in exchange for an honest review. As always, all opinions are 100% my own!


Subscribe to unOriginal Mom via email and get instant access to my library of FREE Silhouette Studio & SVG cut files - exclusively for email subscribers. Plus there's a new file added every month!





[…] // 18. Practically Functional // 19. Please Excuse My Craftermath… // 20. McCall Manor // 21. unOriginal Mom // 22. Creative Ramblings // 23. A Tossed Salad Life // 24. A Glimpse Into Barb’s Life // 25. […]
Darling…Love the sparkle! In a house of boys, I can never get enough glitter. Have a great week!
~Ariean
Thanks Ariean! And oh yes, there is no such thing as enough glitter! Especially amongst boys, I’d imagine ;-)
So cute and great tutorial! I have to try it ;)
Hugs,
Jamie
Thanks so much Jamie! If you do give it a try, be sure to come back and tell me, I’d love to see it!
I had no idea that you could put HTV on burlap! I need to try this…now! I have the perfect place to put it…Thanks for the inspiration.
Yes, I didn’t know that either until I tried it! It opens up a whole new world of possibilities, doesn’t it?? If you make one of your own, be sure to come back and tell me, I’d love to see it!
That glitter HTV! I need some. I want some! So happy I have an expressions Vinyl Gift Card.
I still can’t get over the finished look of this project, Meredith. It’s outstanding! And you’ve definitely inspired me to give glitter HTV a try. Also, thanks for the link love to my freezer paper stenciling. I love getting others hooked on that medium…lol.
Aw, thanks Lauren! I honestly wasn’t expecting it to turn out as nicely as it did, so I was pleasantly surprised with the end result. I love the glitter HTV, this was my first project with it, and for sure won’t be my last! And you are the queen of freezer paper stenciling, so of course I had to link to the master! Love all your tutorials and tips on that, I look them up to remind myself every time I use it!
[…] // 18. Practically Functional // 19. Please Excuse My Craftermath… // 20. McCall Manor // 21. unOriginal Mom // 22. Creative Ramblings // 23. A Tossed Salad Life // 24. A Glimpse Into Barb’s Life // 25. […]
I don’t do much with fabric. This is a really cute idea though. Might have to stretch my imagination a bit and do more with fabric. Hope you’ll check out my contribution to the challenge at
http://www.katespapercreations.com/2014/04/spring-has-sprung-subway-art.html
I don’t do much with fabric either, Kate…I don’t even really classify burlap as fabric in my brain, haha, since to me it’s more of a crafting medium, especially since you don’t have to sew it – win! It’s really easy to paint on or apply HTV! And your subway art is beautiful!!
I love how cheerful and colorful this is! What a fun accent to add to your garden! I am a huge fan of anything glitter, so naturally, this project is going on my to-do list ;)
Thanks Emily! It does add a fun touch of color and sparkle to our front walk :-)
[…] // 18. Practically Functional // 19. Please Excuse My Craftermath… // 20. McCall Manor // 21. unOriginal Mom // 22. Creative Ramblings // 23. A Tossed Salad Life // 24. A Glimpse Into Barb’s Life // 25. […]
Fabulous Banner. The glitter is a great touch too, a great contrast against the burlap.
[…] // 18. Practically Functional // 19. Please Excuse My Craftermath… // 20. McCall Manor // 21. unOriginal Mom // 22. Creative Ramblings // 23. A Tossed Salad Life // 24. A Glimpse Into Barb’s Life // 25. […]
[…] // 18. Practically Functional // 19. Please Excuse My Craftermath… // 20. McCall Manor // 21. unOriginal Mom // 22. Creative Ramblings // 23. A Tossed Salad Life // 24. A Glimpse Into Barb’s Life // 25. […]
Love the glitter monogram! It makes a wonderful garden flag, and I can only imagine how the glitter catches the light outside. Thanks for sharing that Burlap tip too!
Thanks Kristy!! It actually turned out much better than I was expecting…and it is still holding up perfectly!
[…] // 18. Practically Functional // 19. Please Excuse My Craftermath… // 20. McCall Manor // 21. unOriginal Mom // 22. Creative Ramblings // 23. A Tossed Salad Life // 24. A Glimpse Into Barb’s Life // 25. […]
[…] // 18. Practically Functional // 19. Please Excuse My Craftermath… // 20. McCall Manor // 21. unOriginal Mom // 22. Creative Ramblings // 23. A Tossed Salad Life // 24. A Glimpse Into Barb’s Life // 25. […]
Thanks so much for stopping by the Creative Spark Link Party. I can’t believe you cut burlap without fraying. I have a whole stack if you would like to stop by ;)
[…] // 18. Practically Functional // 19. Please Excuse My Craftermath… // 20. McCall Manor // 21. unOriginal Mom // 22. Creative Ramblings // 23. A Tossed Salad Life // 24. A Glimpse Into Barb’s Life // 25. […]
[…] // 18. Practically Functional // 19. Please Excuse My Craftermath… // 20. McCall Manor // 21. unOriginal Mom // 22. Creative Ramblings // 23. A Tossed Salad Life // 24. A Glimpse Into Barb’s Life // 25. […]
Do you know if you can buy the heat transfer vinyl at hobby lobby, Michaels, Joann fabrics, etc?
[…] // 18. Practically Functional // 19. Please Excuse My Craftermath… // 20. McCall Manor // 21. unOriginal Mom // 22. Creative Ramblings // 23. A Tossed Salad Life // 24. A Glimpse Into Barb’s Life // 25. […]
Love this! How does the HTV hold up outdoors? I’ve learned that colored fabric and burlap fades fast. This looks great! Do you recommend spraying flag with an outdoor solar protectant? Thanks!
Thanks Susan! I was actually really surprised with how well this held up. We had it outside in the sun all summer, and it didn’t fade much at all. The HTV and burlap did fade a bit but not enough for it to be too noticeable (though I used a lighter burlap to begin with), and the paint didn’t at all. I did toss it at the end of the season though, because the burlap was fraying quite a bit…so if I did it again, I’d do some fray check along the edges or something. If you had some solar protectant it probably couldn’t hurt, especially if you used really vibrant colors, but I didn’t really find it necessary!
Too cute! I pinned to my Silhouette board. :)
[…] // 18. Practically Functional // 19. Please Excuse My Craftermath… // 20. McCall Manor // 21. unOriginal Mom // 22. Creative Ramblings // 23. A Tossed Salad Life // 24. A Glimpse Into Barb’s Life // 25. […]
It’s so pretty and your tutorial so clear, thanks for sharing.
Love this project! What fonts did you use for the “L” and the “established…”
Thanks Alex! I think the “est. 2010” was “Grand Hotel” and the letter L was a font called “Mary Jane Antique.” I believe they’re both free fonts.
How do you keep it from fading in the sun?
I did red htv glitter and it has been outside less than a month and the red had faded and looks like orange.
Mine did fade a bit through the summer too. But I think they make UV protectant fabric spray, I bet that would work to keep the colors bright…I think I will try that next time I make a garden flag.
[…] Monogram Garden Flag by Unoriginal Mom […]
[…] Use heat transfer vinyl on burlap to create a fun, cheerful, and welcoming burlap garden flag. Perfect for cheering up a front lawn or patio! Unoriginal Mom shows you how to make this DIY Burlap Garden Flag with Heat Transfer Vinyl. […]